The newly created database will come with three basic fields as examples. You can delete them or change the field types, or directly add new fields.
For field operations, Bika.ai provides two different interaction path methods, and there will be slight differences in application scenarios and logical effects between the two.
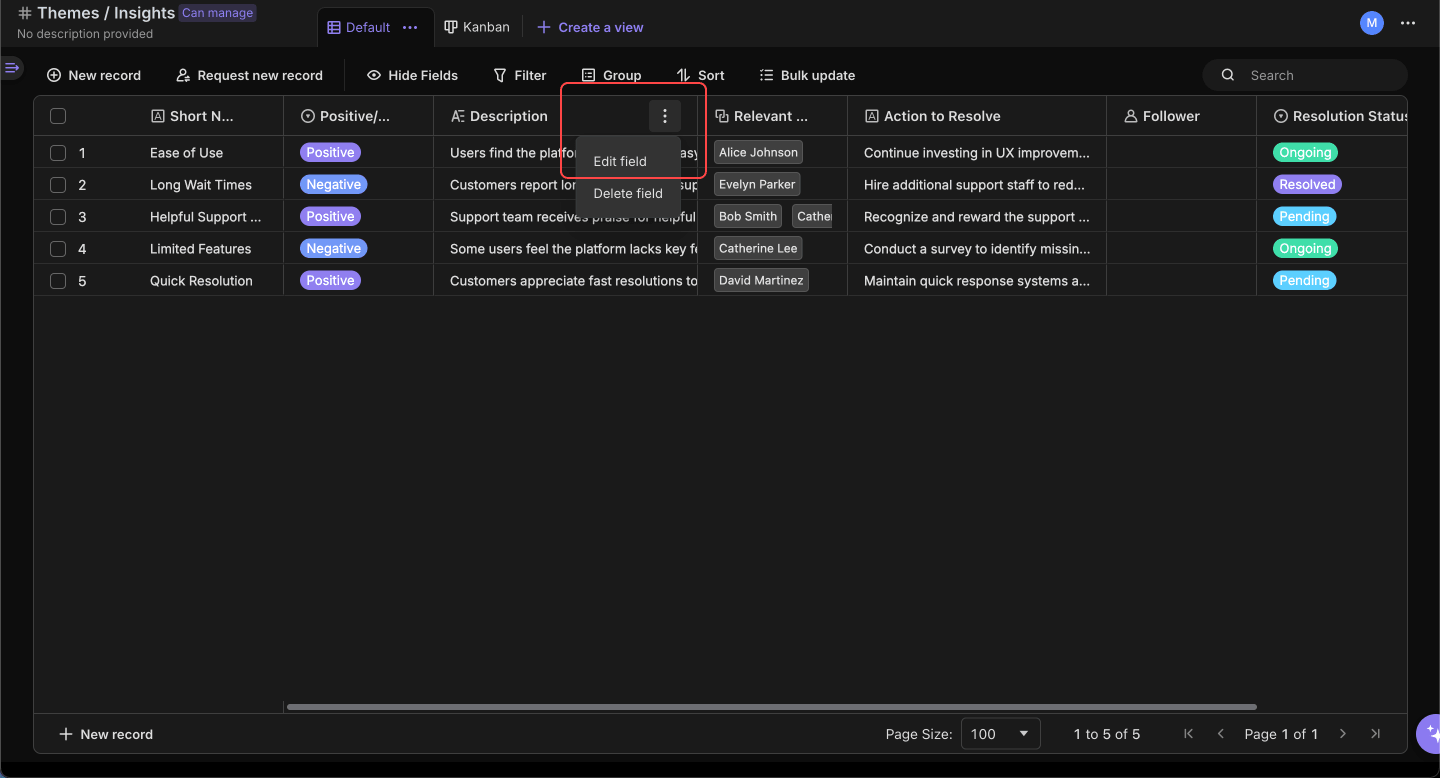
The first one is that you can operate directly on the grid view interface. Click the "..." in the column header to enter the "field editor" interface. You can also click the "+" button to quickly add a new field. This method is suitable for scenarios where there are a small number of fields to operate.
The second one is that you can click the "..." button in the upper right corner of the database interface to enter the database editor. Perform various complex and batch field configurations in the database editor.
Create Fields
You can click the "+" button on the far right of the database header to create a new field. You can also click the "..." in the upper right corner of the interface to enter the database editor and then add. The difference between the two:
Difference
Who can operate?
Will the field appear in other views?
Create field from view header
Members with "Can manage" permission for the database
The field created in the header of view A only appears in view A and will not appear in other views. (You need to enter the database editor and manually switch the display.)
If the type of the new field is an "Link" field, the current view of this database will display the field, and the associated database will hide the field.
Create field from database editor
Members with "Can manage" permission for the database
If you create a new field in the field list of the database editor, by default, this field will not be displayed in all views. You need to enter the view editing interface and manually switch to display it.
If the type of the new field is an "Link" field, then this field is hidden by default in both associated database A and B.
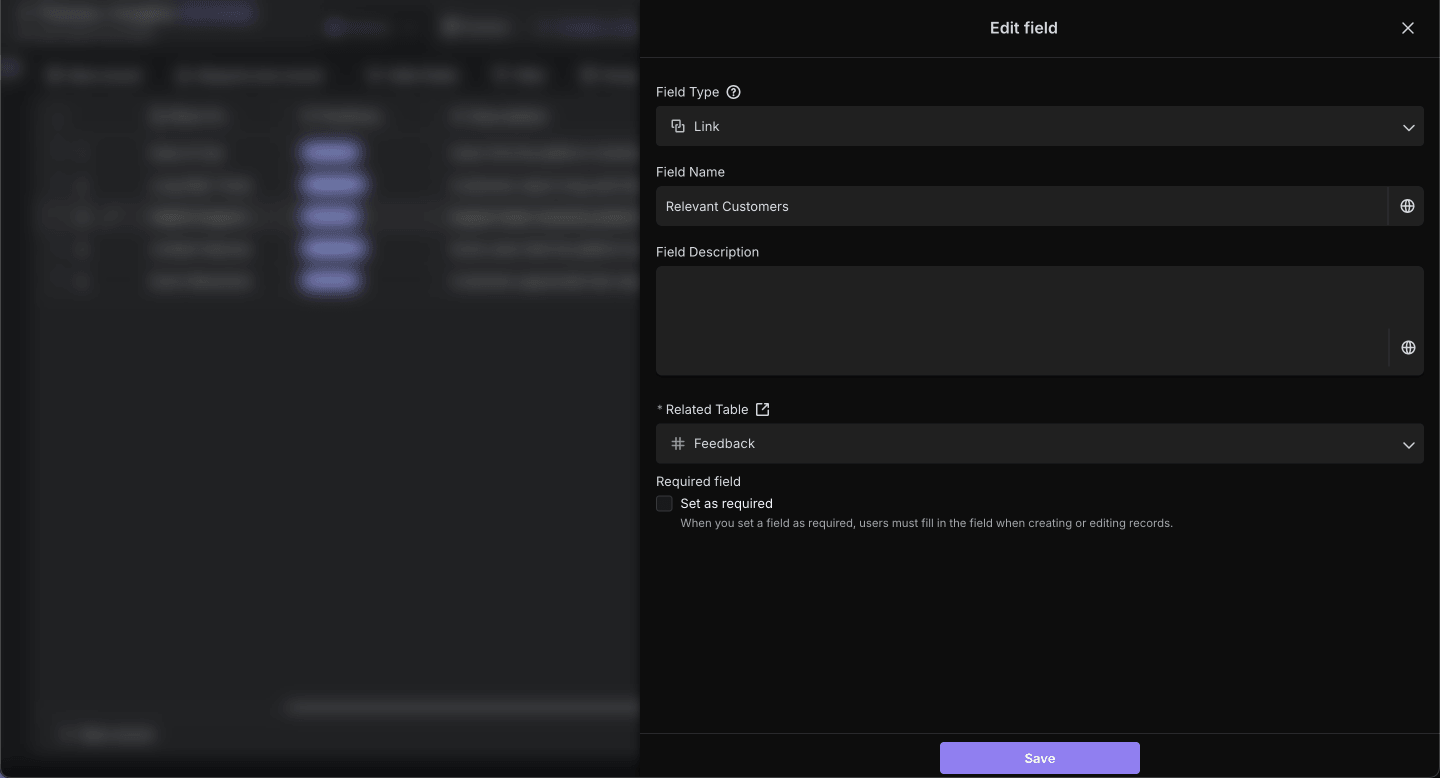
Fill in information in the popped-up field editing interface.
Field name: The name displayed for the field
Field type: Define the data format (such as text, number)
Field description: Supplement detailed explanations and can be seen in the record details
Field configuration: Adjust configuration items according to field type
Required switch: After checking, when creating a new record, editing a record, or filling out a form, this field cannot be empty. Please note that when a field is set to hidden in a specific view, its required attribute will automatically become invalid in this view. For example, if the "backup email" field is hidden in the "Customer View", even if this field is marked as required, when a user submits a form in this view, no verification will be triggered. The system follows the verification trigger mechanism of "what is seen is what is verified"
Click the "Save" button at the bottom to complete the configuration of the field.
Edit Fields
Modify existing fields anytime:
Quick edit: Double-click the column header
Full edit: Hover over the field title → Click ... → Edit
Open the editing panel to modify, and it will take effect after saving.
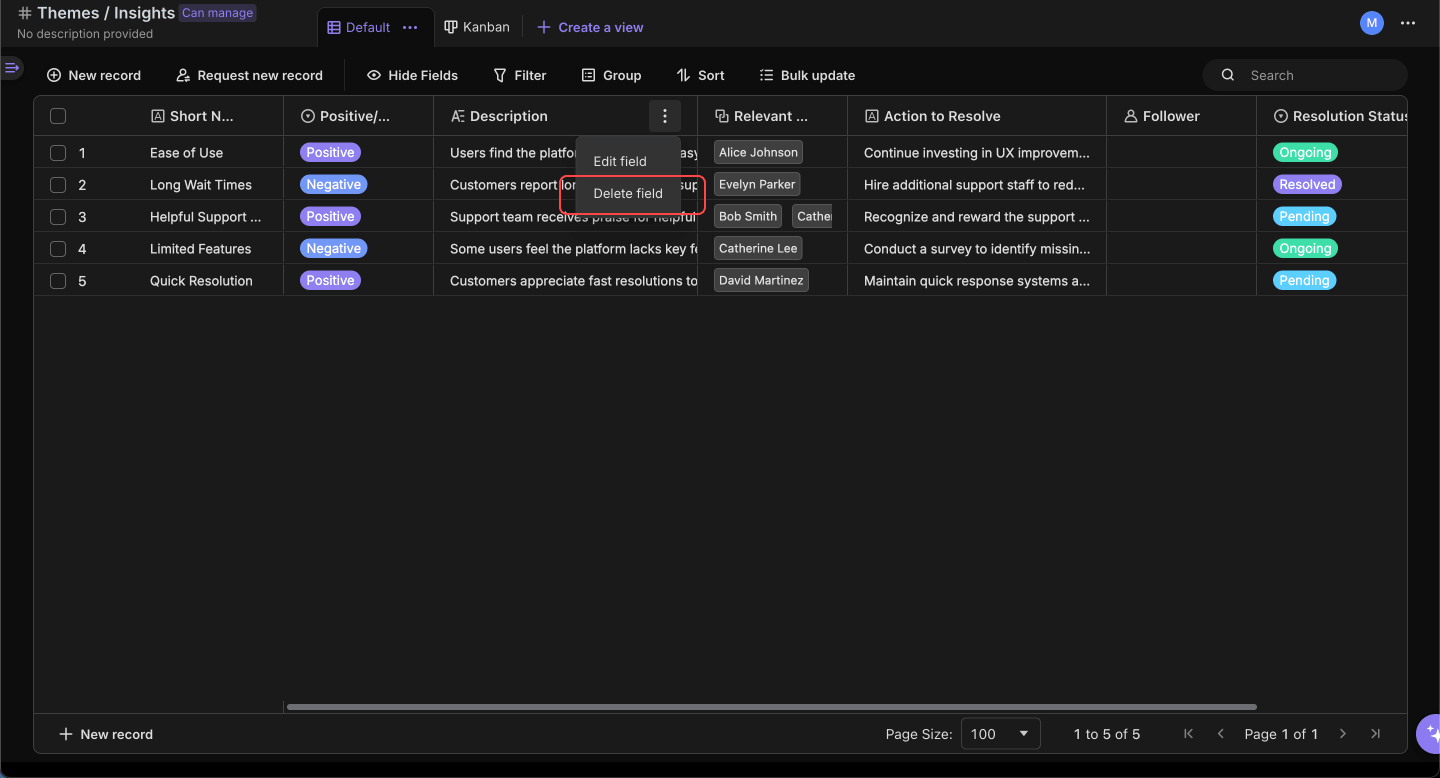
Delete Fields
Remove unneeded fields (except first filed):
Hover over the field title → Click ... → Delete Field
Confirm in the pop-up modal
Display and hiding of fields
The display or hiding settings of fields are very flexible. You can assign different display or hiding states to the same field under different views to meet the needs of different scenarios.
Quickly modify the display and hiding of fields through the view toolbar
When you read a database and conduct data analysis, if there are too many displayed fields, it may affect the reading experience. At this time, you can quickly temporarily hide the fields that you do not currently need to view through the "Hide Field" control on the view toolbar.
This way of hiding operations is only effective for you. When other members in the space access the same view, they can still view this field normally.
Through the view editor, modify the "global" visibility of fields
Creating multiple views is to recombine and display the data of a database through different filtering conditions and interaction forms, so as to improve the reading experience and work efficiency of members in different business scenarios.
Members with "Can manage" permissions for the database can enter the view editing interface of the database and then perform batch hiding or showing operations on fields. The display or hiding operations in this way take effect for all members of the space. Any member accessing the same view of the database will see exactly the same rows and columns initially.
For example, if a member with "Can manage" permission sets field A to "Hidden" in the view editing interface. Then all members entering this view, whether in the data area or the "Hide field" control on the view toolbar, will not be able to see field A.
View editor vs View toolbar
Difference
Effect
Who can operate
Hide fields in view editor
All members cannot see this field in the data area and toolbar of the view
Members with "Can manage" permission for the database
Roles with "Resource" permission in the space
Hide fields in view toolbar
It will not affect others and only take effect for oneself in the current view
Members who can view the database can hide fields on the view toolbar of the database
Common questions
Q: If field A is set as "required", and this field is in a hidden state under view X. Will the required field verification take effect when creating a record?A: It will not take effect. The system follows the verification trigger mechanism of "what you see is what you verify", and it only takes effect when the field is visible. For example, if the "alternate email" field is hidden in the "customer view", even if this field is marked as required, the user will not trigger verification when submitting the form in this view.
In the following special cases, the required field verification will not take effect:
When creating or updating database records through Bika.ai's OpenAPI, the required field validation will also not take effect. Please be aware.
In the view interface, when modifying row records using functions such as "Duplicate record", "Bulk update", and batch deletion by selecting cells, required field validation will not take effect.
When creating and updating records using the "Create Record" and "Update Record" actions in automation, the required field verification does not take effect.
Team interaction is the key to propelling projects forward, the bond that maintains alignment among project teams, and the link that facilitates strategic planning. Even seasoned project managers find the complexity of project management increasing as the number of team members and key stakeholders expands.
This template queries and summarizes news about specific companies, providing you with 10 selected news reports every day to help you make investment decisions.
This template covers basic functions such as product inventory, transaction records, and membership management, and is further equipped with AI-powered intelligent data analysis and strategy formulation. It provides comprehensive business operation support for stores, significantly enhancing management efficiency and customer service levels, and boosting store performance.
The SWOT analysis, alternatively known as a SWOT matrix, aids in pinpointing the Strengths, Weaknesses, Opportunities, and Threats associated with any prospective decision-making process.
This template utilizes automated tools to efficiently allocate tasks, provide timely reminders for progress and deadlines, thereby enhancing team efficiency and task quality.
You can set up scheduled notifications in Telegram groups, channels, and private chats. Ensure team members complete tasks on time, attend meetings, or stay informed about important information. This feature helps improve team collaboration efficiency and ensure smooth workflow.