X(Twitter) – Upload Media
X(Twitter) – Upload Media
This automation action uses the X(Twitter) OAuth1.0a integration to upload one or more media files (images, GIFs, or videos) to your authorized X account. Once uploaded, it returns media IDs that you can use in a "Create Tweet" action to publish tweets with media attachments.
ℹ️ Tip: To post a tweet with media, use Upload Media first, then pass the resulting
mediaIdsinto the Create Tweet action.
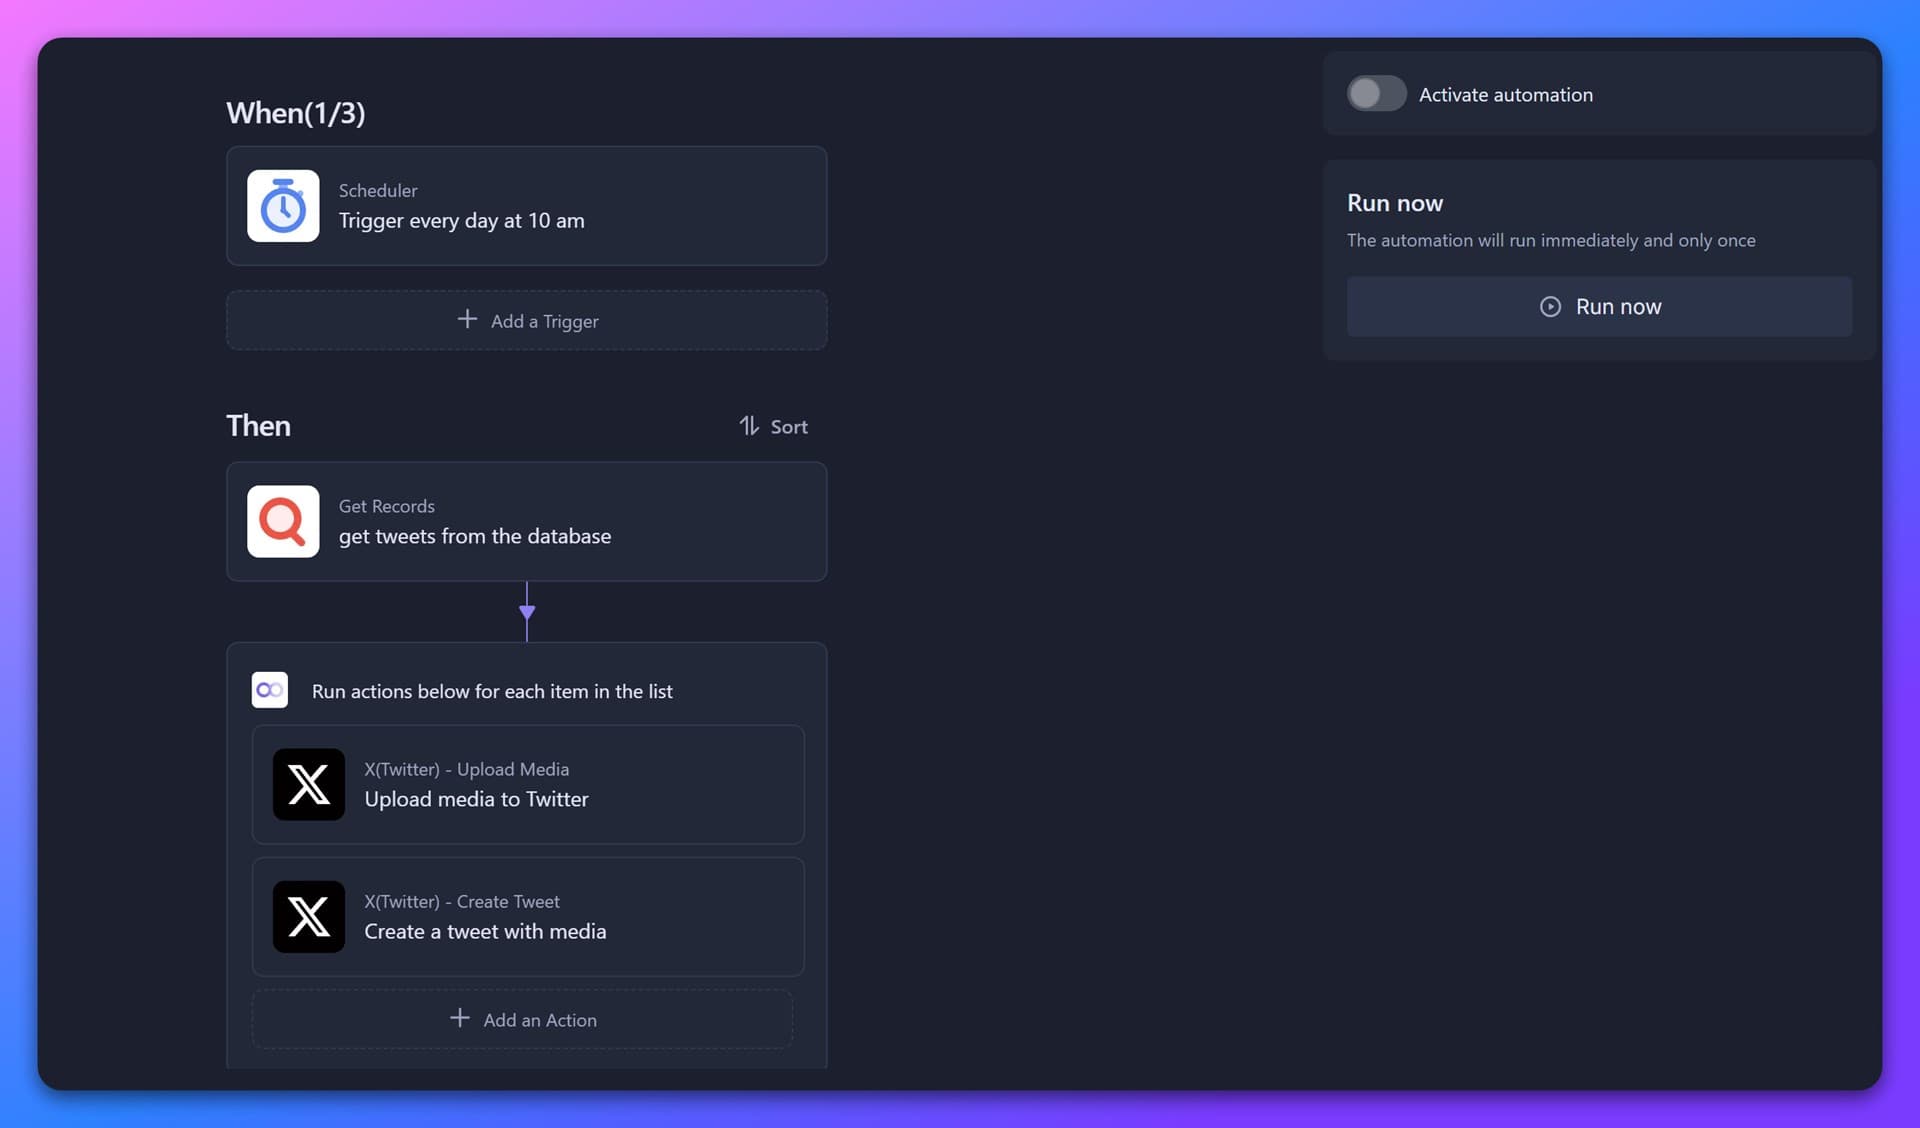
💡 Configuration Instructions
Before you start, make sure you’ve completed the "X(Twitter) OAuth1.0a Integration" and connected your X account to Bika.
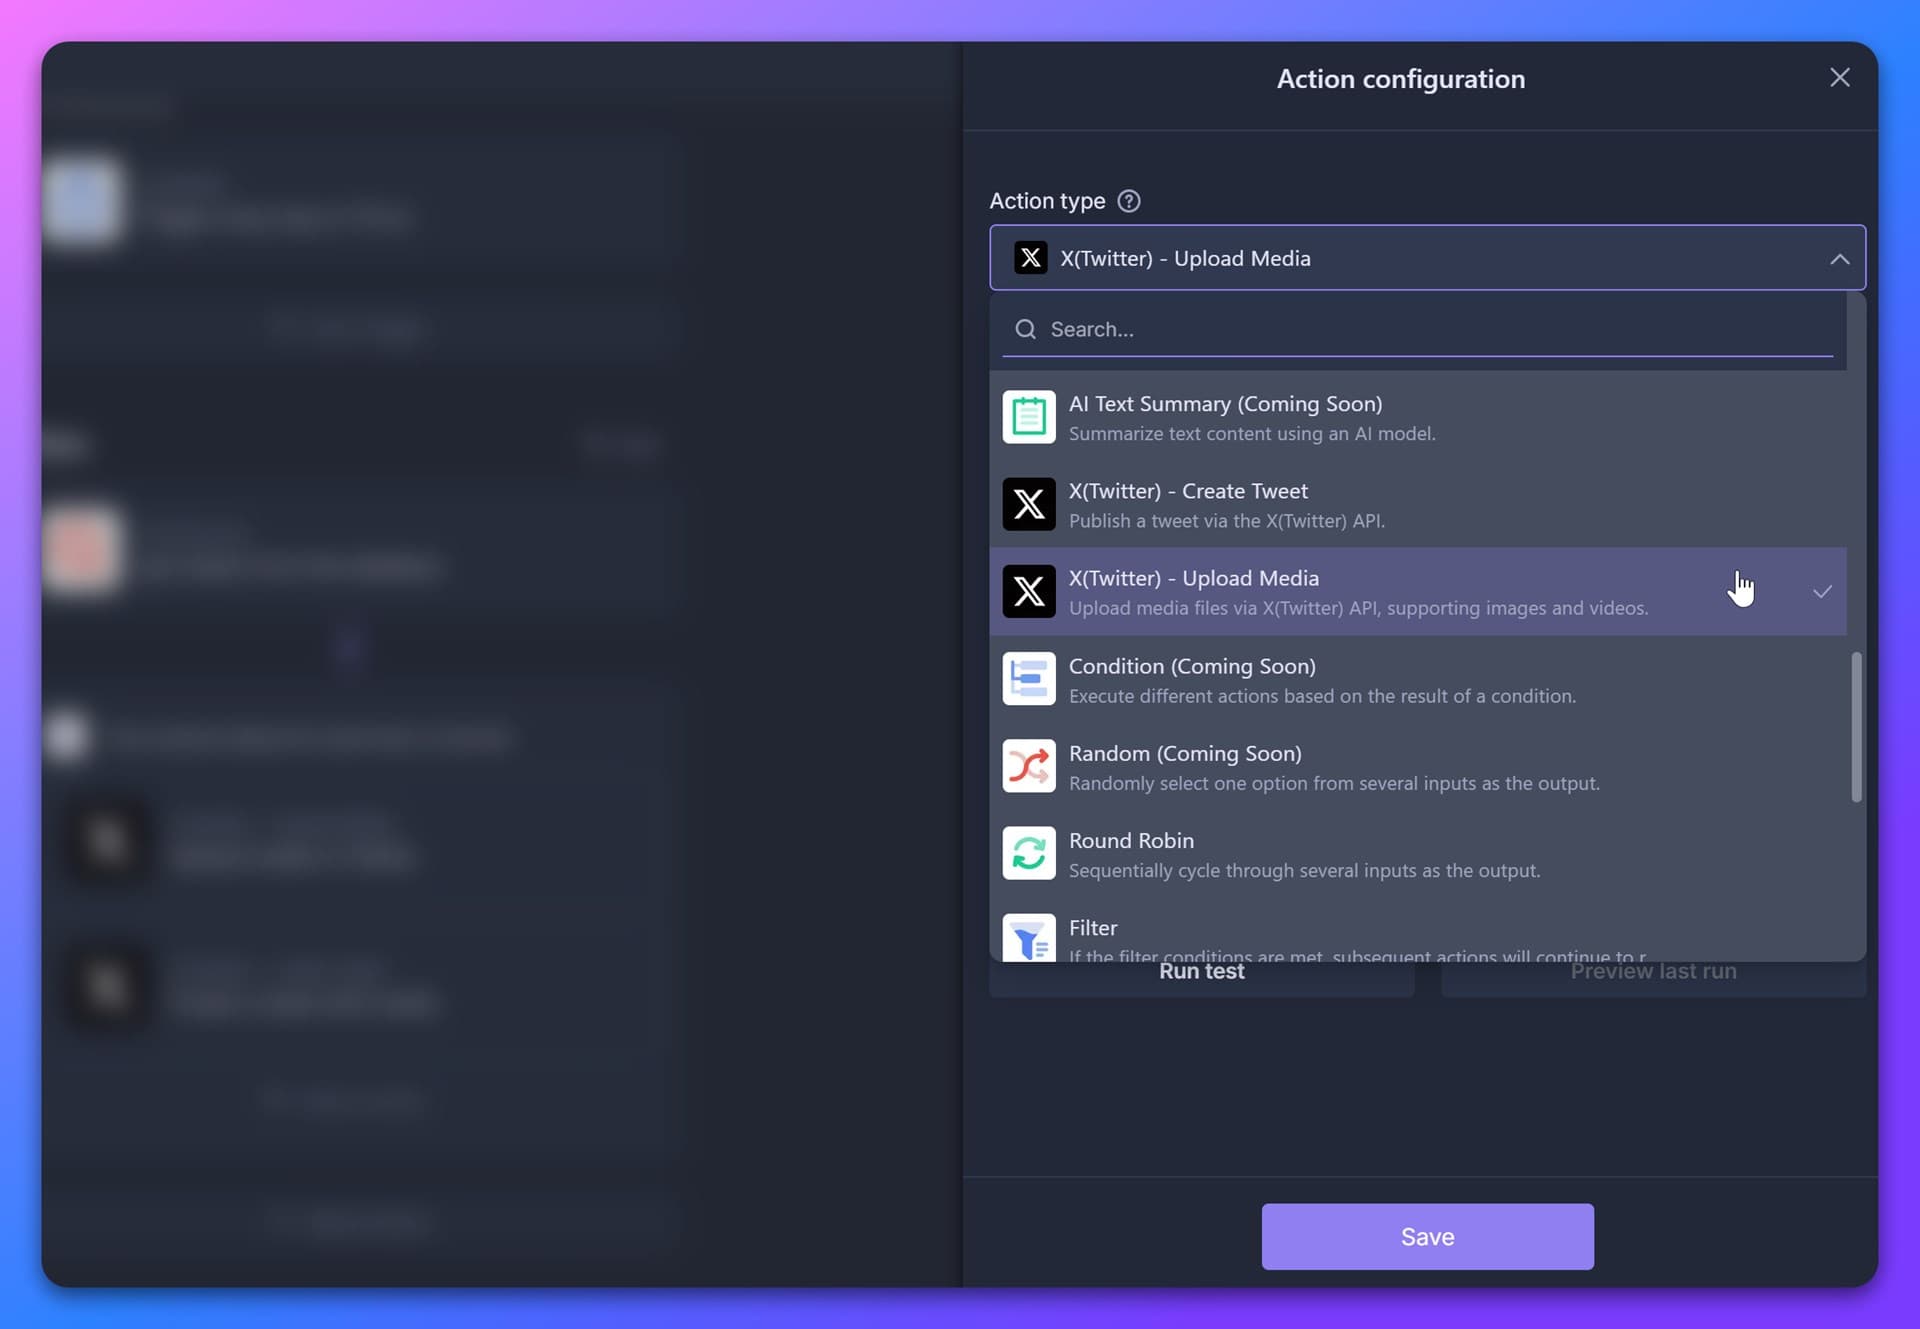
1. Add the “Upload Media” Action
-
In your automation editor, click Add Action and select X(Twitter) – Upload Media from the dropdown.
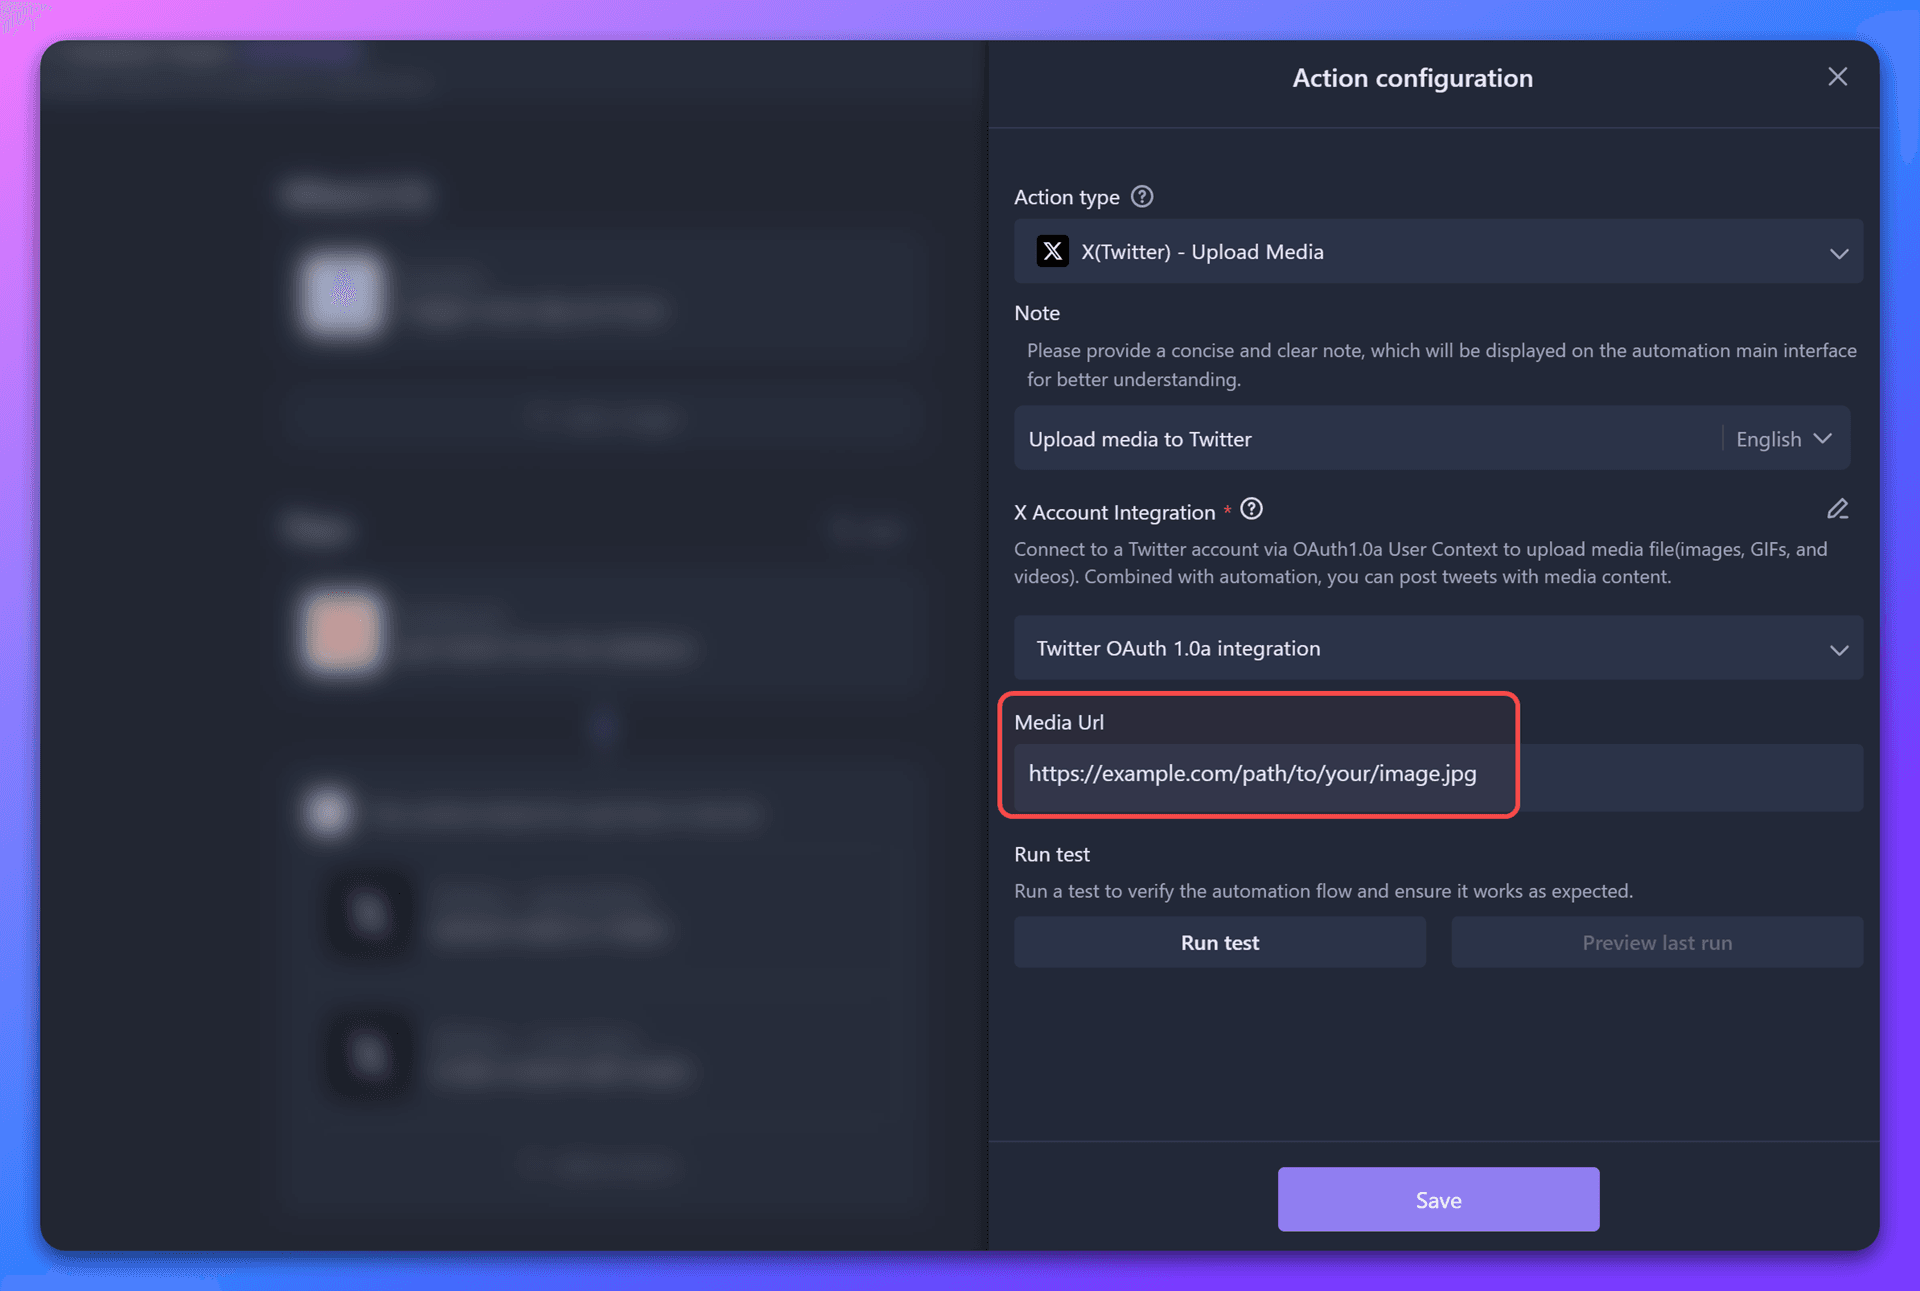
2. Configure Action Fields
In the Action Configuration panel, you’ll see the following settings:
| Field | Description |
|---|---|
| Note | A short, human-readable description of this step. It appears on the automation canvas so you’ll know at a glance what the action does (e.g. “Upload header image”). |
| X Account Integration | Choose the OAuth1.0a integration you previously set up. This tells Bika which X account to use when uploading media. |
| Media URL | Enter a public URL to a media file or insert a variable referencing a file stored in your database. You can either paste a direct URL or use the / key to open the variable selector and choose an attachment field. |
Media Upload Guidelines
- GIF files: Maximum size is 15MB
- Other image formats (e.g., JPG, PNG): Maximum size is 5MB
- Videos: Twitter supports files up to 512MB, but due to upload latency and network reliability, we recommend keeping video size as small as possible for smoother performance.
Using the Media URL Field
-
Direct URL: Paste a publicly accessible link to an image, GIF, or video. Only one URL can be entered this way.
-
Variable: Use a variable referencing an attachment field in a previous step (e.g., from a record in your database). Press
/to open the variable selector.ℹ️ Note: A single tweet can include up to 4 media files. If your attachment field contains more than 4 files, only the first 4 will be uploaded.

3. Run Test
After configuring the fields, click Run Test. This will validate your Twitter integration—though it won’t upload media yet, it ensures the connection works correctly.
🔔 Note: Be sure to run this test at least once before adding the Create Tweet action, as it depends on the
mediaIdsreturned by this step.
4. Connect to “Create Tweet”
-
Add a Create Tweet action after the Upload Media step.
-
In the Create Tweet configuration panel, select the
mediaIdsvariable returned by the Upload Media step to attach the media to your tweet.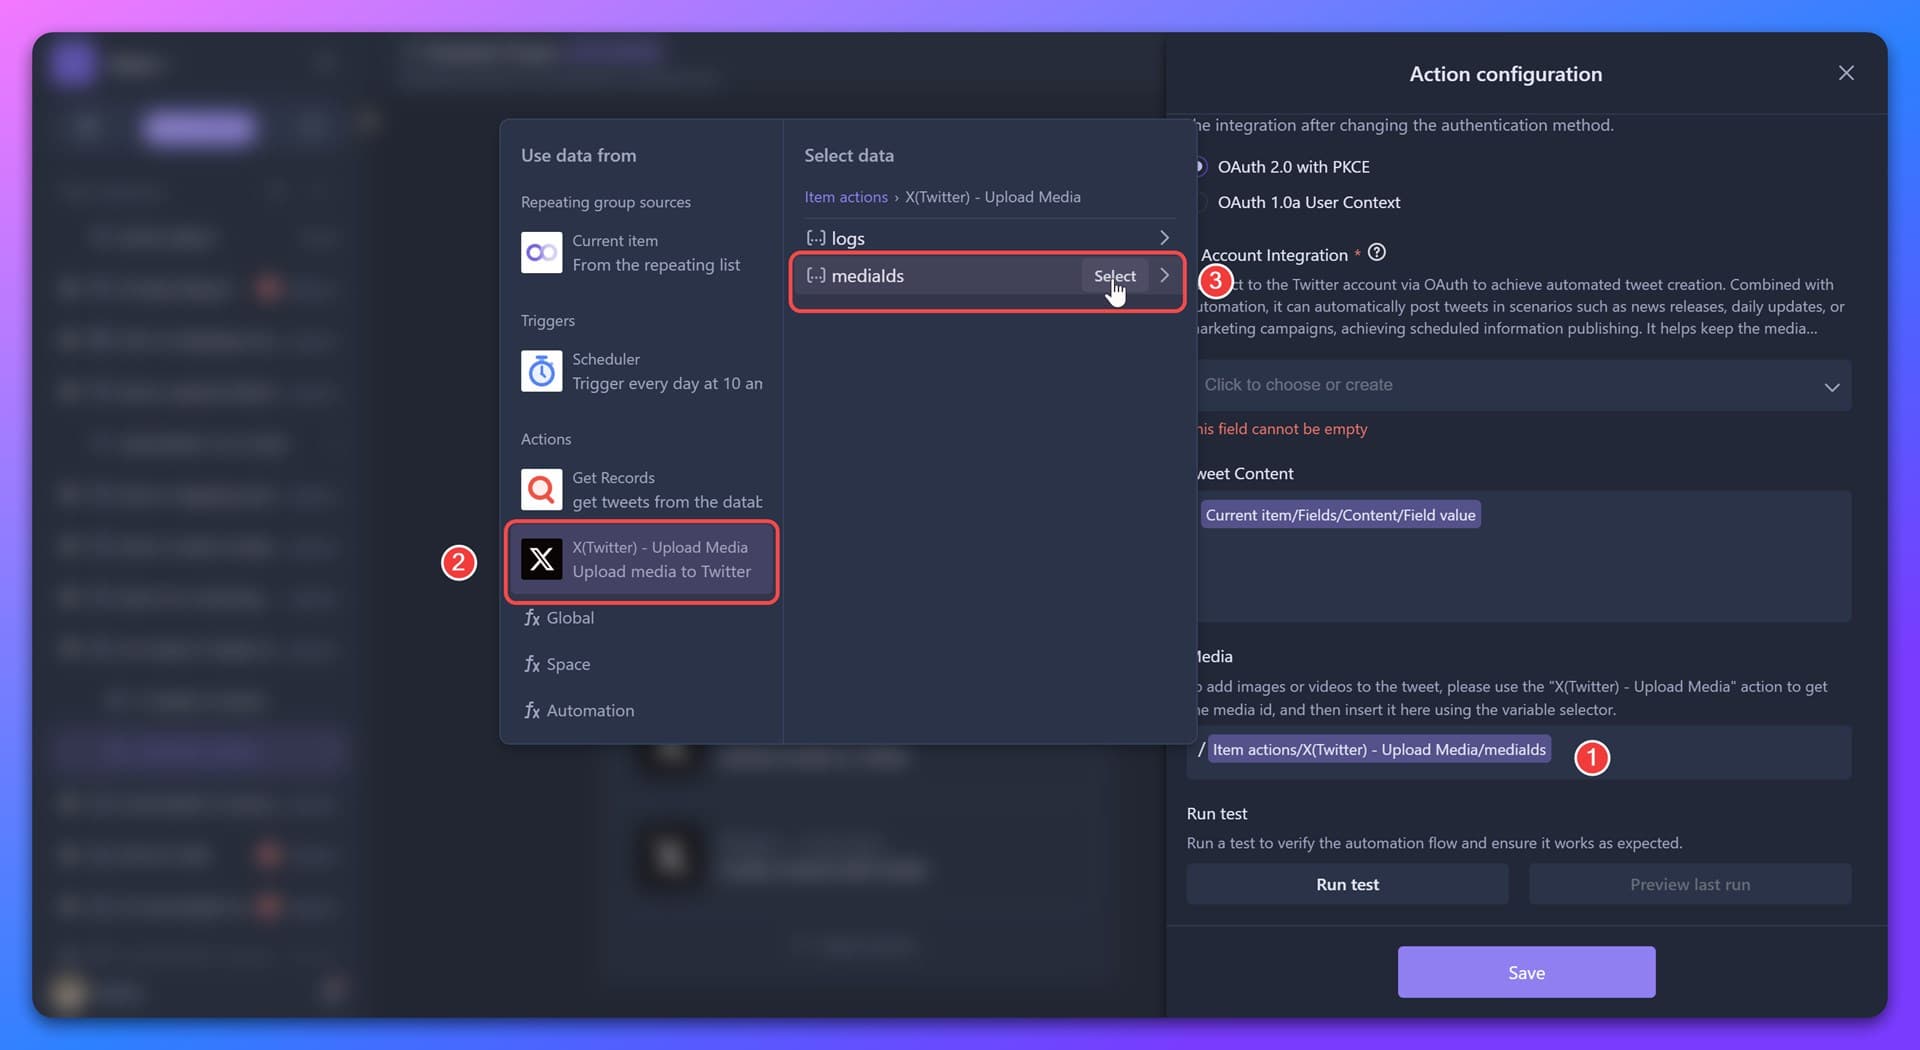
-
Save the Create Tweet action.
5. Run the Automation
Now, run your automation. The media will be uploaded to your X account, and the tweet will be published with the attached media.
🎯 Want to get started quickly?
Check out our ready-to-use template that combines Upload Media and Create Tweet actions:
👉 AI Automated X Tweets
Recommend AI Automation Templates


Coming soon