Daily Transaction Summary Automation
Daily Transaction Summary Automation
v1.0.6
Nagisakon
Automatically track daily transactions and generate detailed transaction summaries with this powerful automation template. Monitor bank accounts in real time, extract income and expenditure from emails, and create daily summary reports. Perfect for personal finance managers, small business owners, and financial analysts looking for accurate account monitoring and streamlined cash flow management.
📊 Finance & Operations
🤖 Automation
Included Resources
Bank Daily Accounting
Retrieve Bank Email
Daily Summary Analysis
Workflow Graph
Workflow Graph
Workflow of Daily Transaction Summary Automation
Release notes
Release notes
Release notes of Daily Transaction Summary Automation
Daily Transaction Summary Automation
Daily Transaction Summary Automation allows you to automatically track changes in your bank accounts. When a bank notification email is received, the system automatically identifies and extracts key information such as the bank account, transaction amount, currency code, and balance, and fills it into a spreadsheet. An AI then summarizes this data into a daily transaction report. This not only saves manual entry time but also prevents human error, ensuring real-time financial data accuracy.
👉 How the Template Works
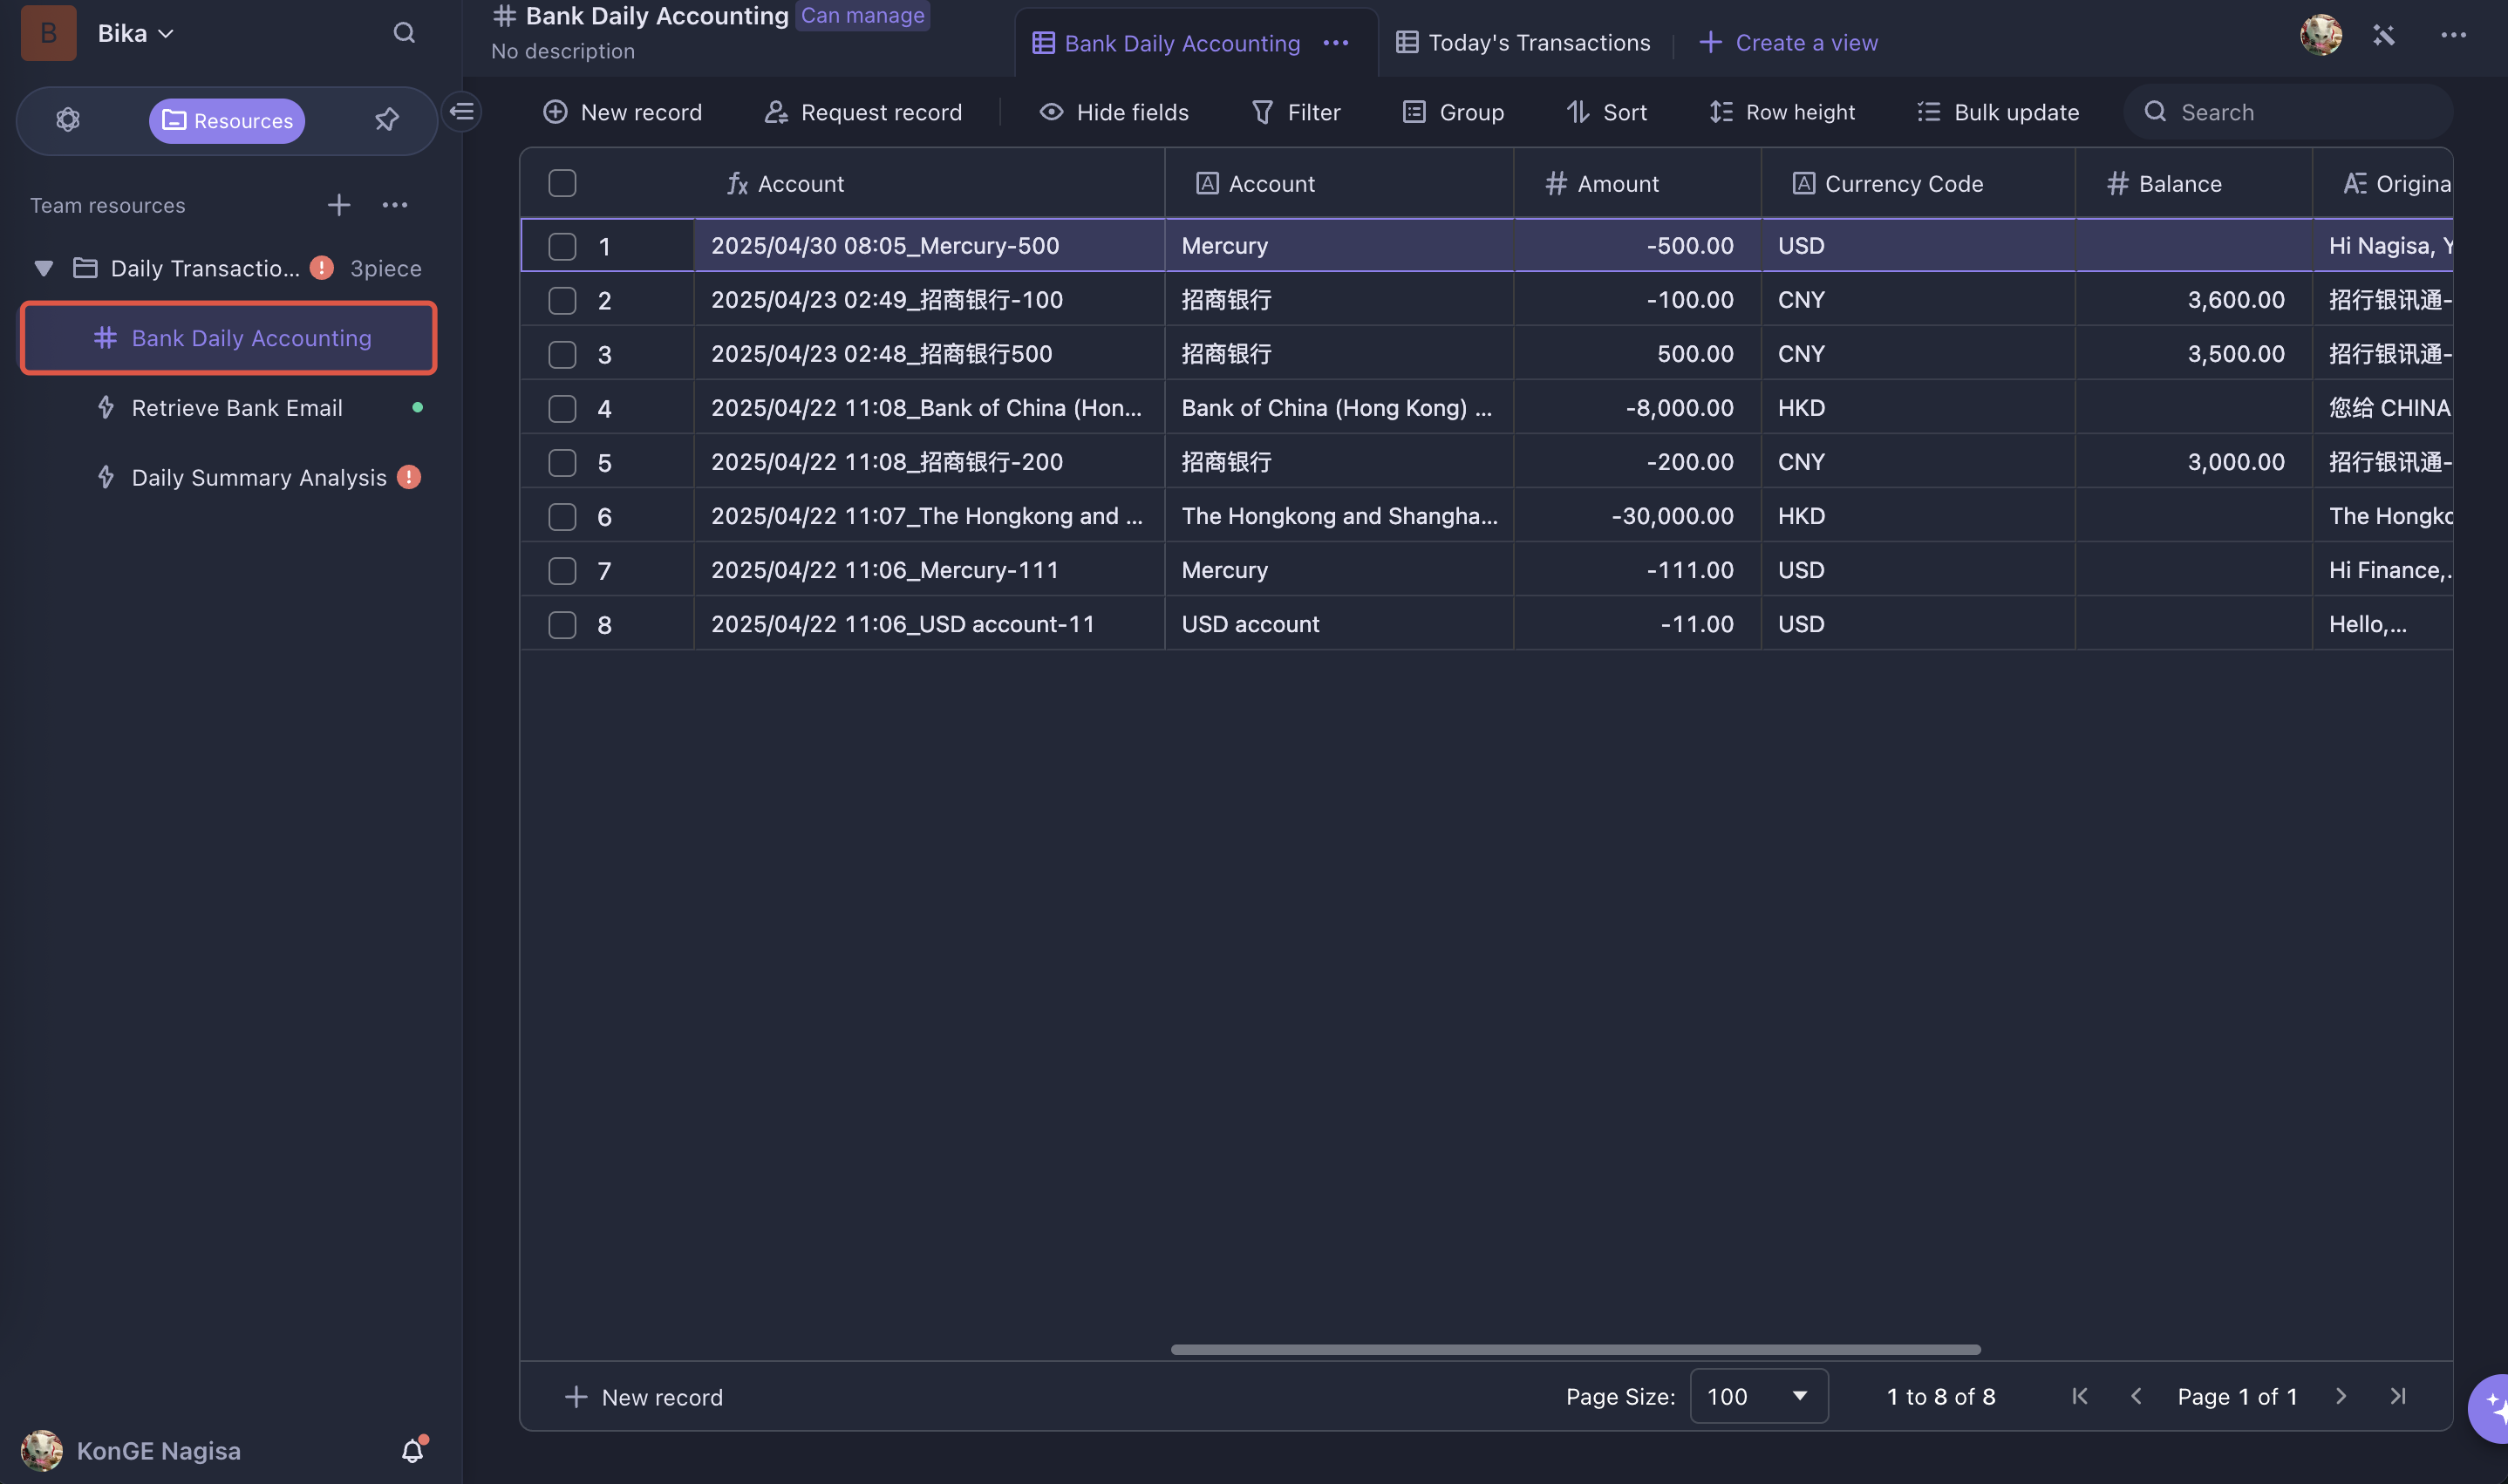
- Bank Daily Accounting: Records every bank transaction detected from emails in detail, including account, transaction amount, currency code, balance, and other key data.
- Retrieve Bank Email: Intelligently monitors your inbox for emails regarding bank transactions. Once such an email is received, AI automatically analyzes and extracts key data and records it in the "Bank Daily Accounting."
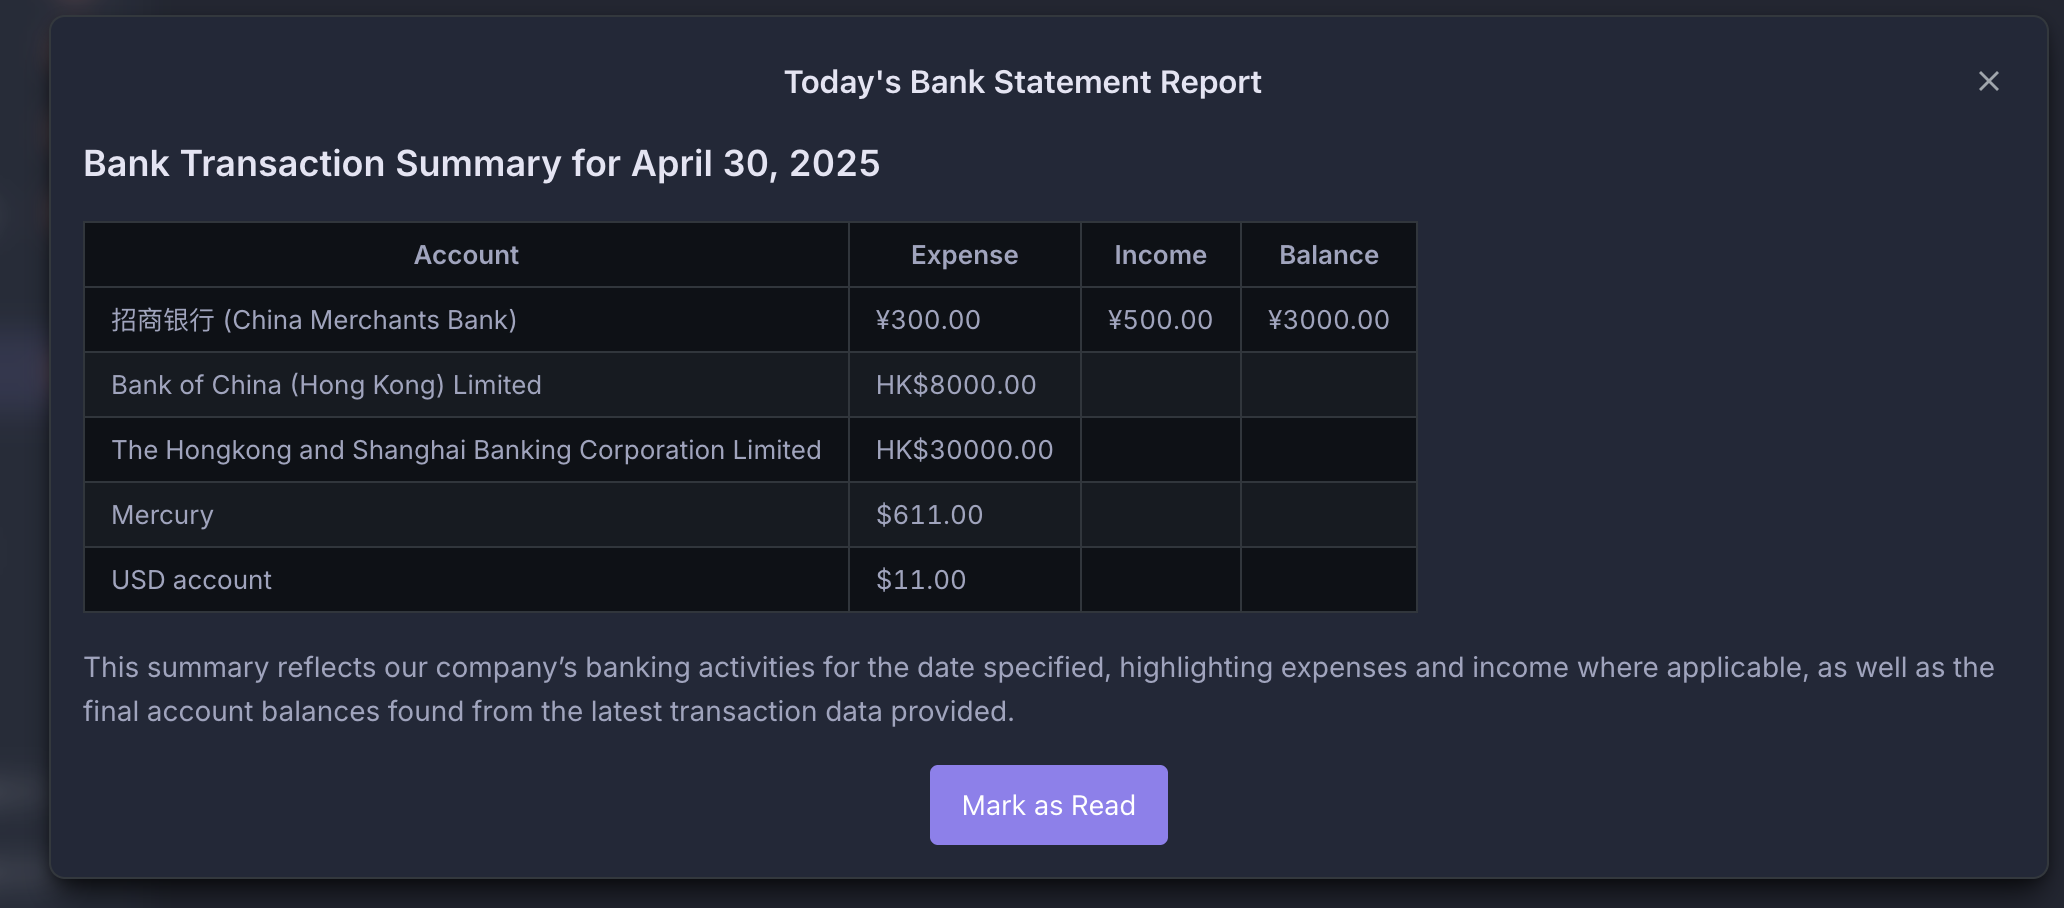
- Daily Summary Analysis: Automatically triggered at 8:00 PM every day, this feature summarizes all transaction data extracted and recorded from emails during the day. The AI generates a daily account change report for each bank, helping you stay informed of your account activity and balances.
🎯 Steps to Use
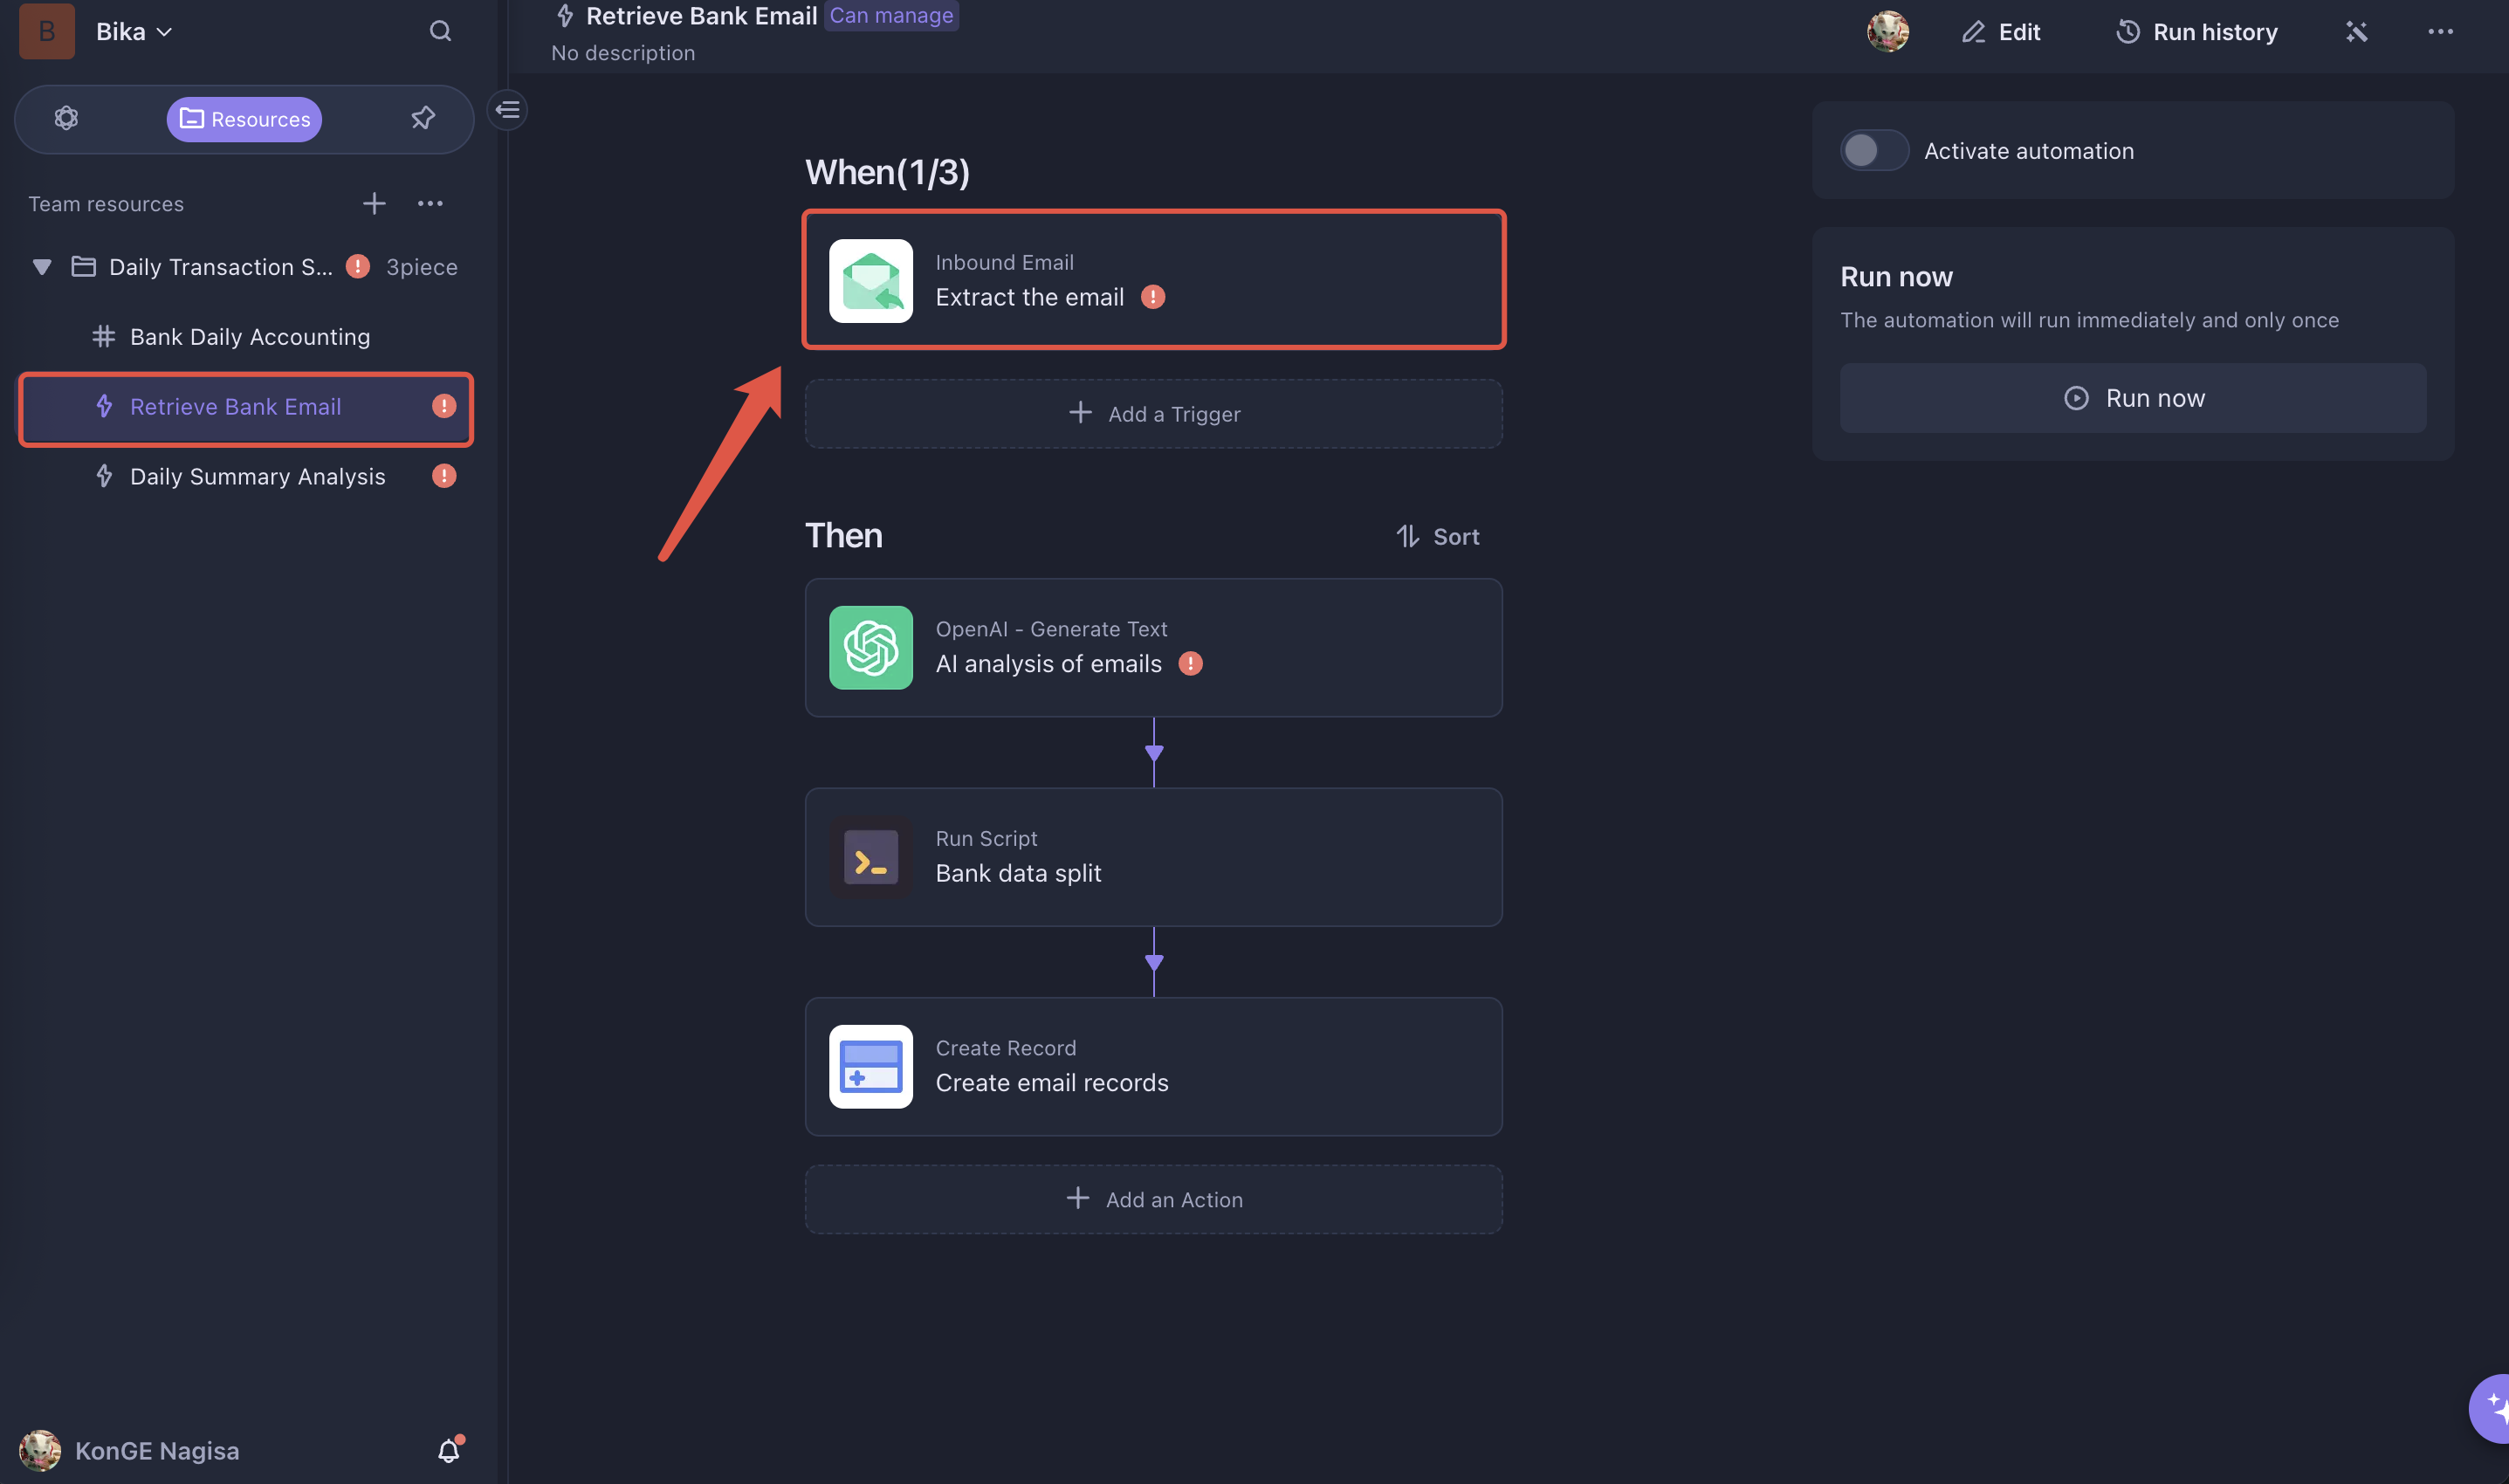
1. Configure and Enable the Retrieve Bank Email Automation
-
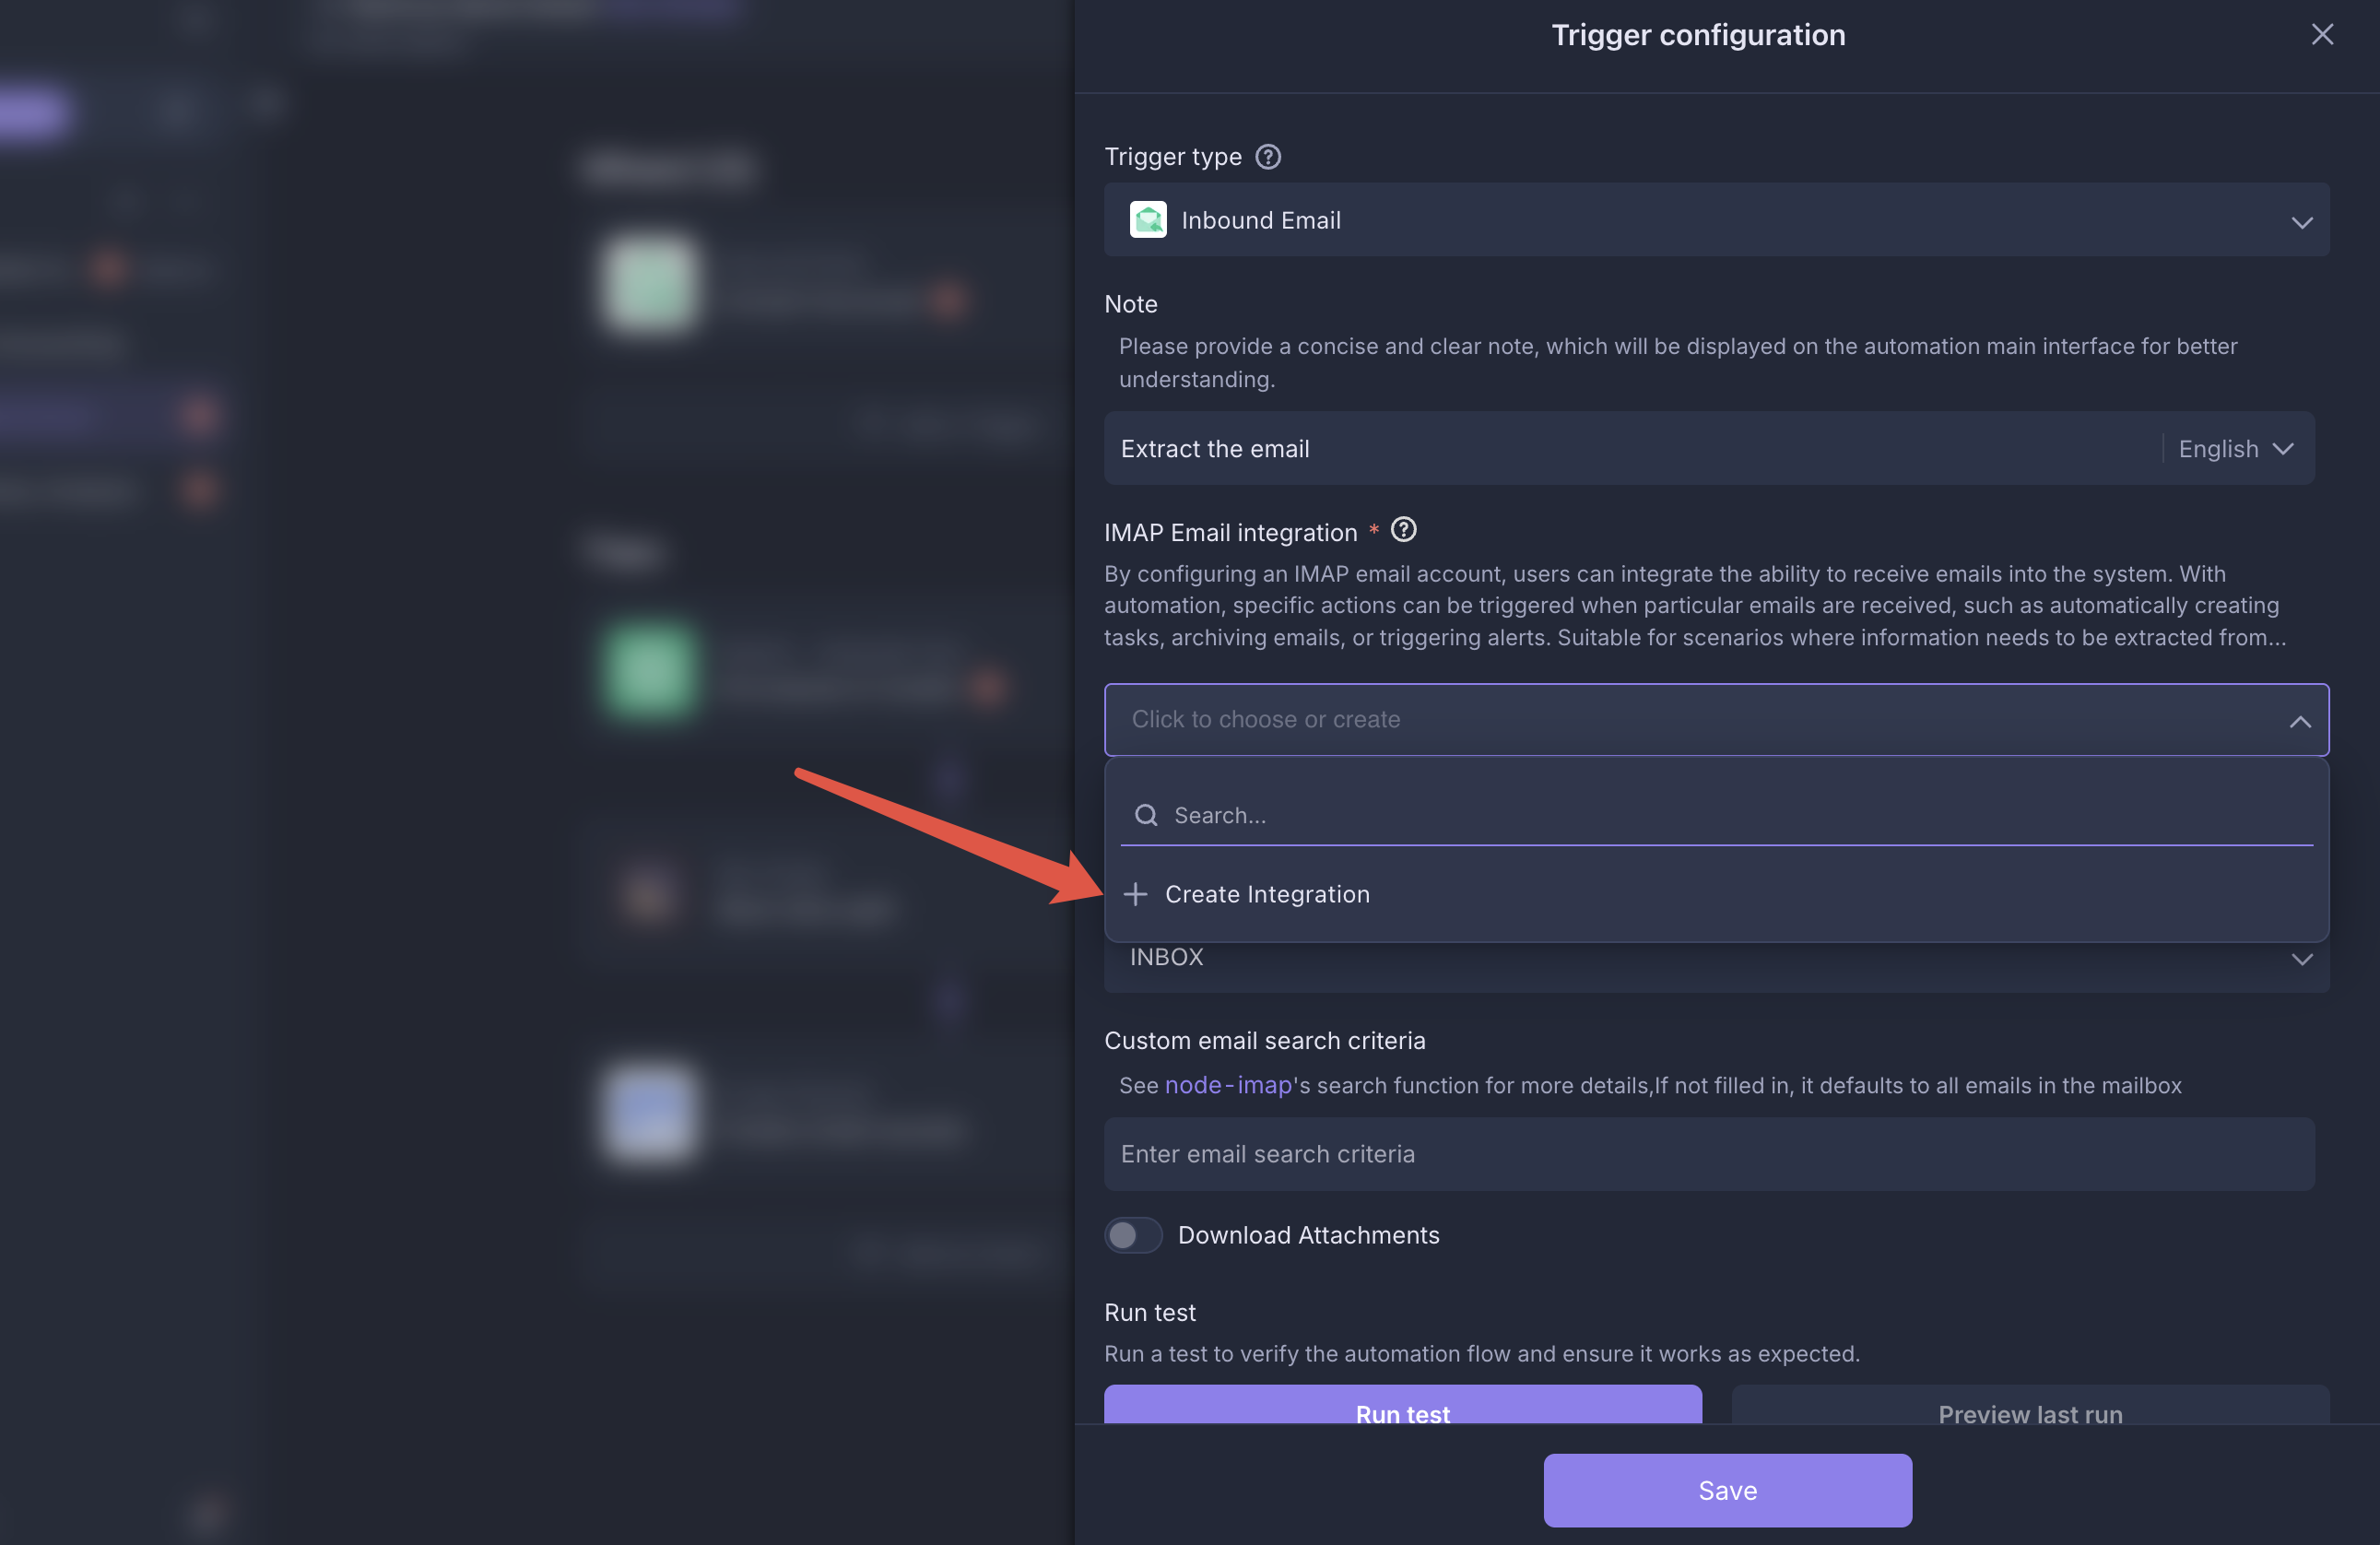
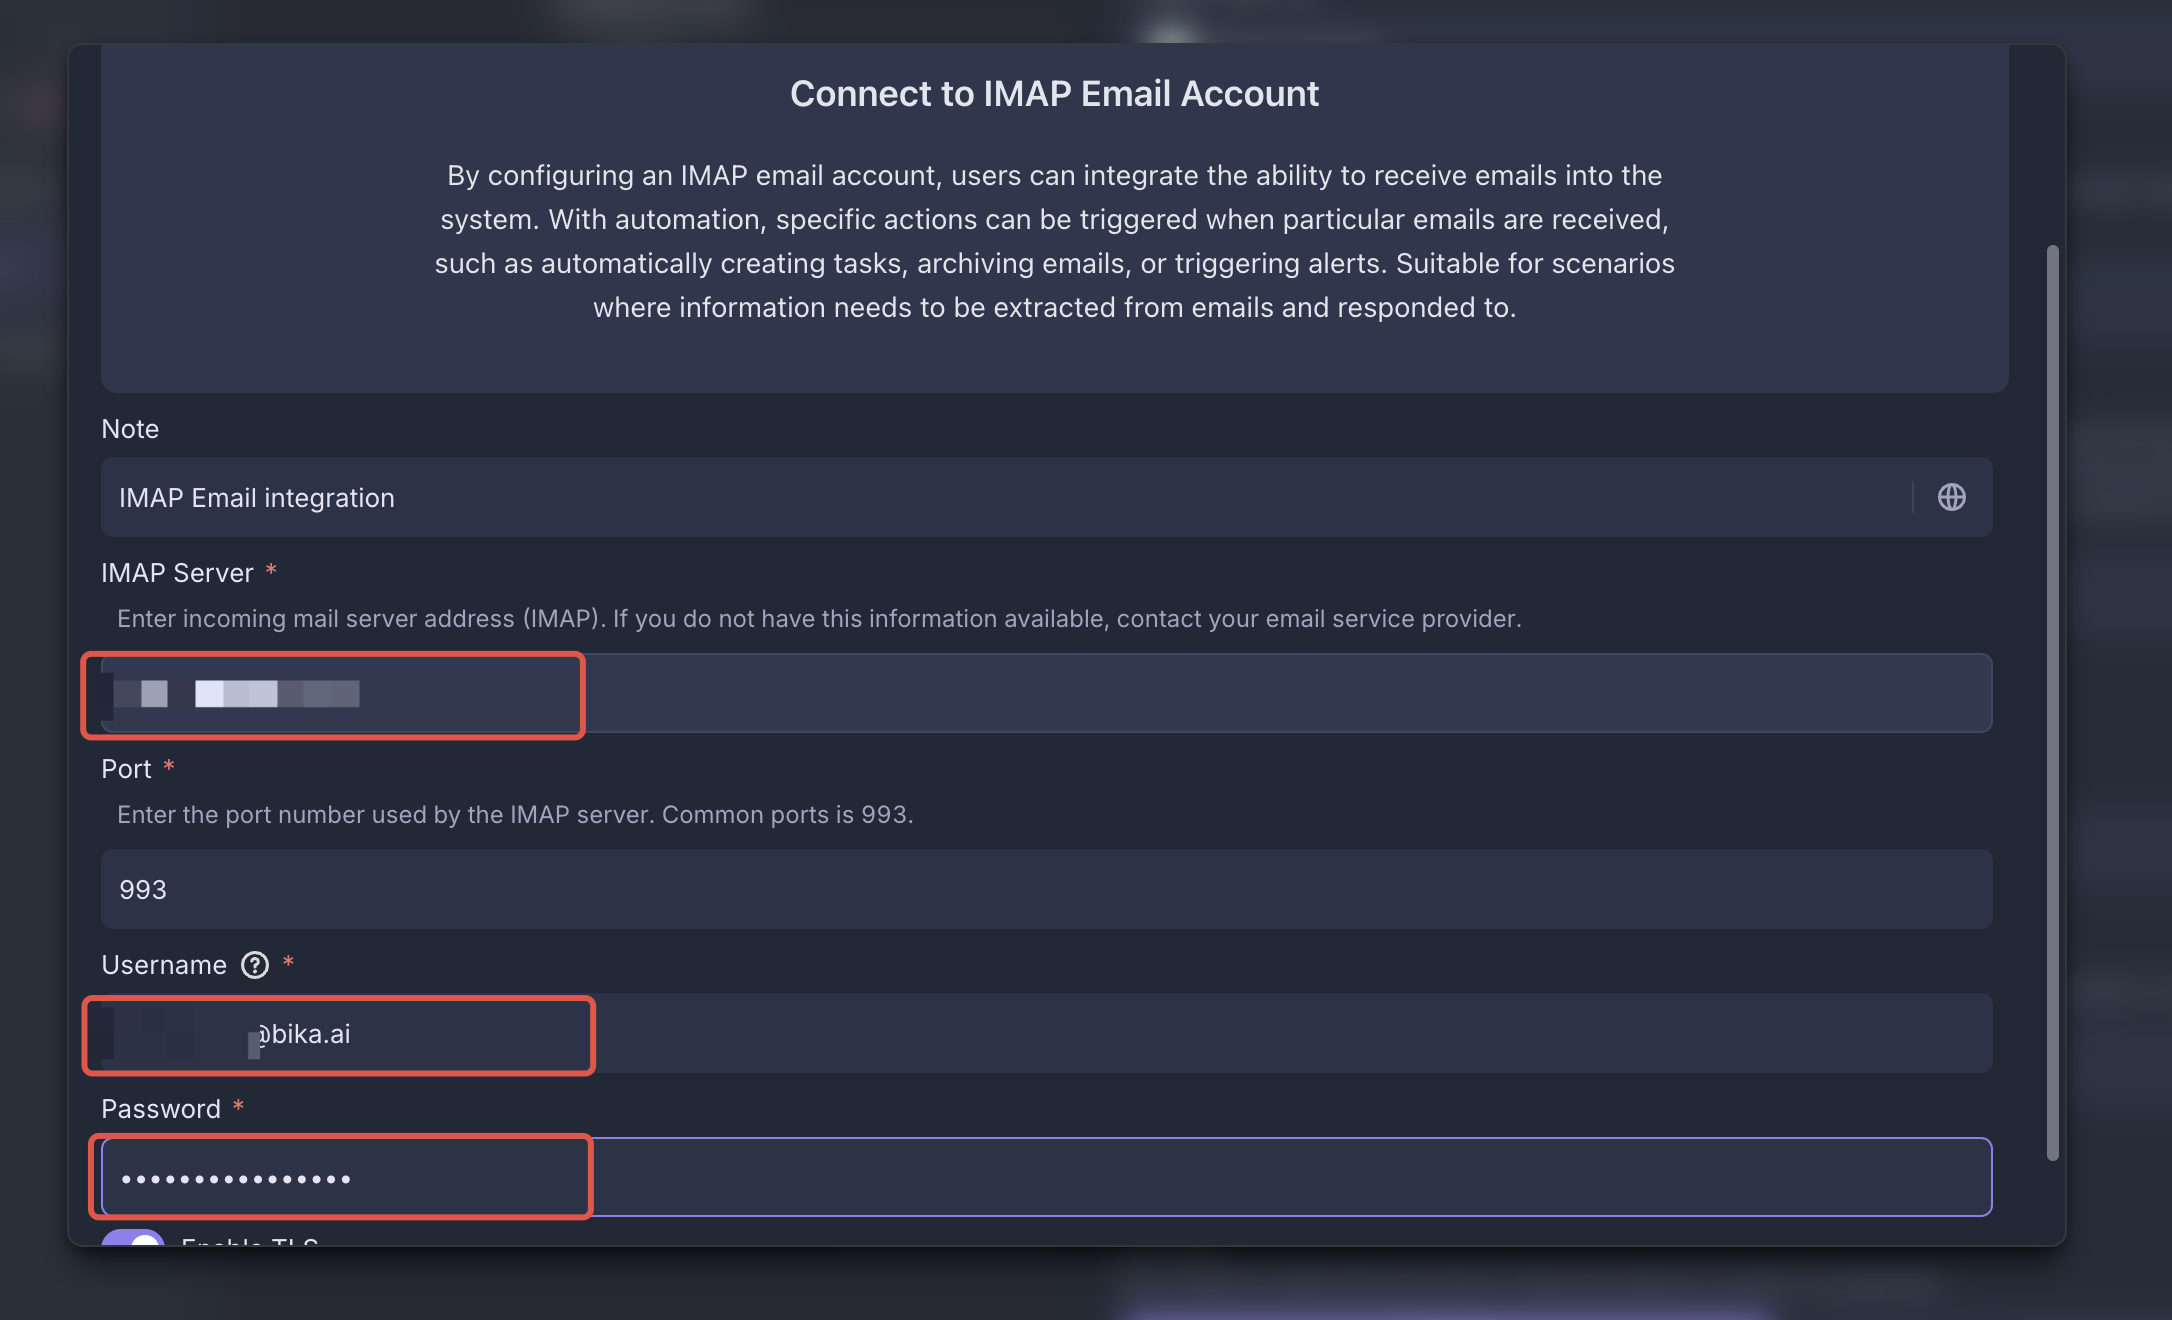
Configure IMAP Email Integration
Go to the Retrieve Bank Email automation and add your IMAP email integration under the
Receive Specific Emailtrigger.How to configure IMAP email integration?
Click to add and correctly configure your IMAP email integration.
-
Set Up Email Filtering Rules
-
Create Bank Email Folder: If your email client supports rules, create a folder (e.g.,
bankEmail) specifically for bank transaction emails. Relevant emails will be automatically moved to this folder.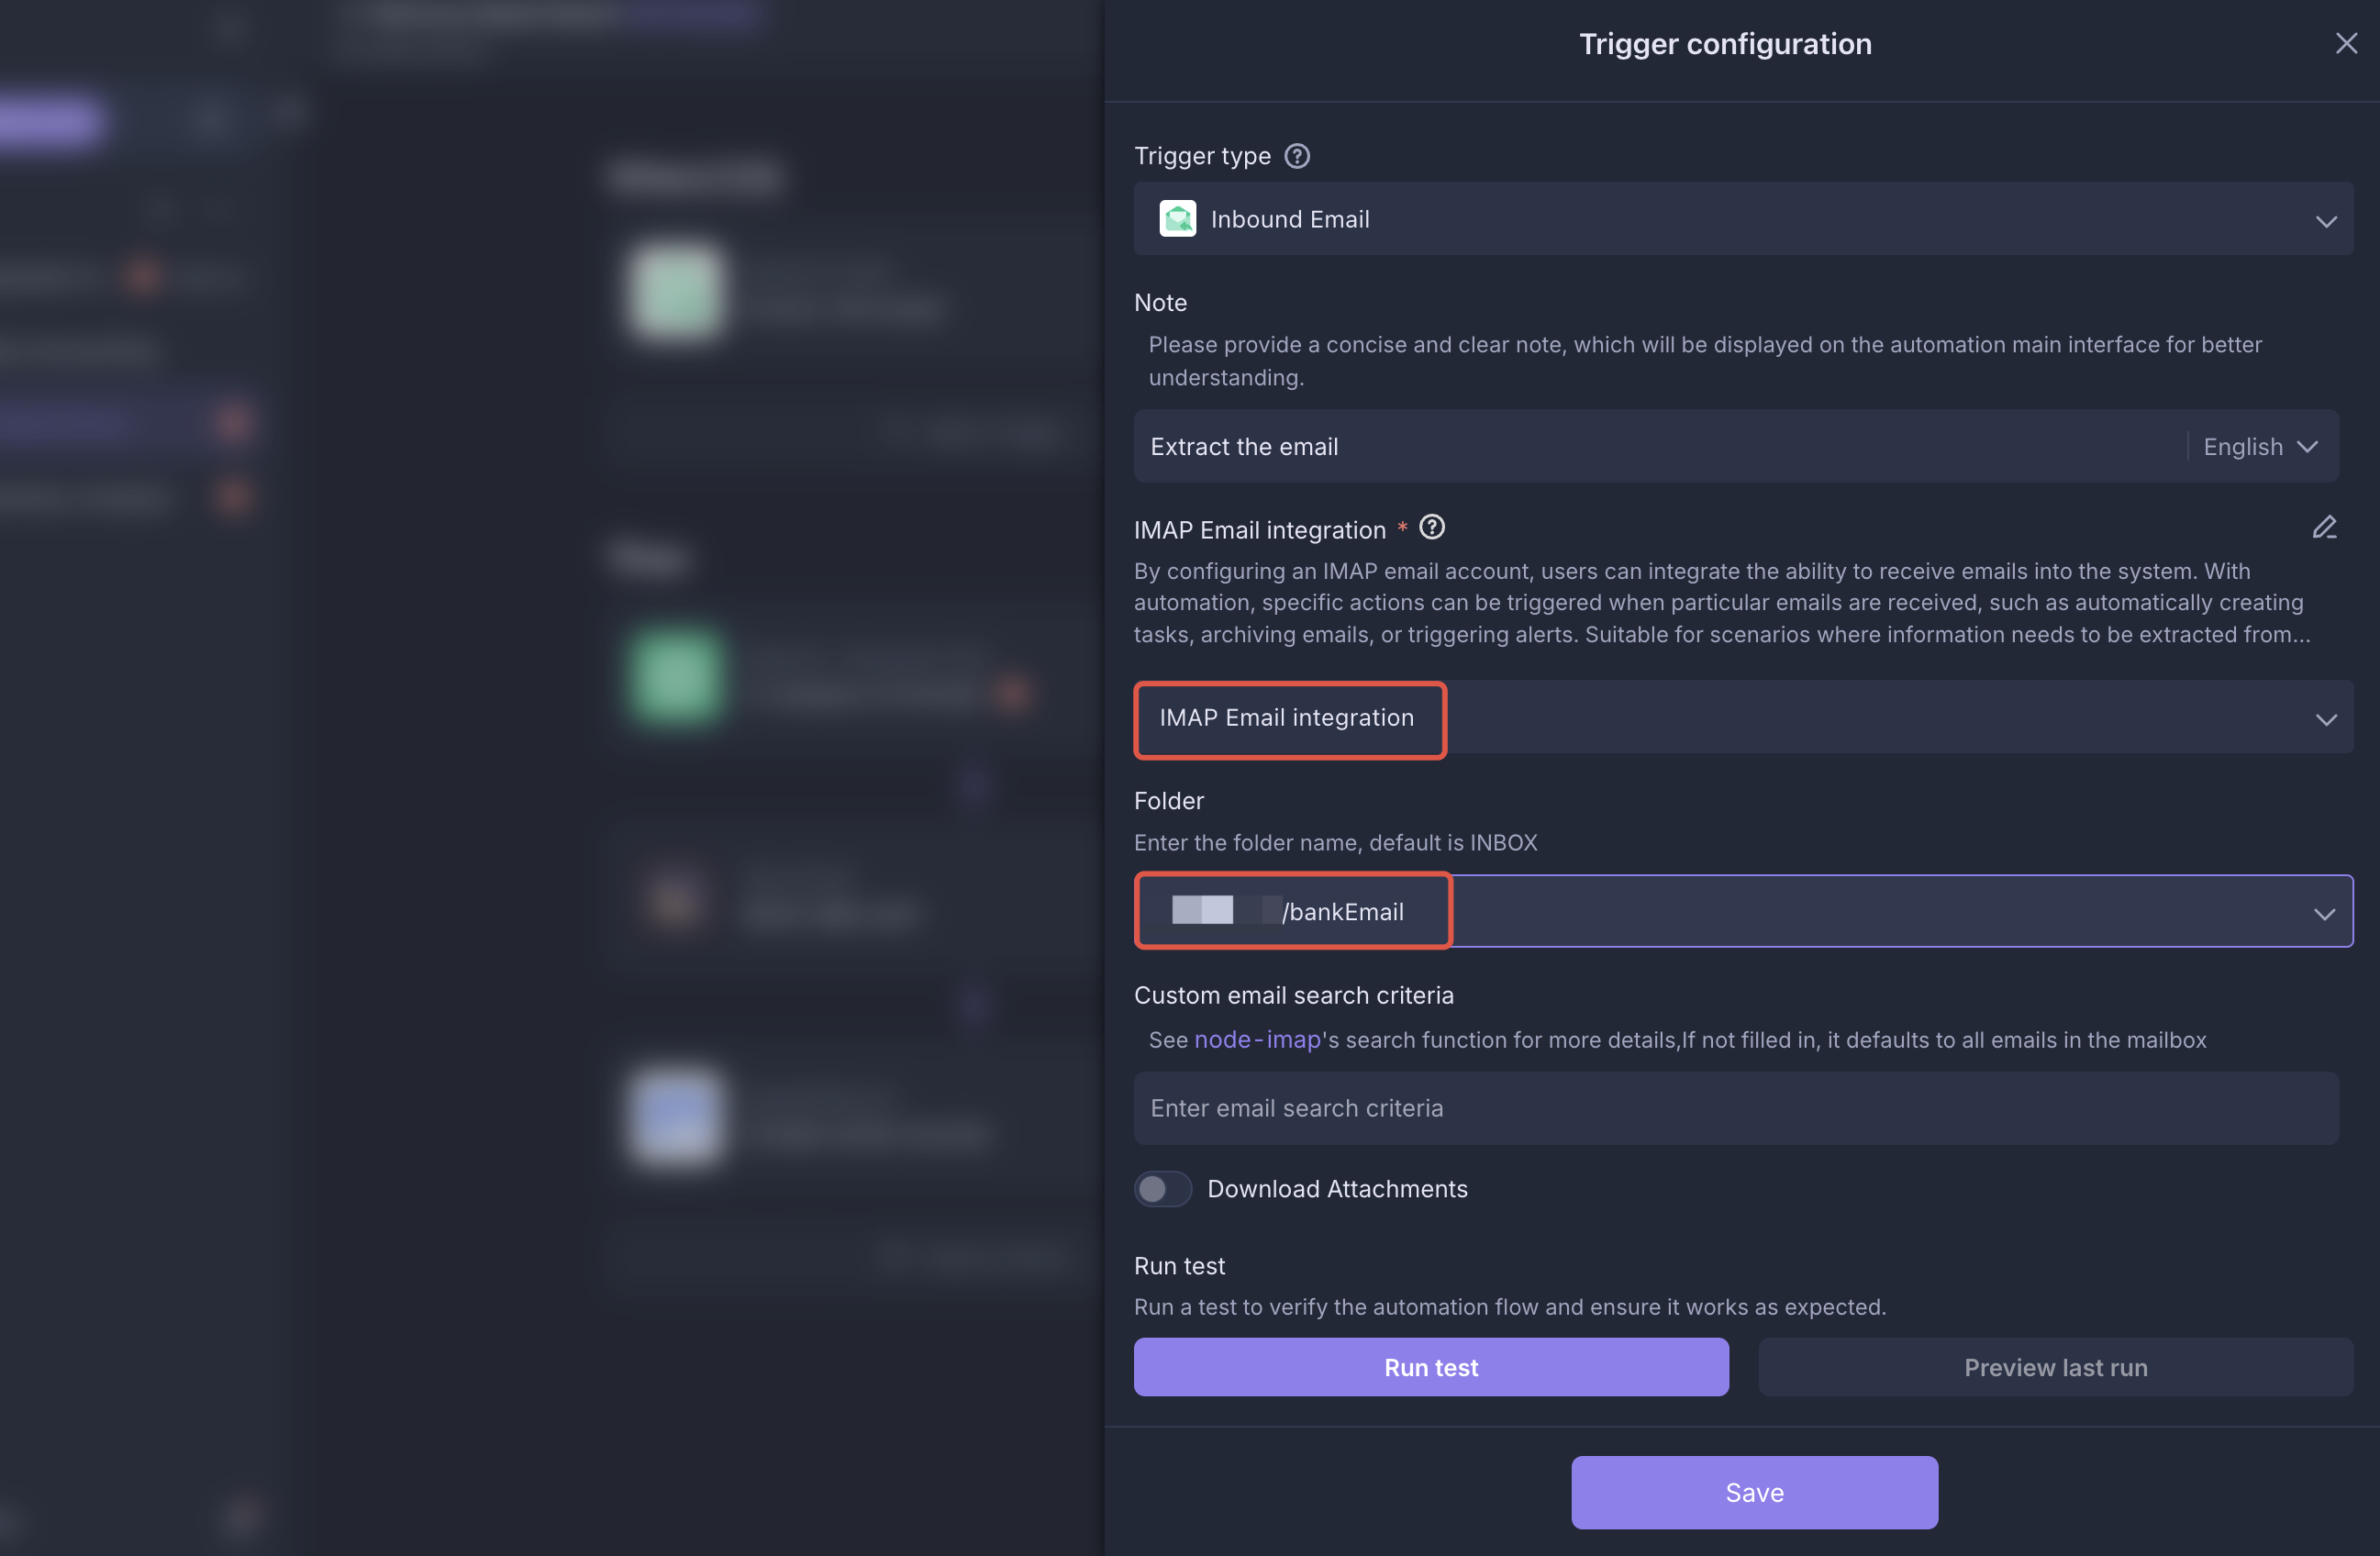
-
Set Up node-imap Filtering Rules: If your email does not support rule-based folders, you can configure email fetching rules in the
Receive Specific Emailtrigger using node-imap rules. See the node-imap documentation for details.
Note: Only some email providers support node-imap rules!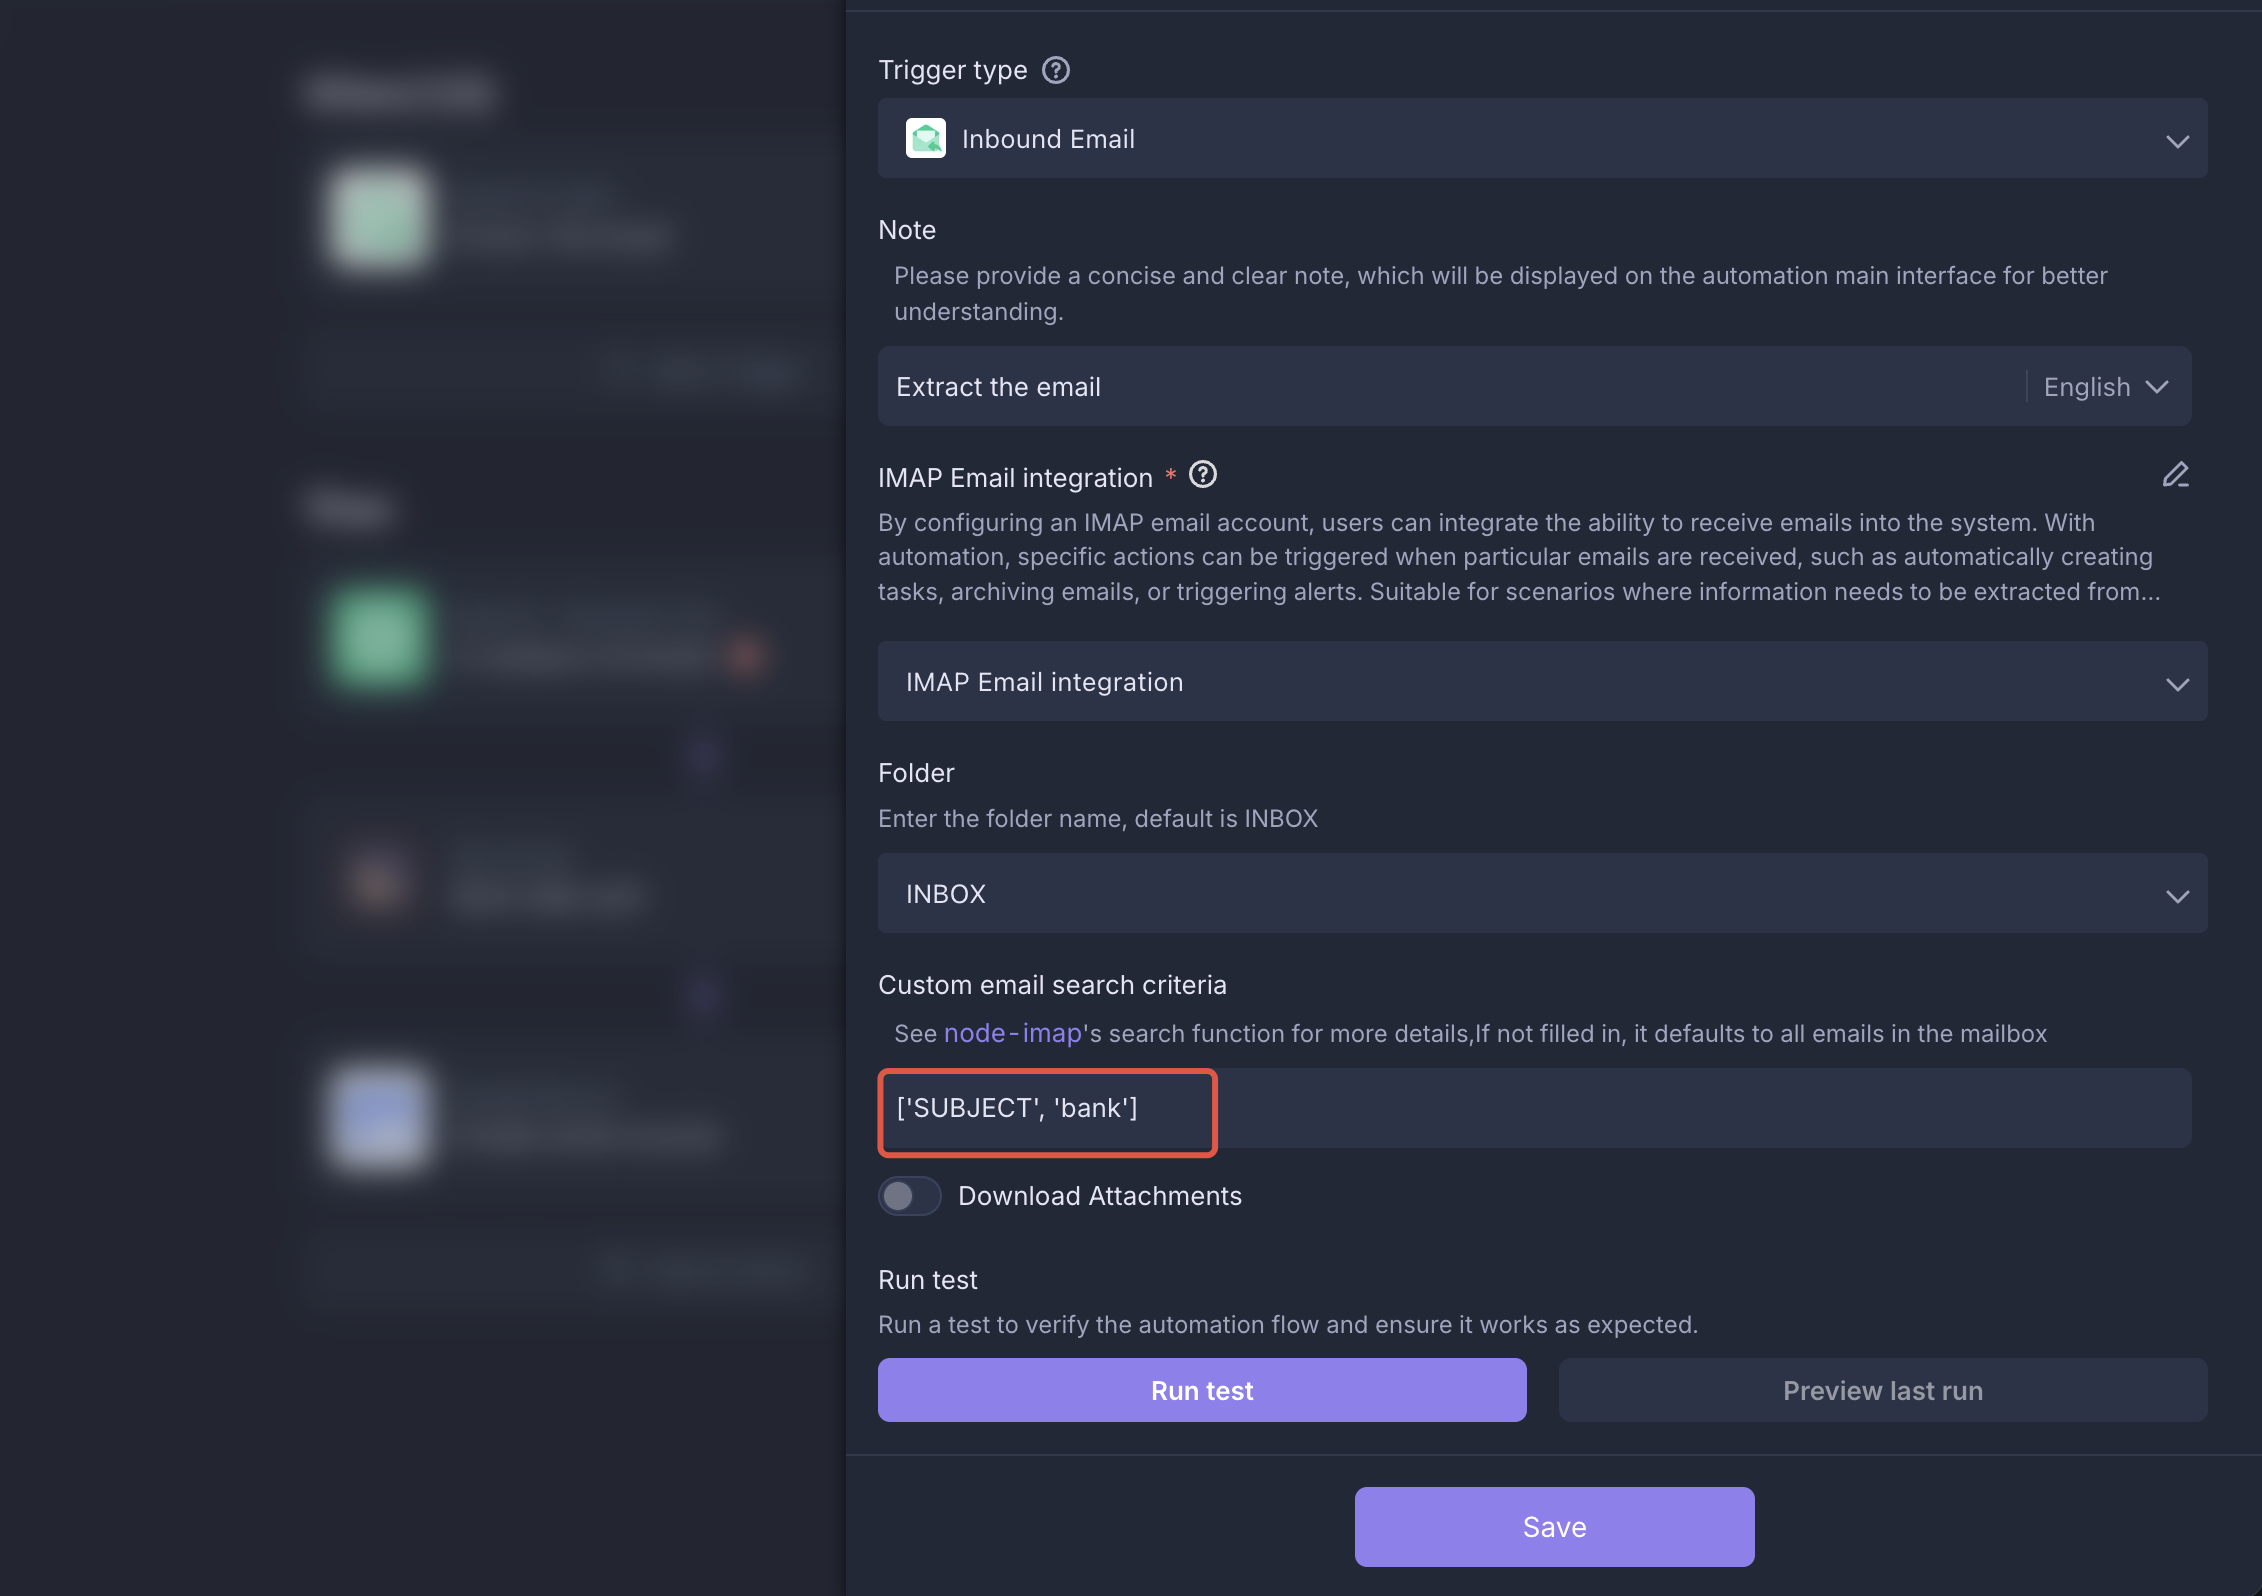
-
-
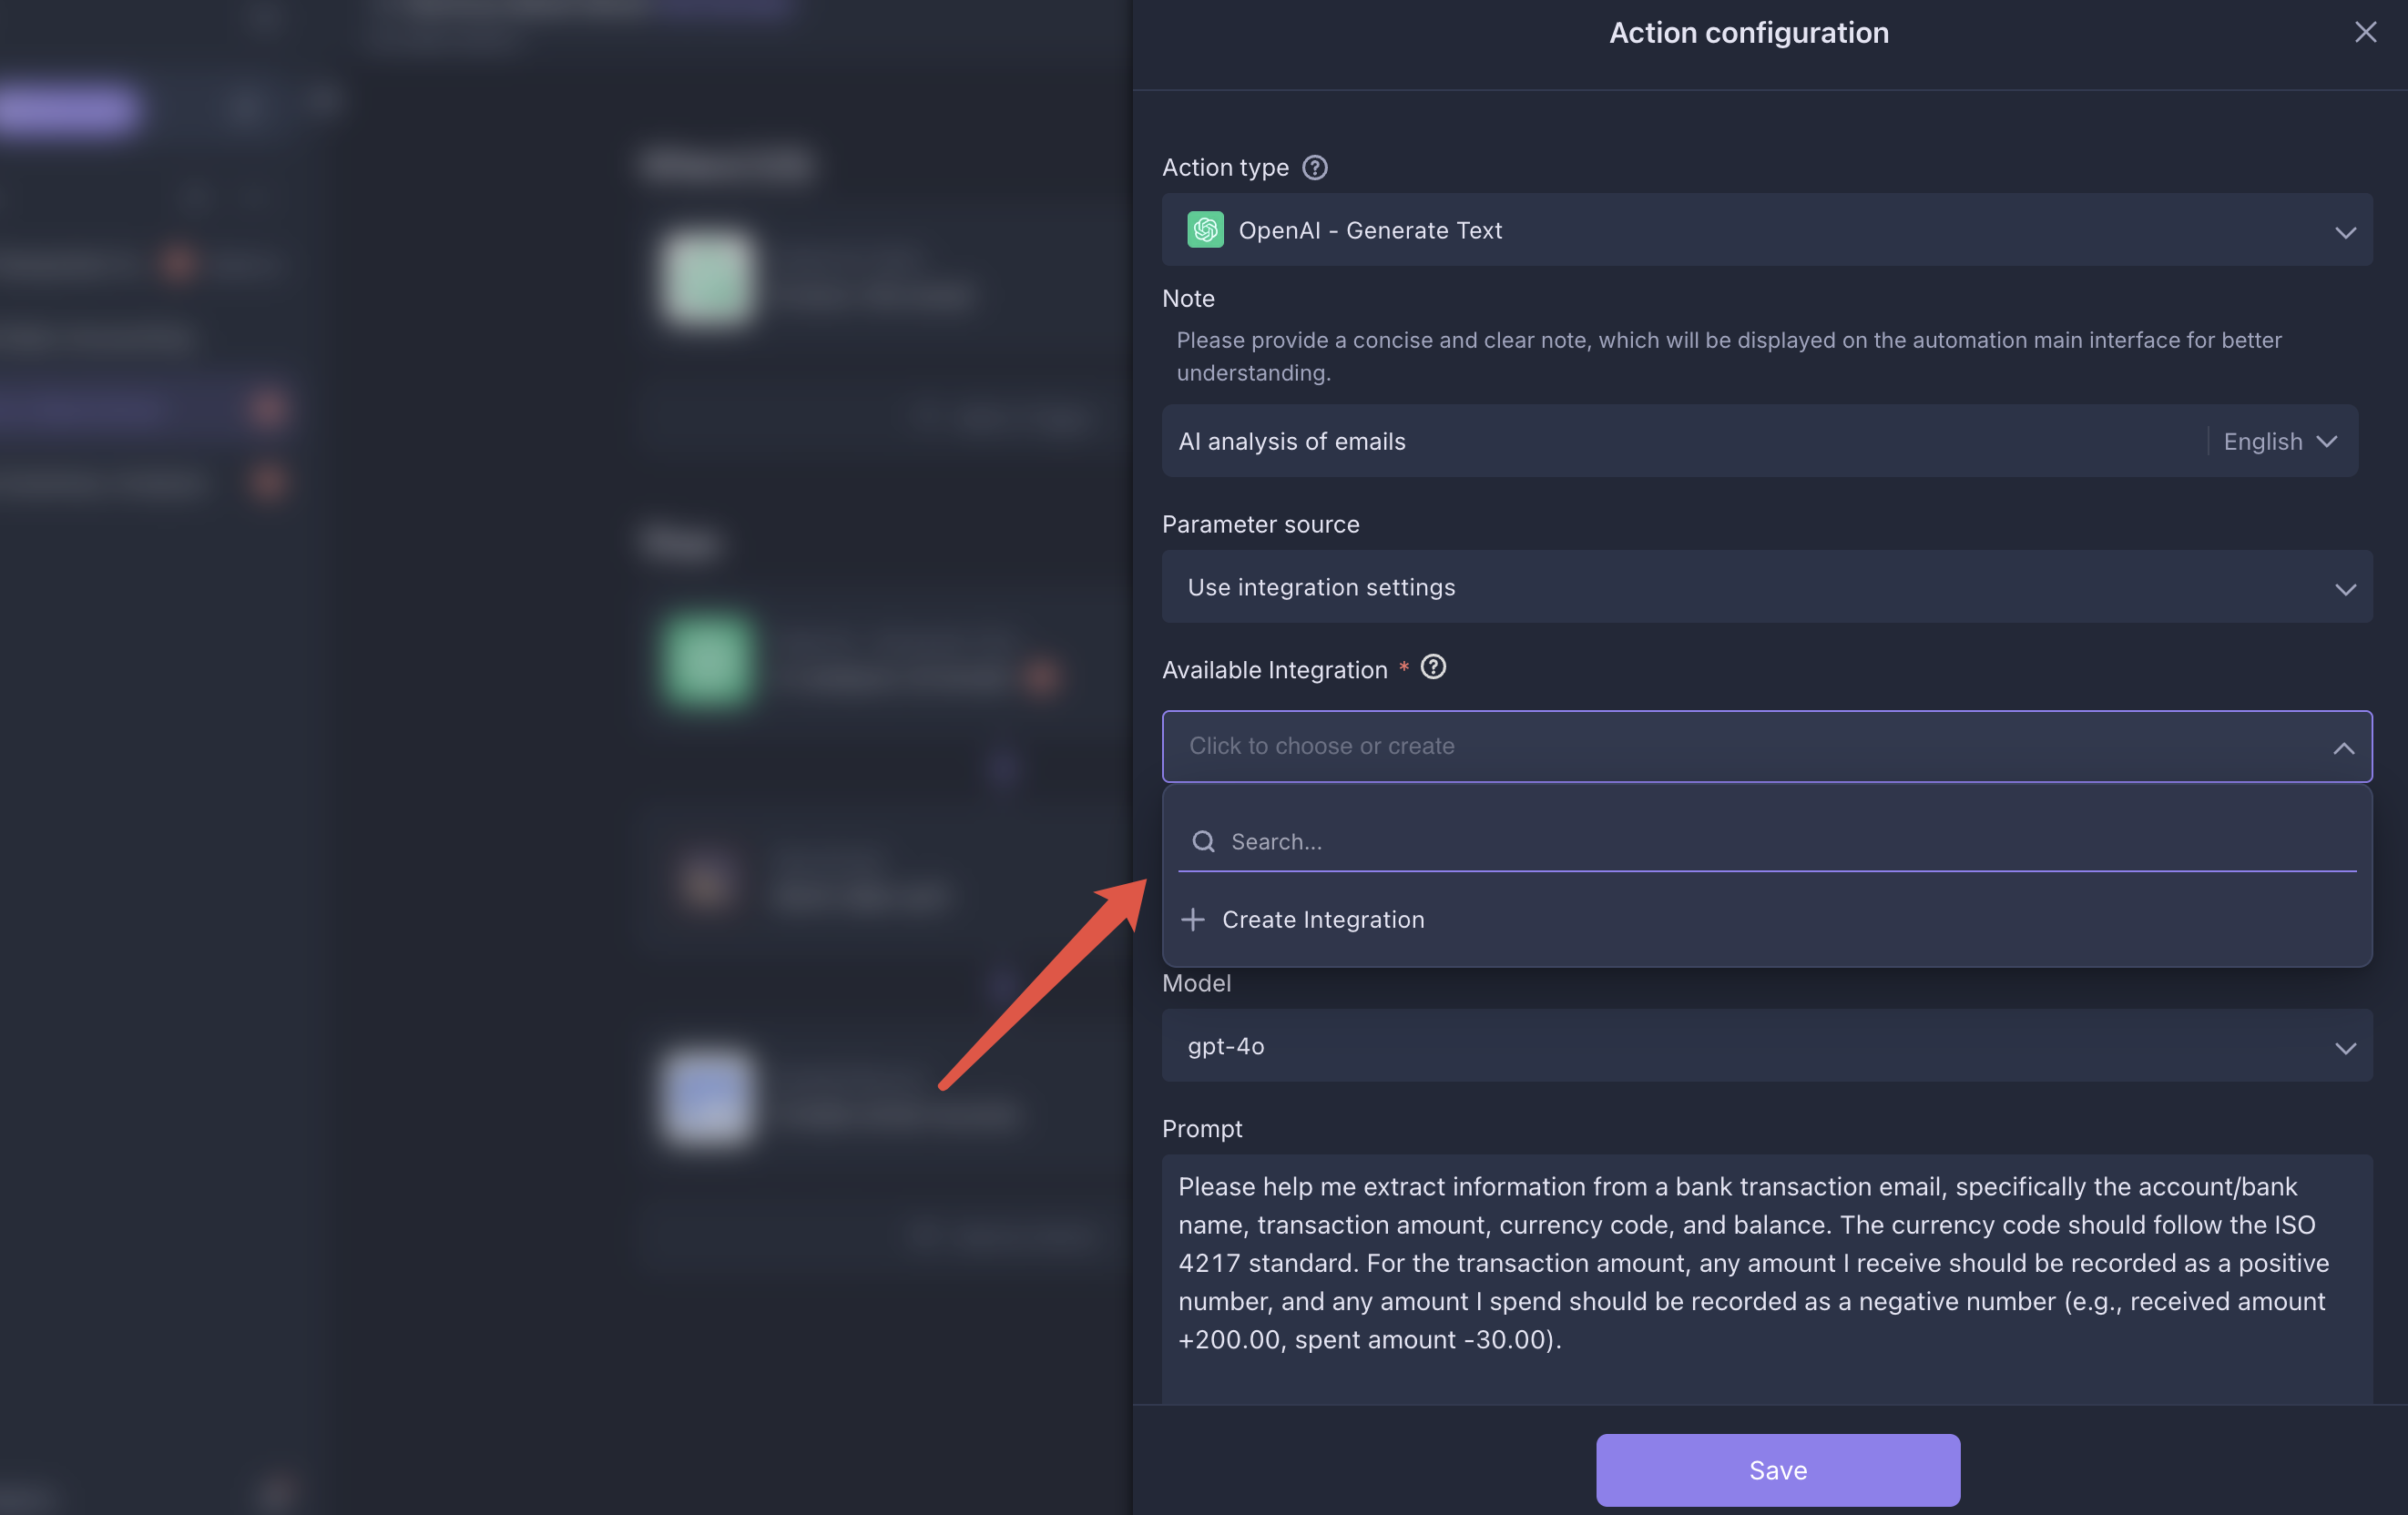
Configure AI Integration
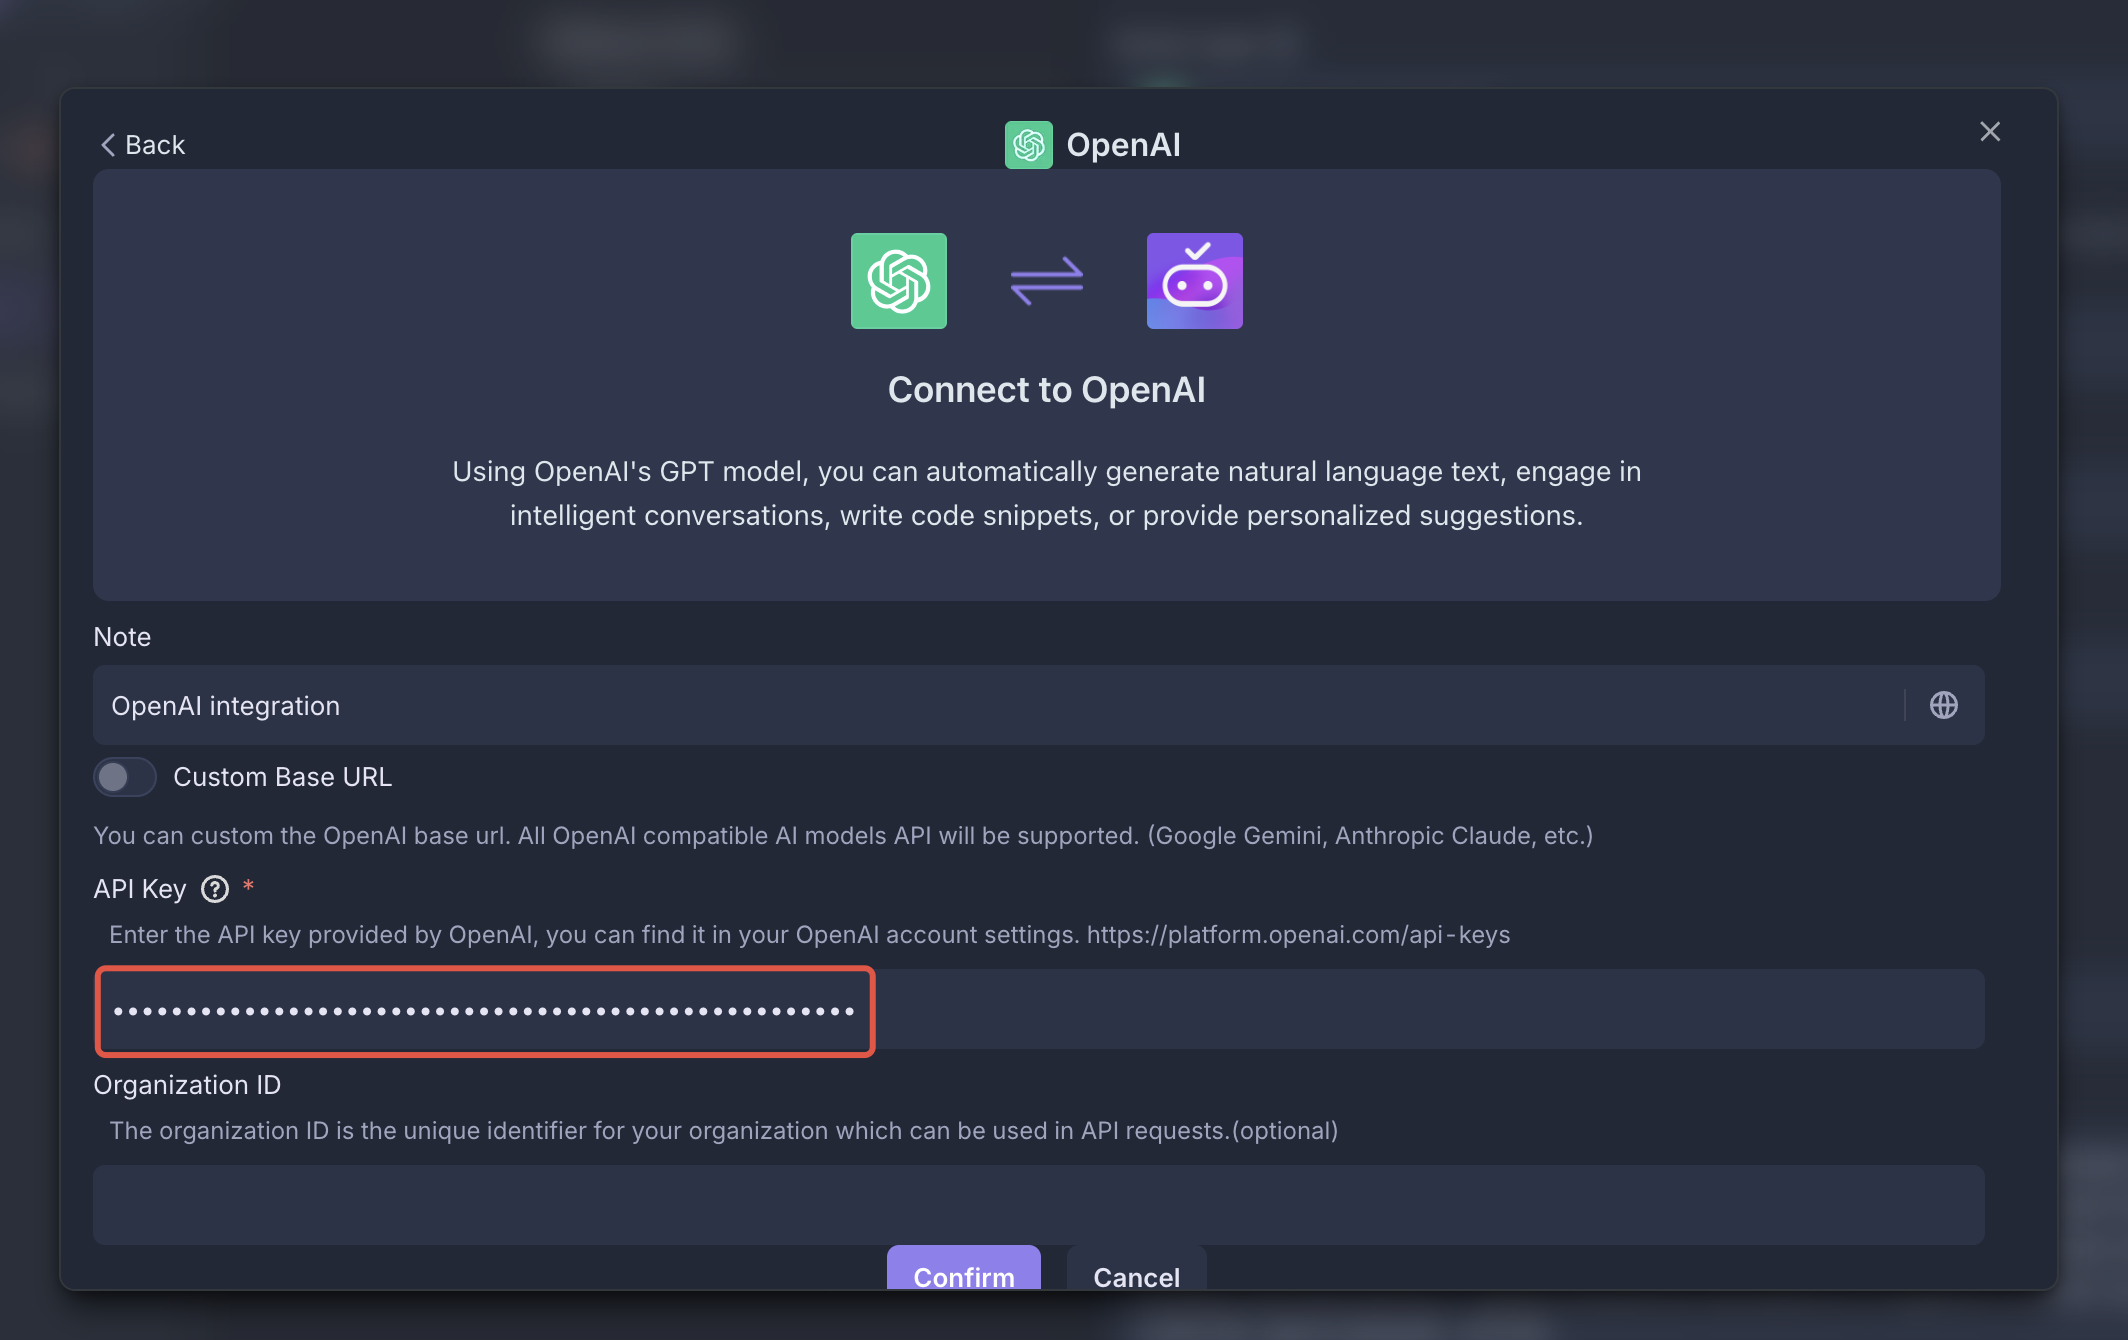
In the Retrieve Bank Email automation, get your
OPENAI API KEYfrom the OpenAI Developer Platform, then configure and save theOpenAI - Generate Textexecutor.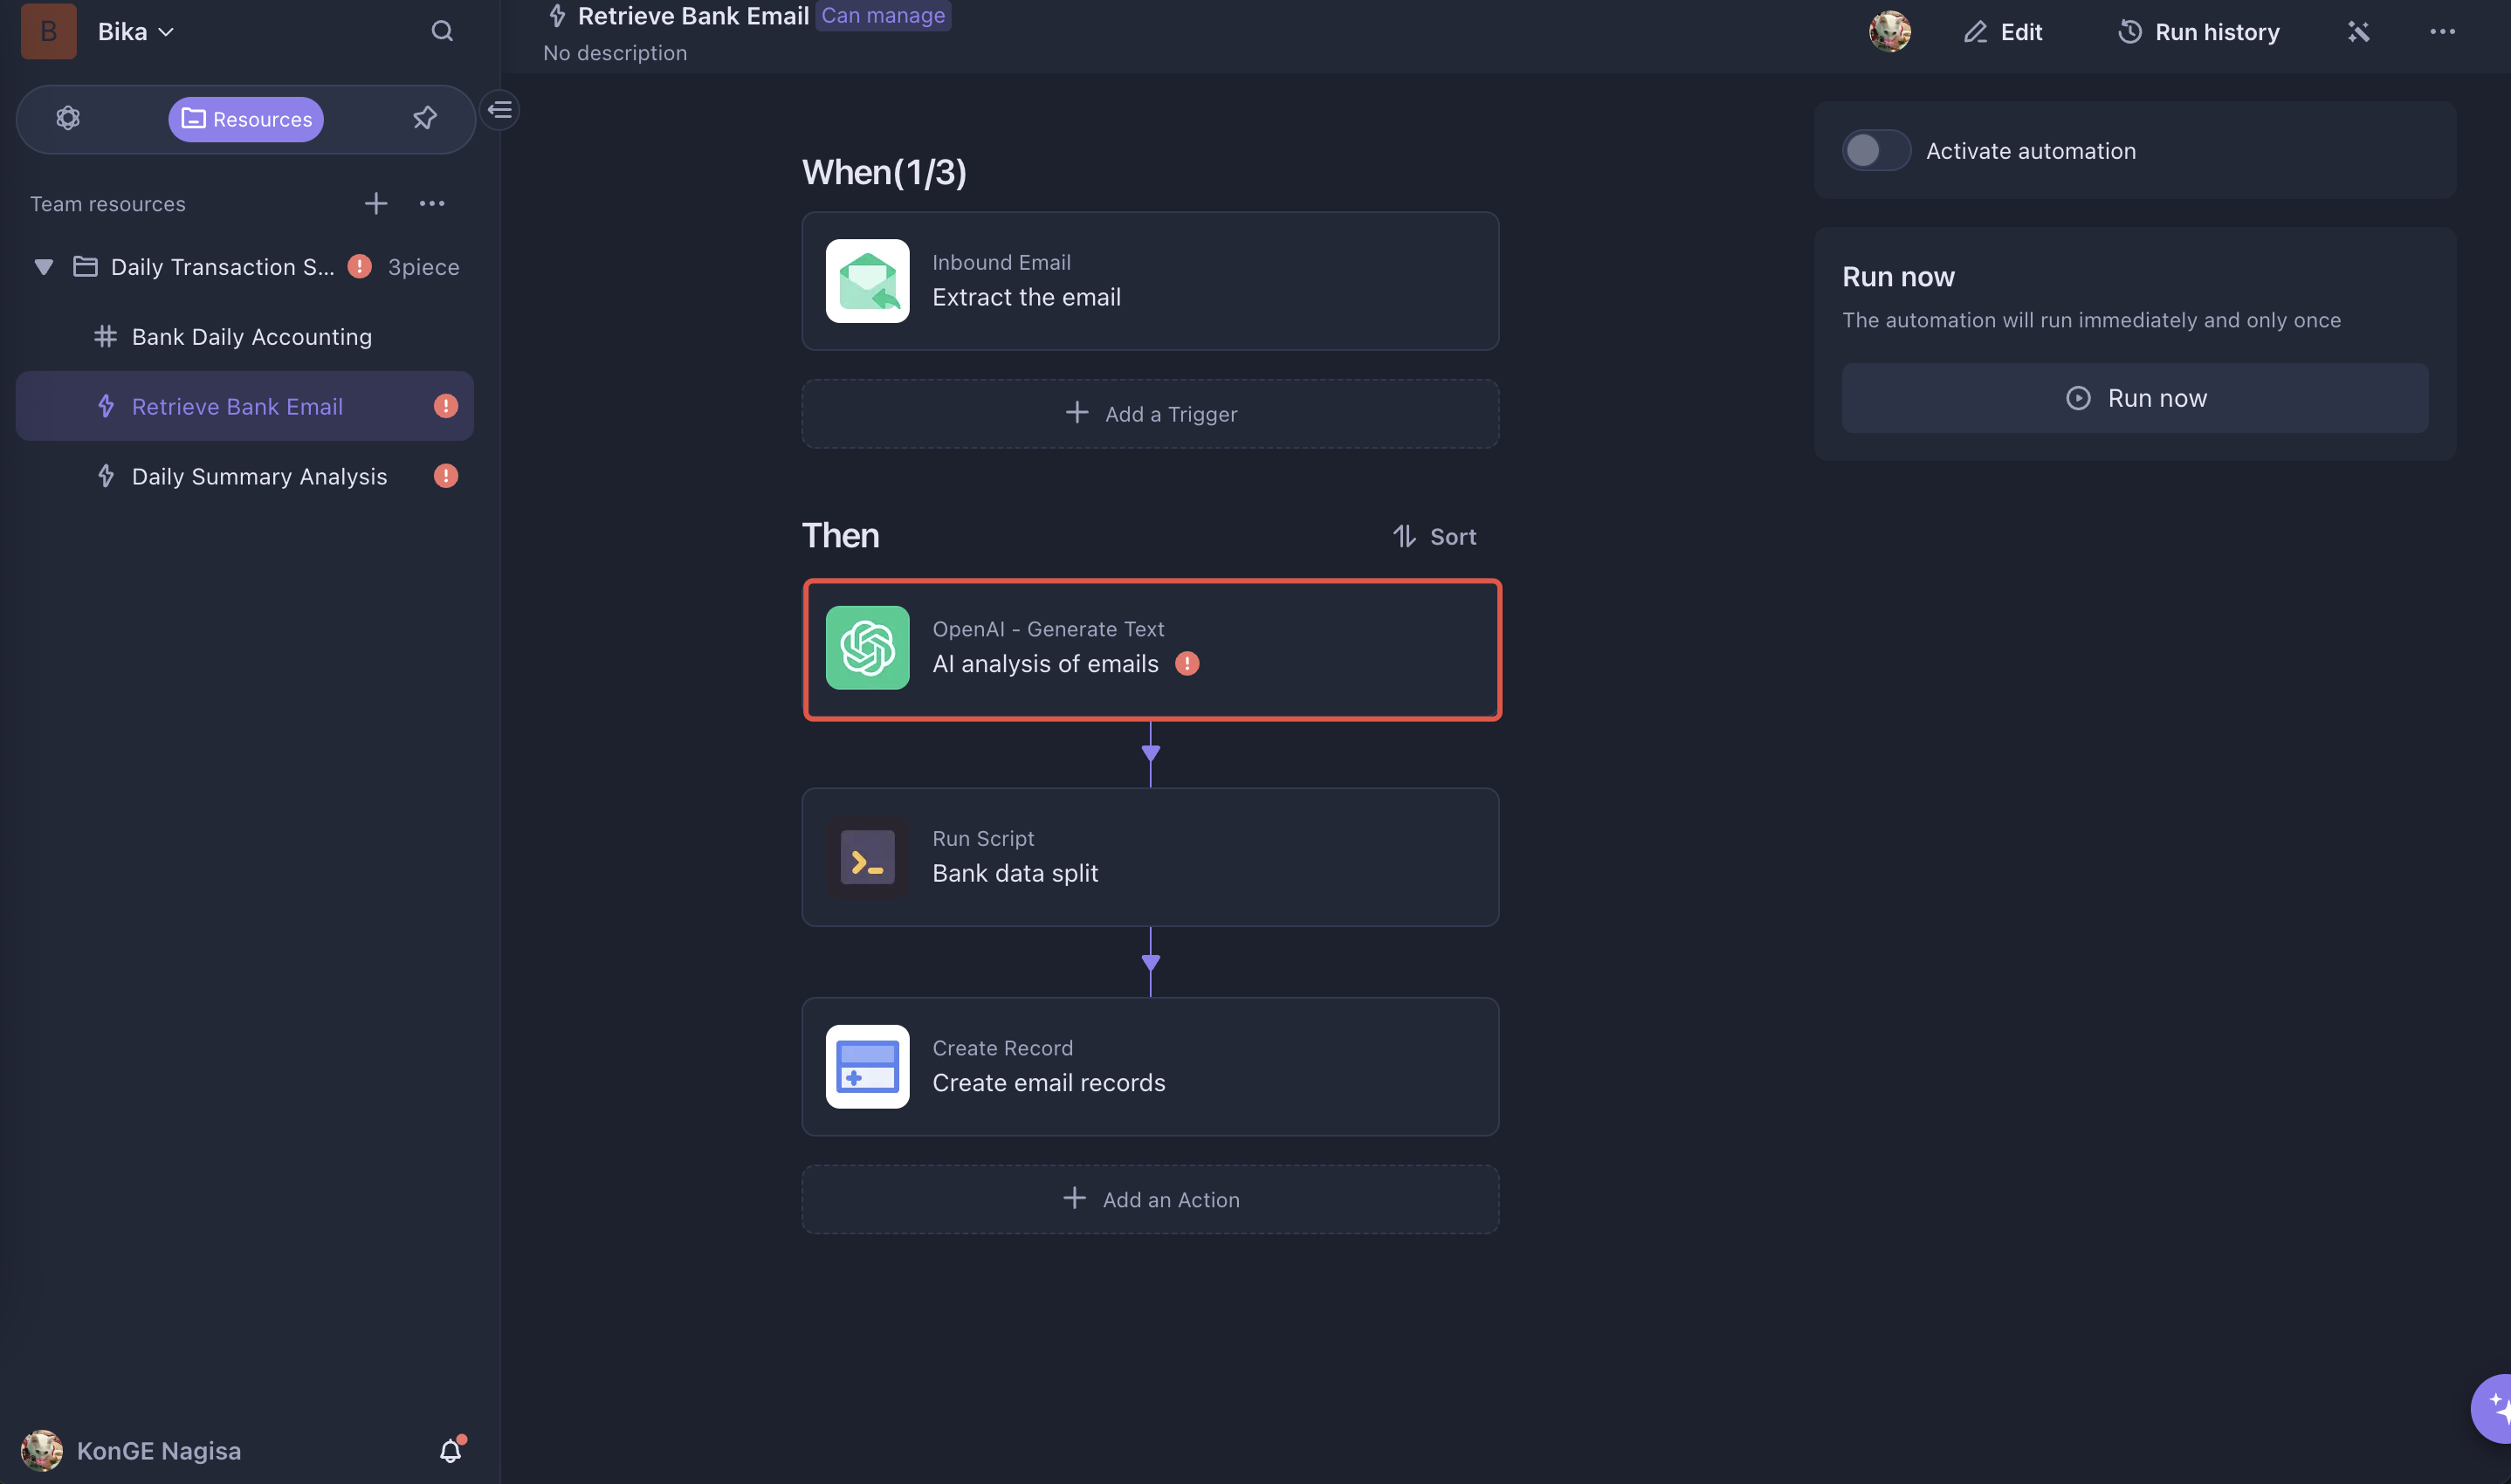
-
Enable Automation
Enable the Retrieve Bank Email automation. Once a bank transaction email is received, data will be automatically extracted and filled into the table.
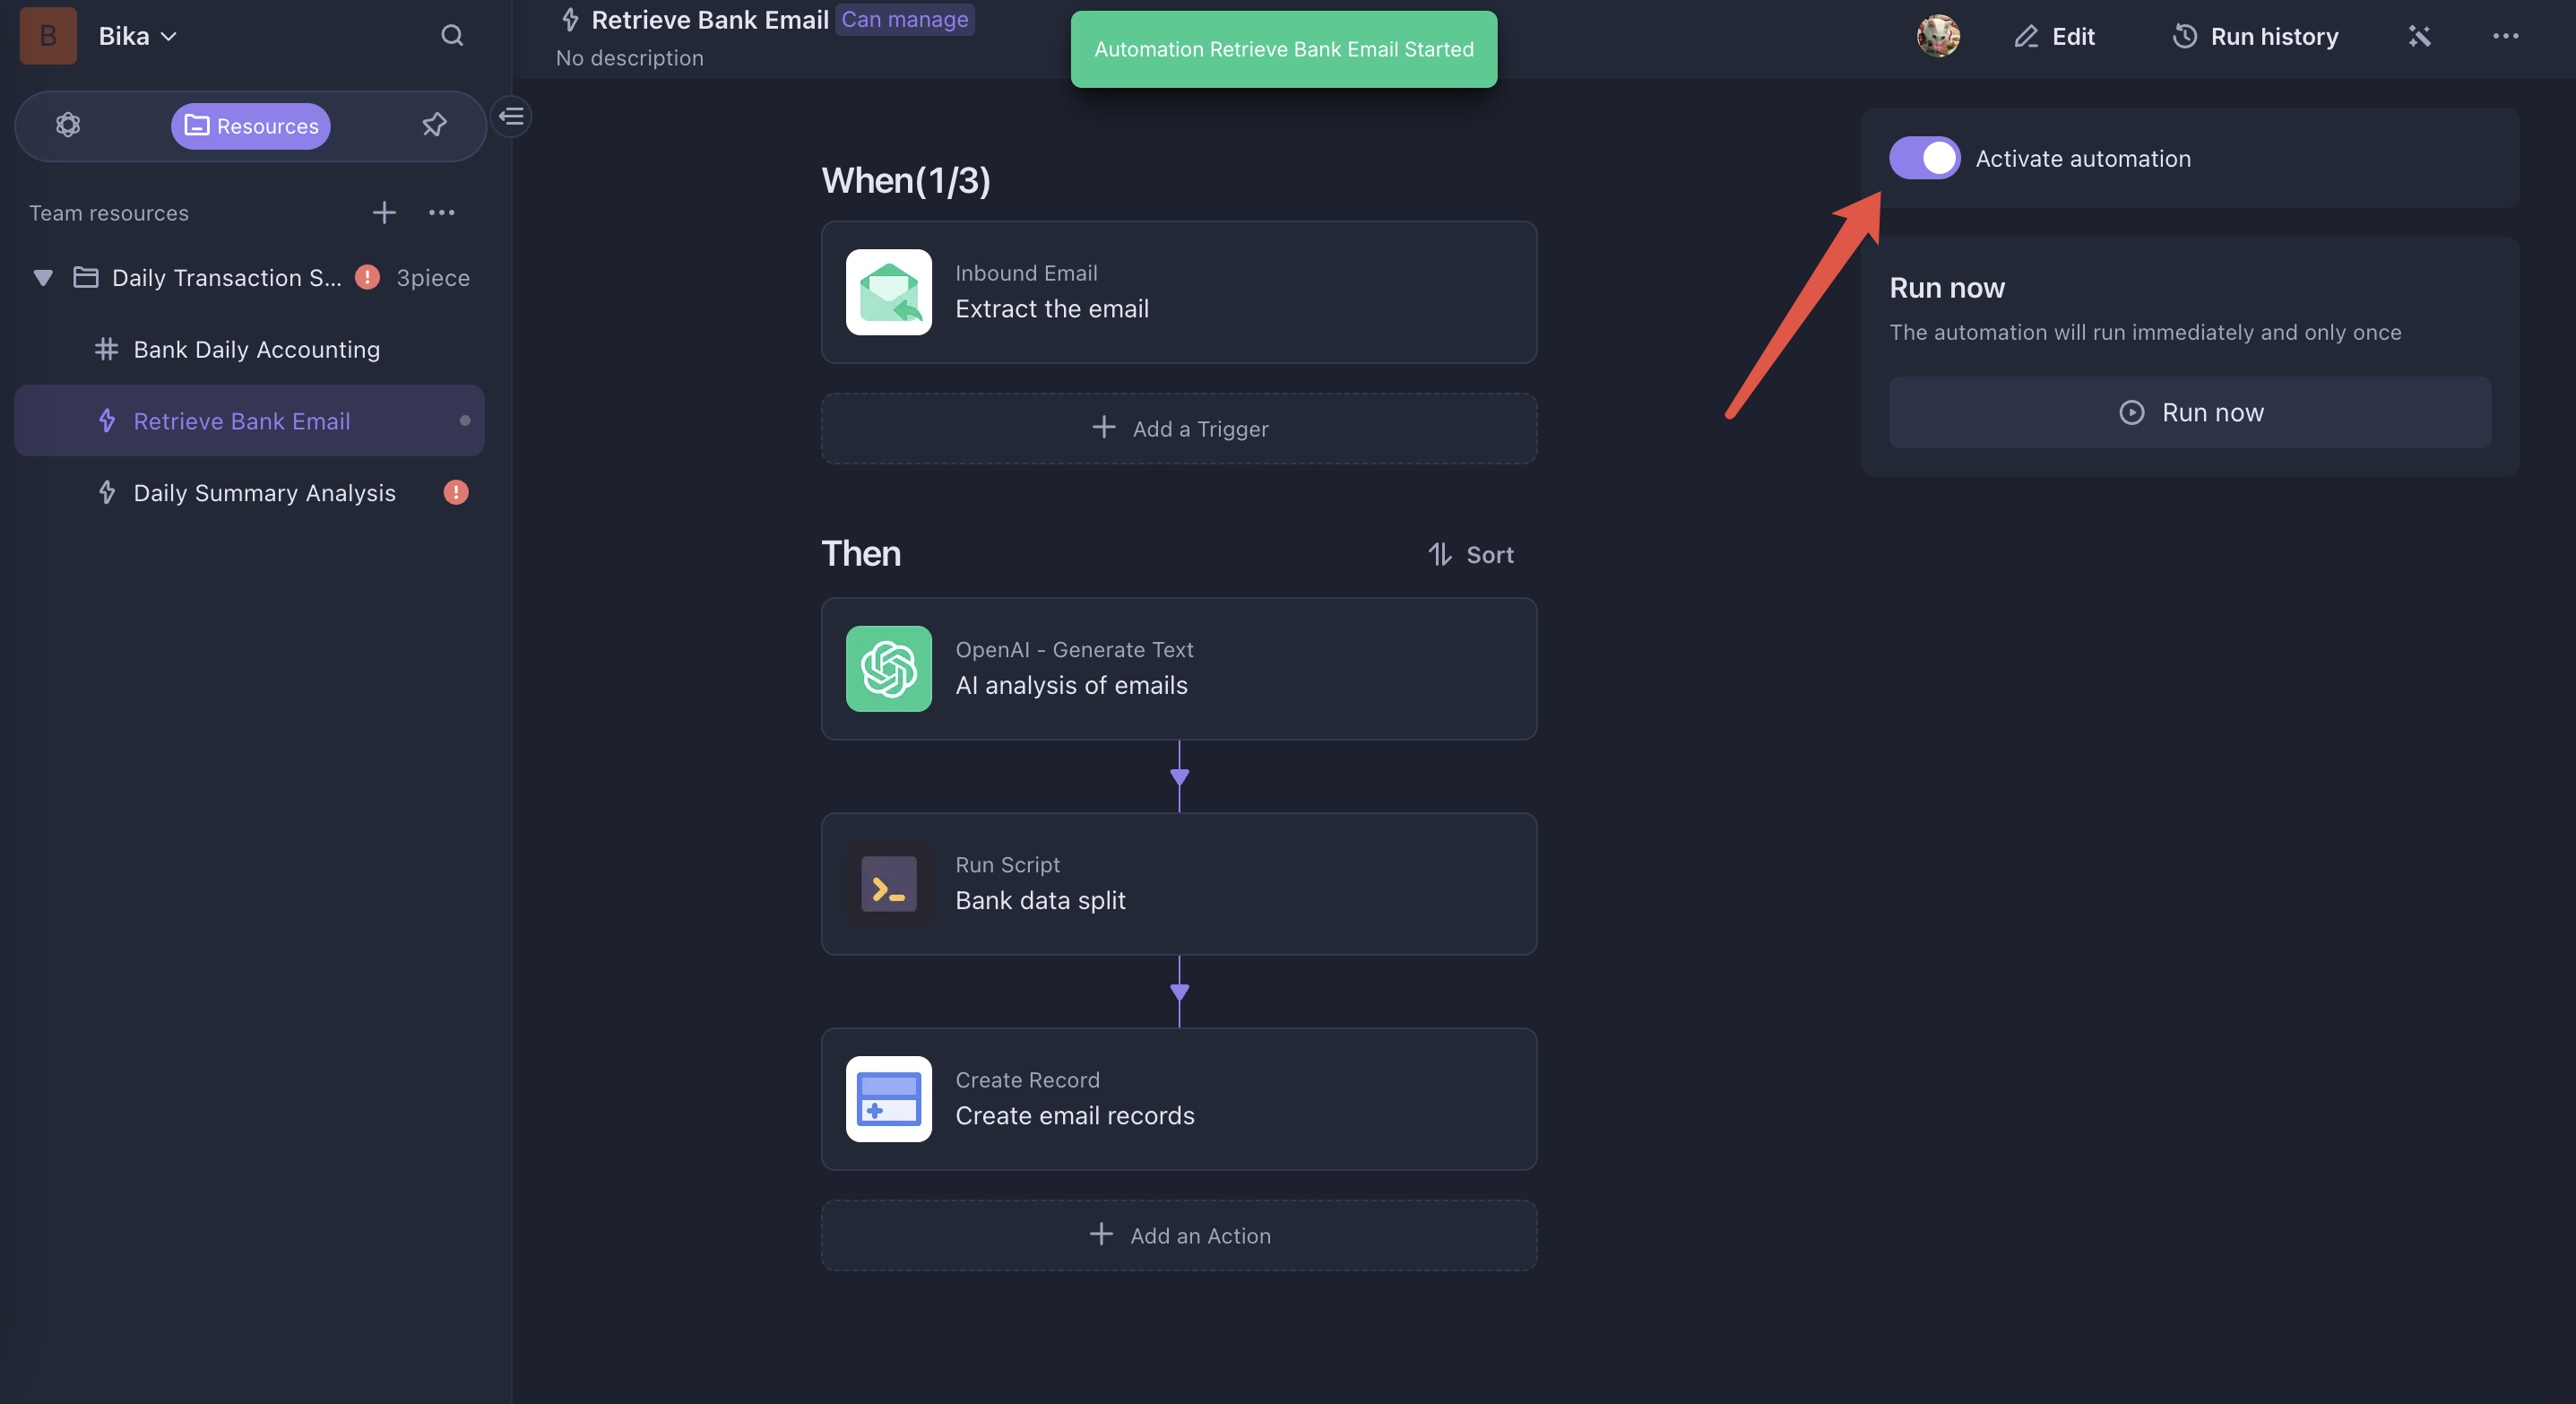
After receiving a transaction email, AI will extract the data and fill it into the Bank Daily Accounting.
2. Configure and Enable the Daily Summary Analysis Automation
-
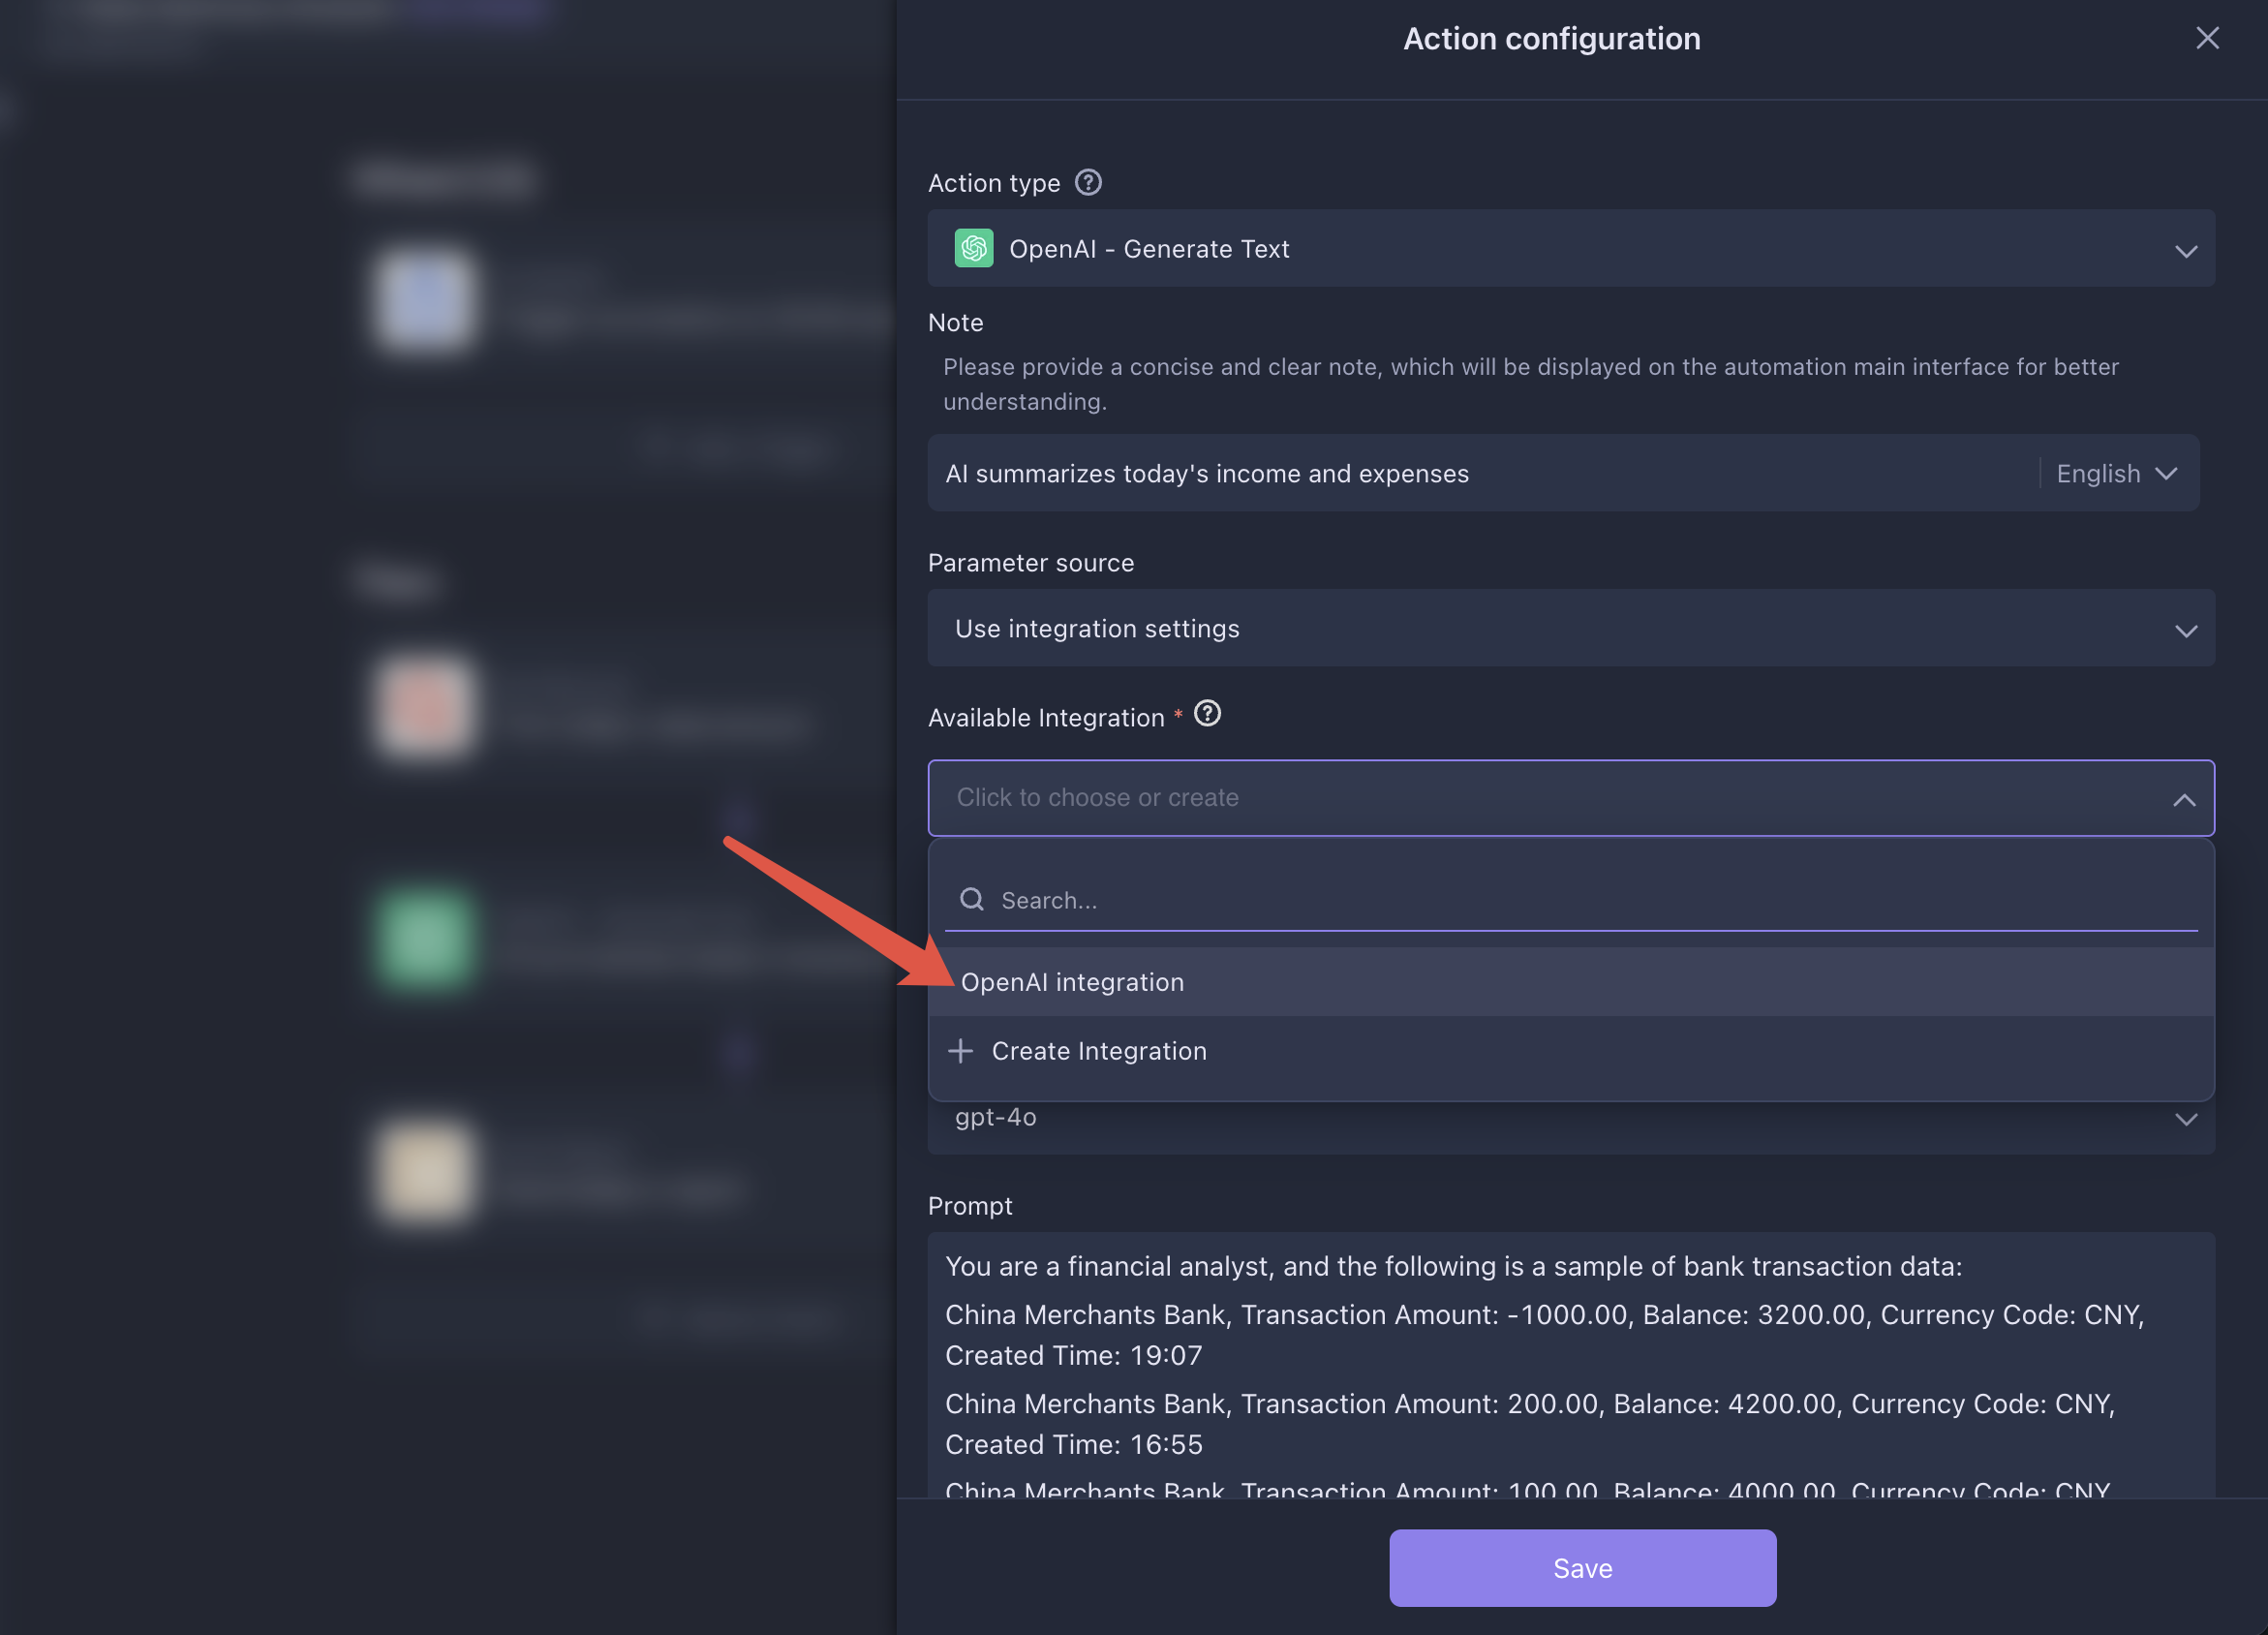
Configure AI Integration
Go to the
OpenAI - Generate Textexecutor within the Daily Summary Analysis automation to configure your AI integration. You can reuse the previously configured AI setup.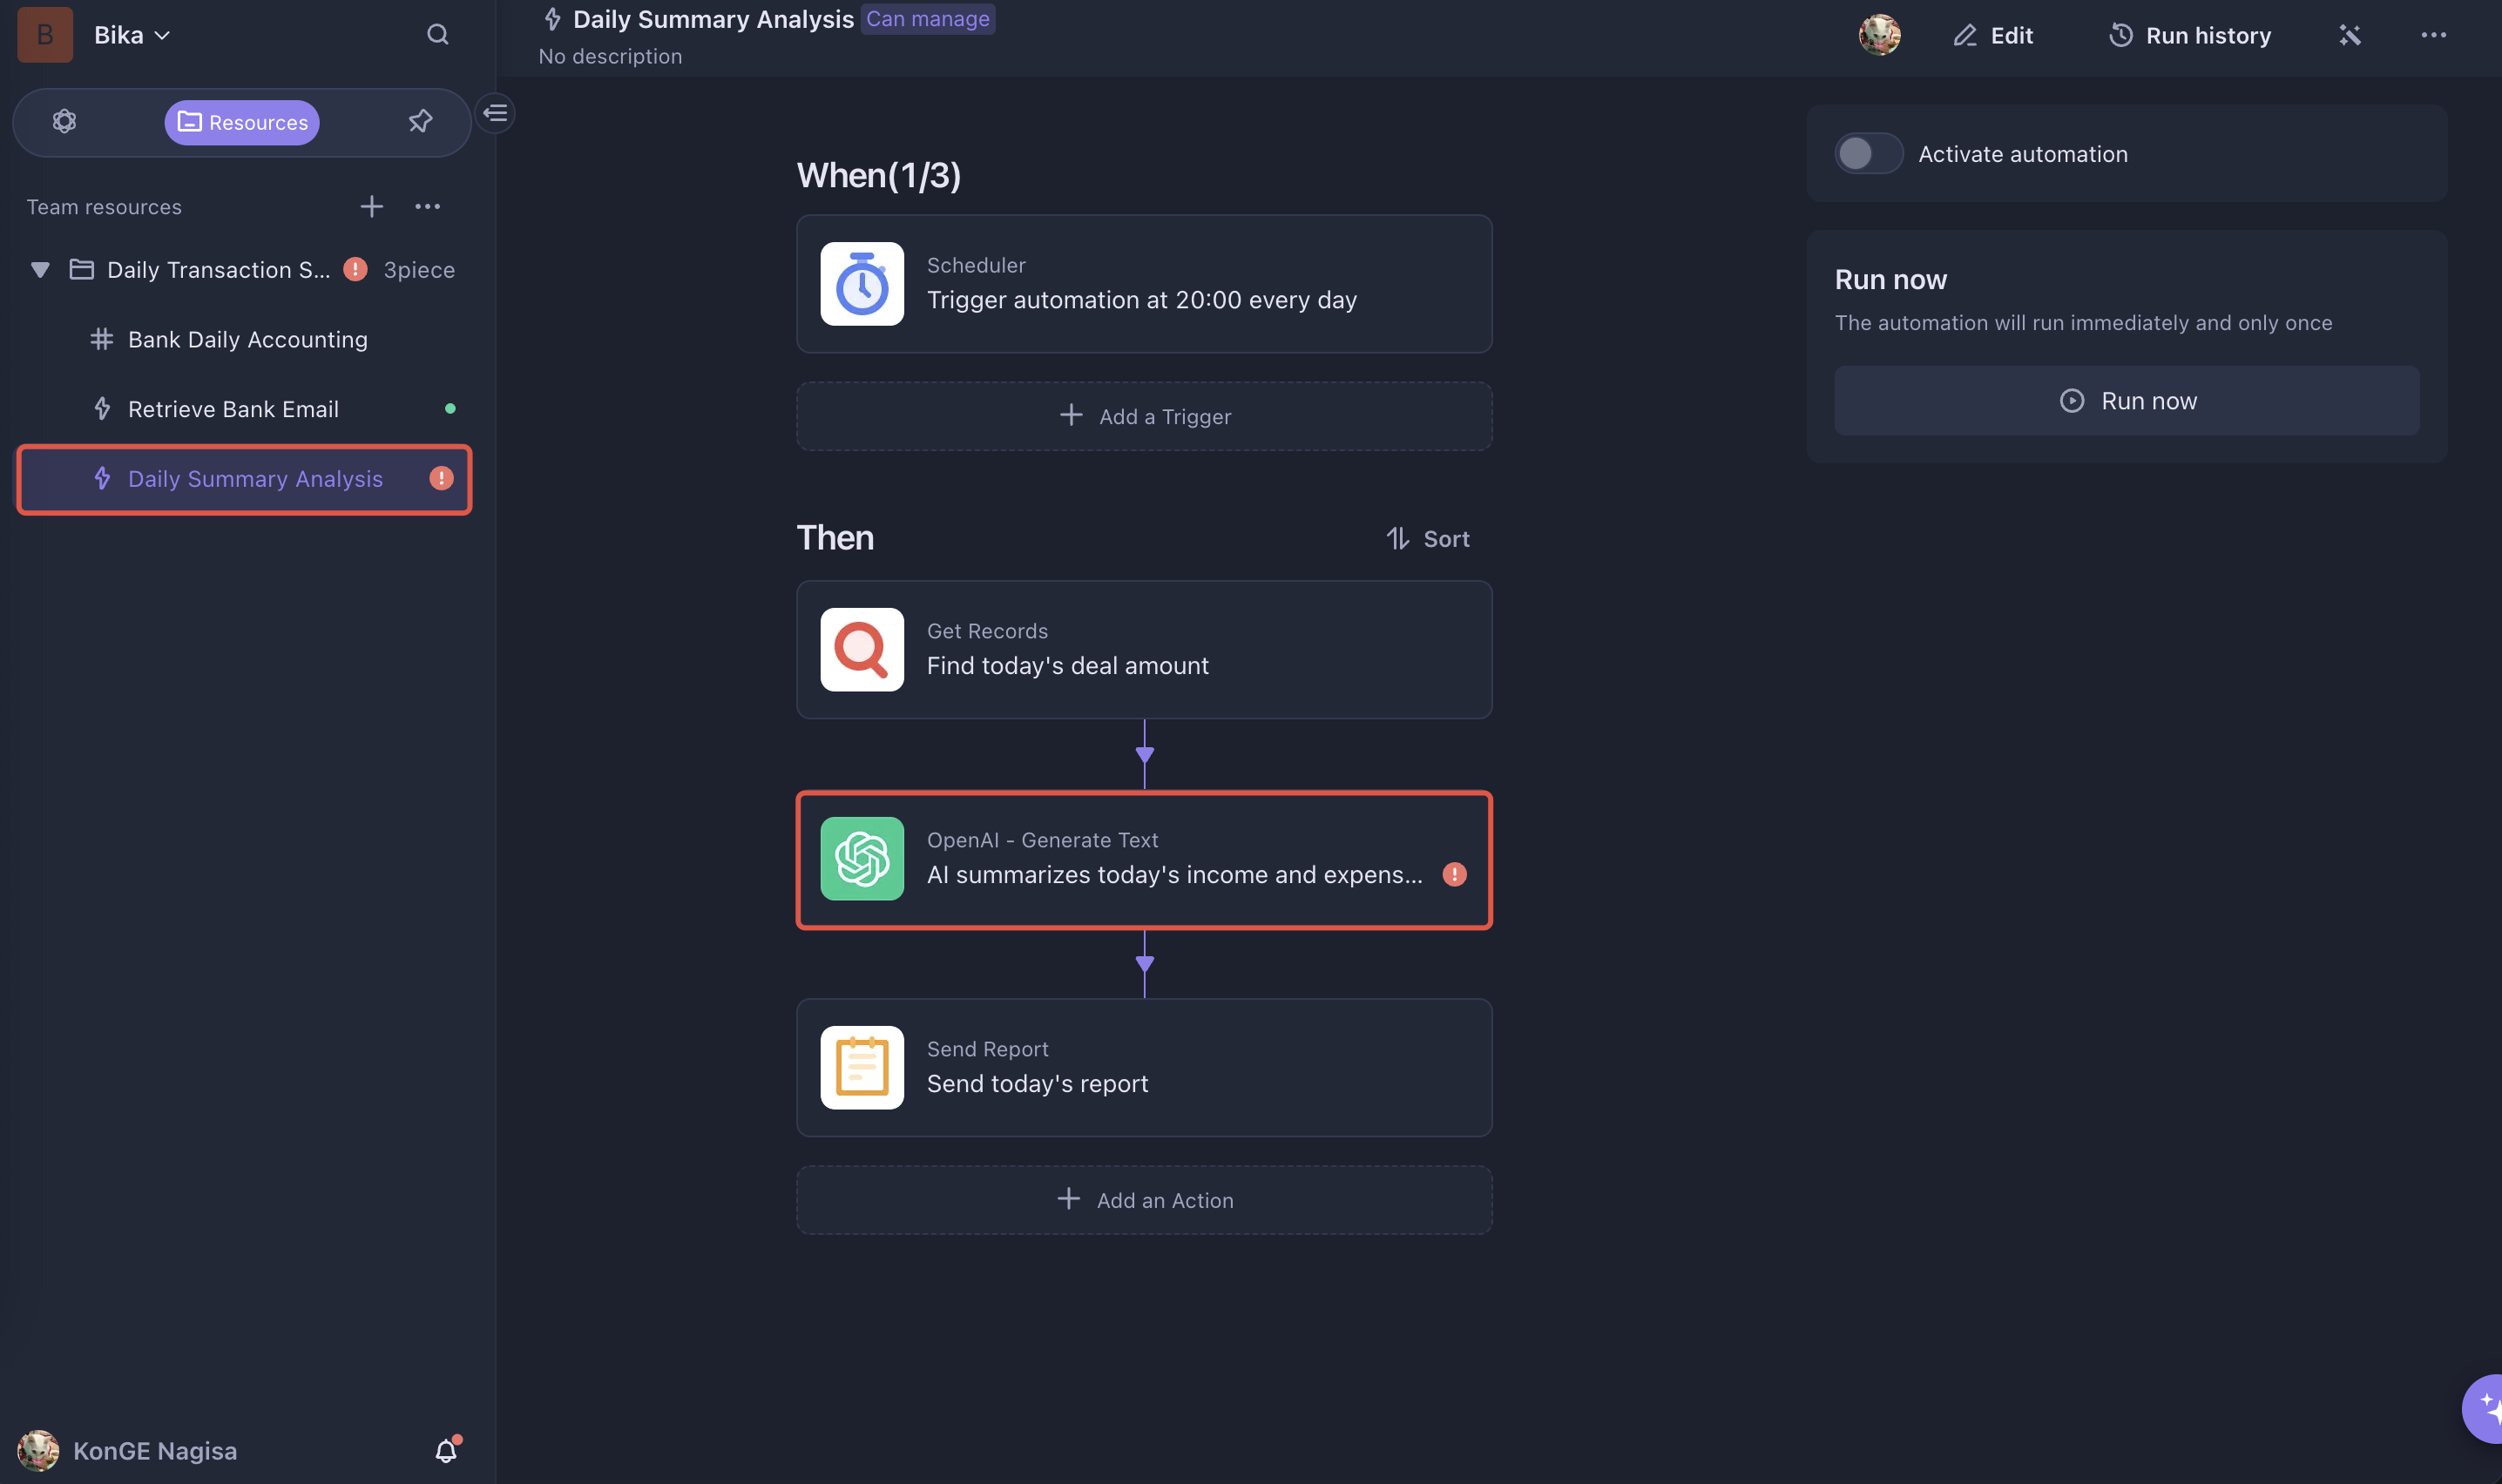
-
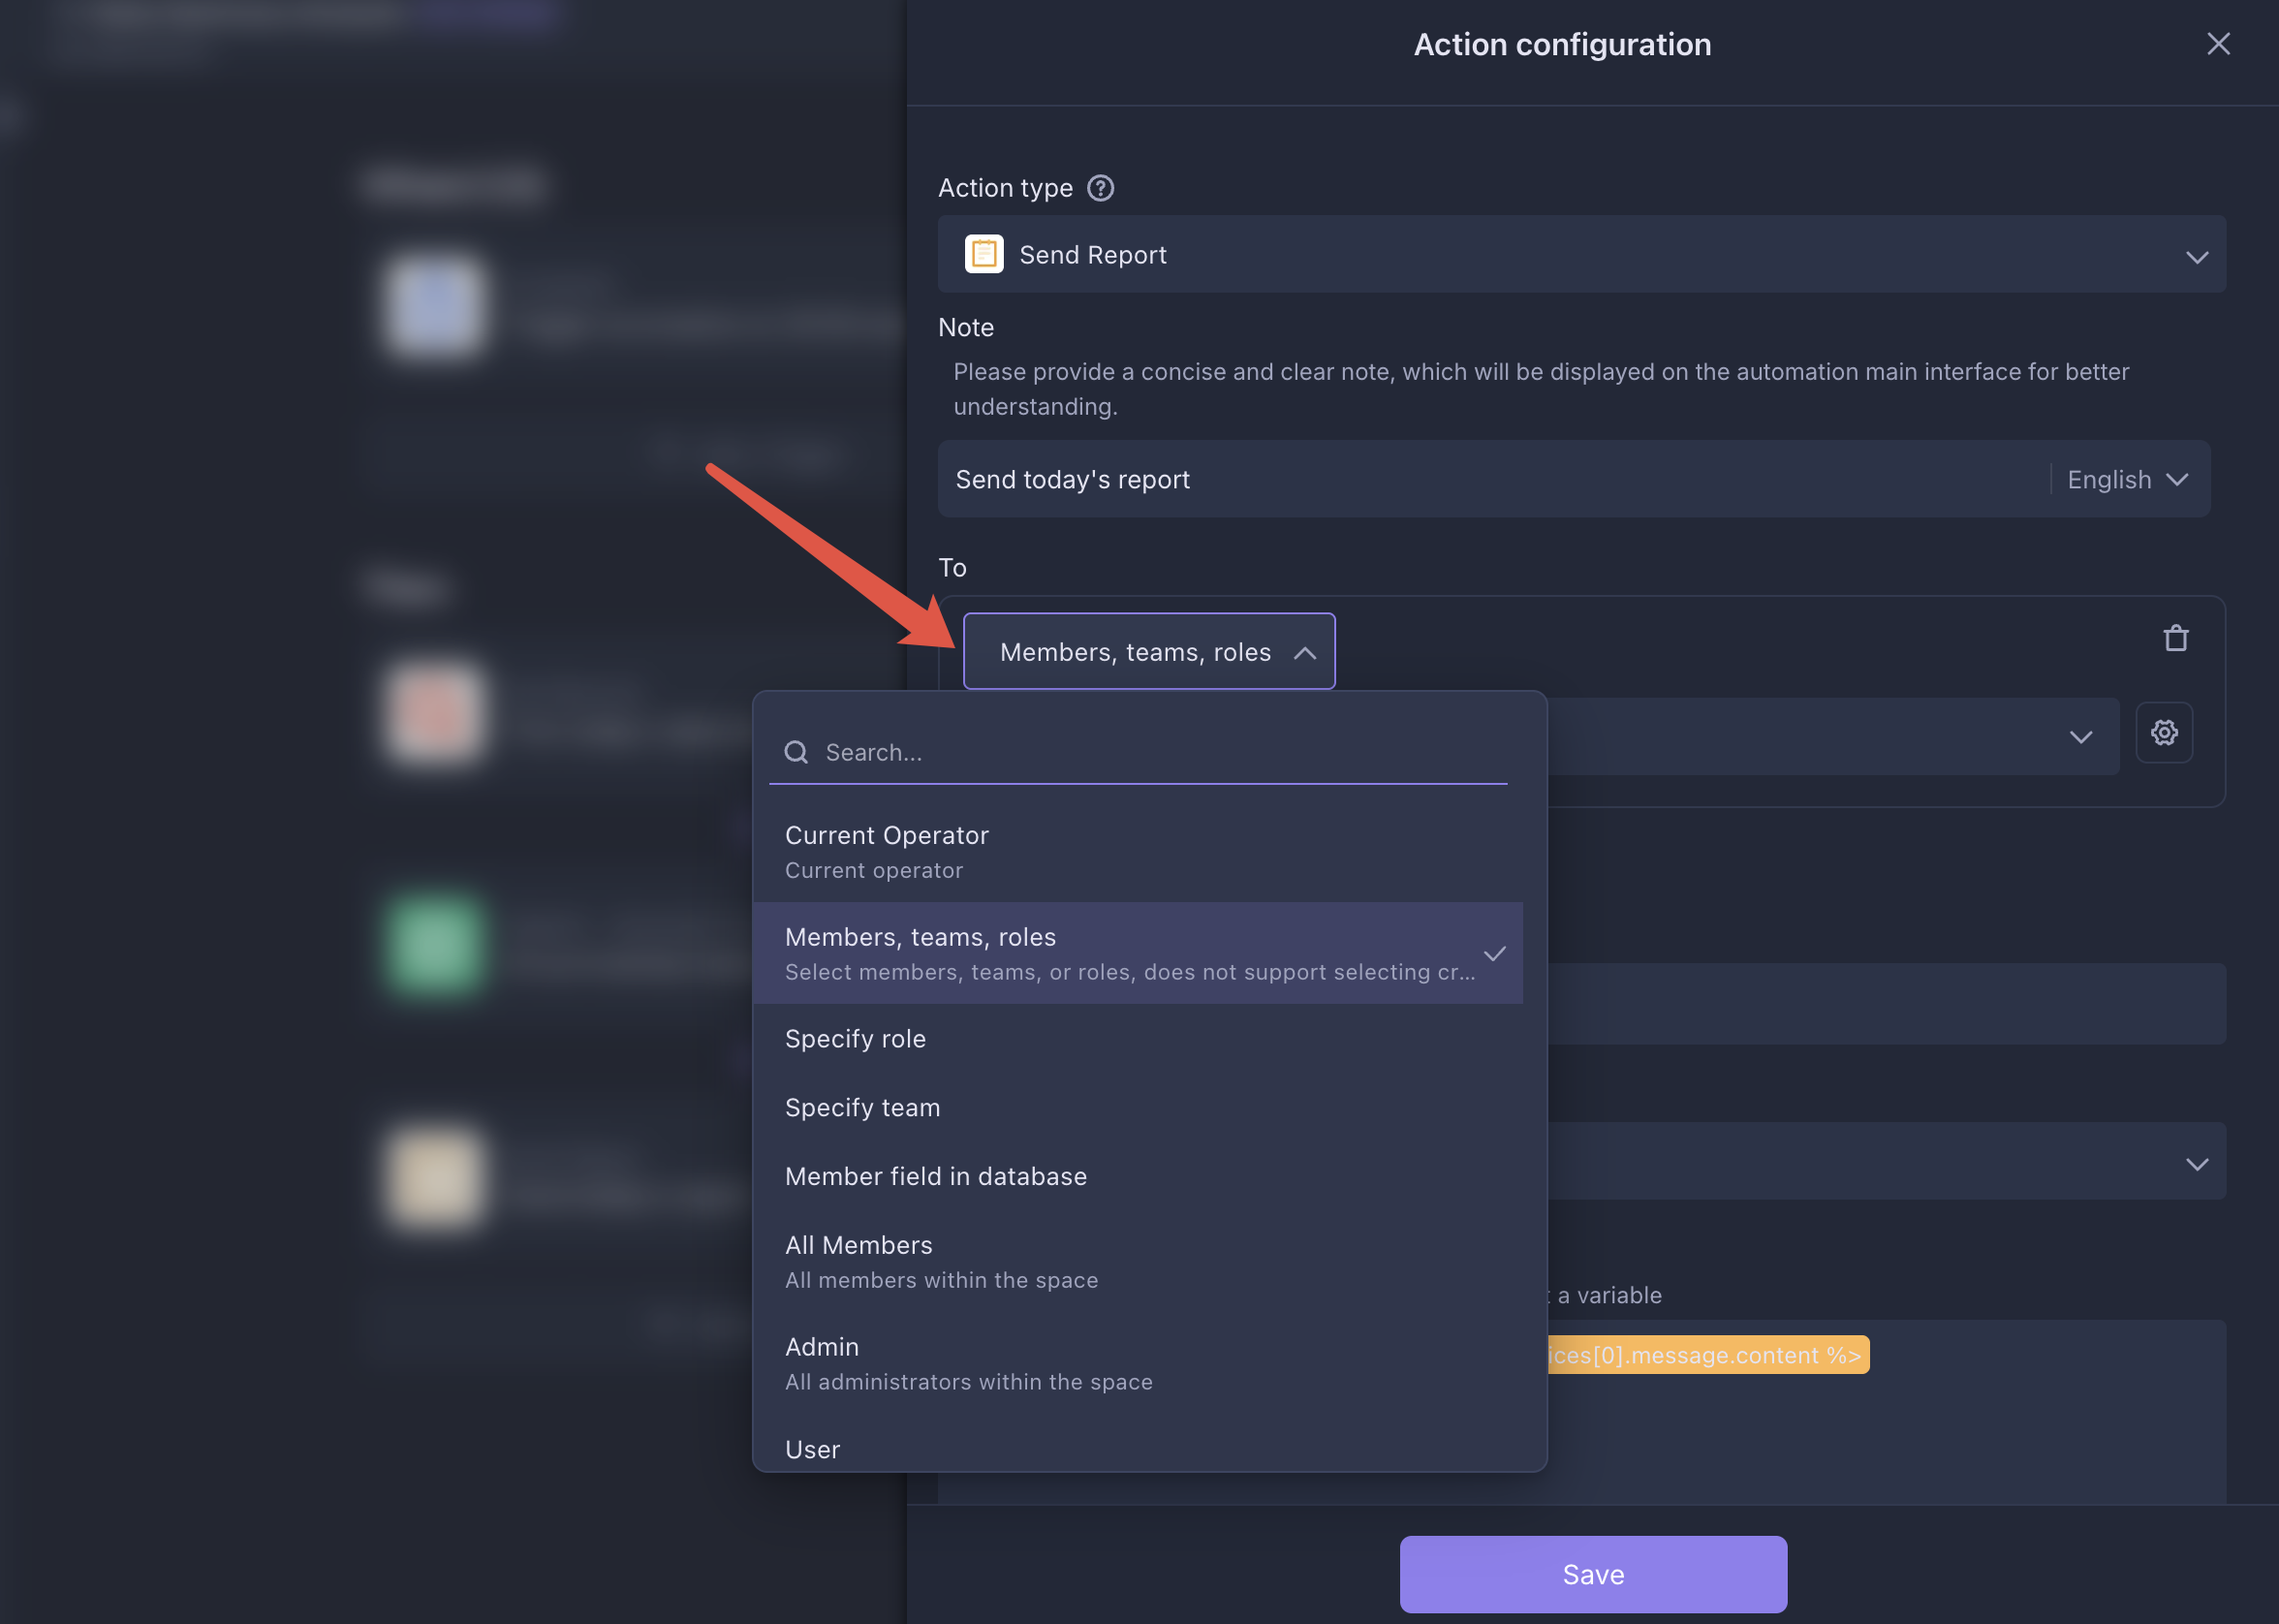
Set Up Recipients
In the
Send Reportexecutor, configure the recipients of the summary report. You can add multiple recipients.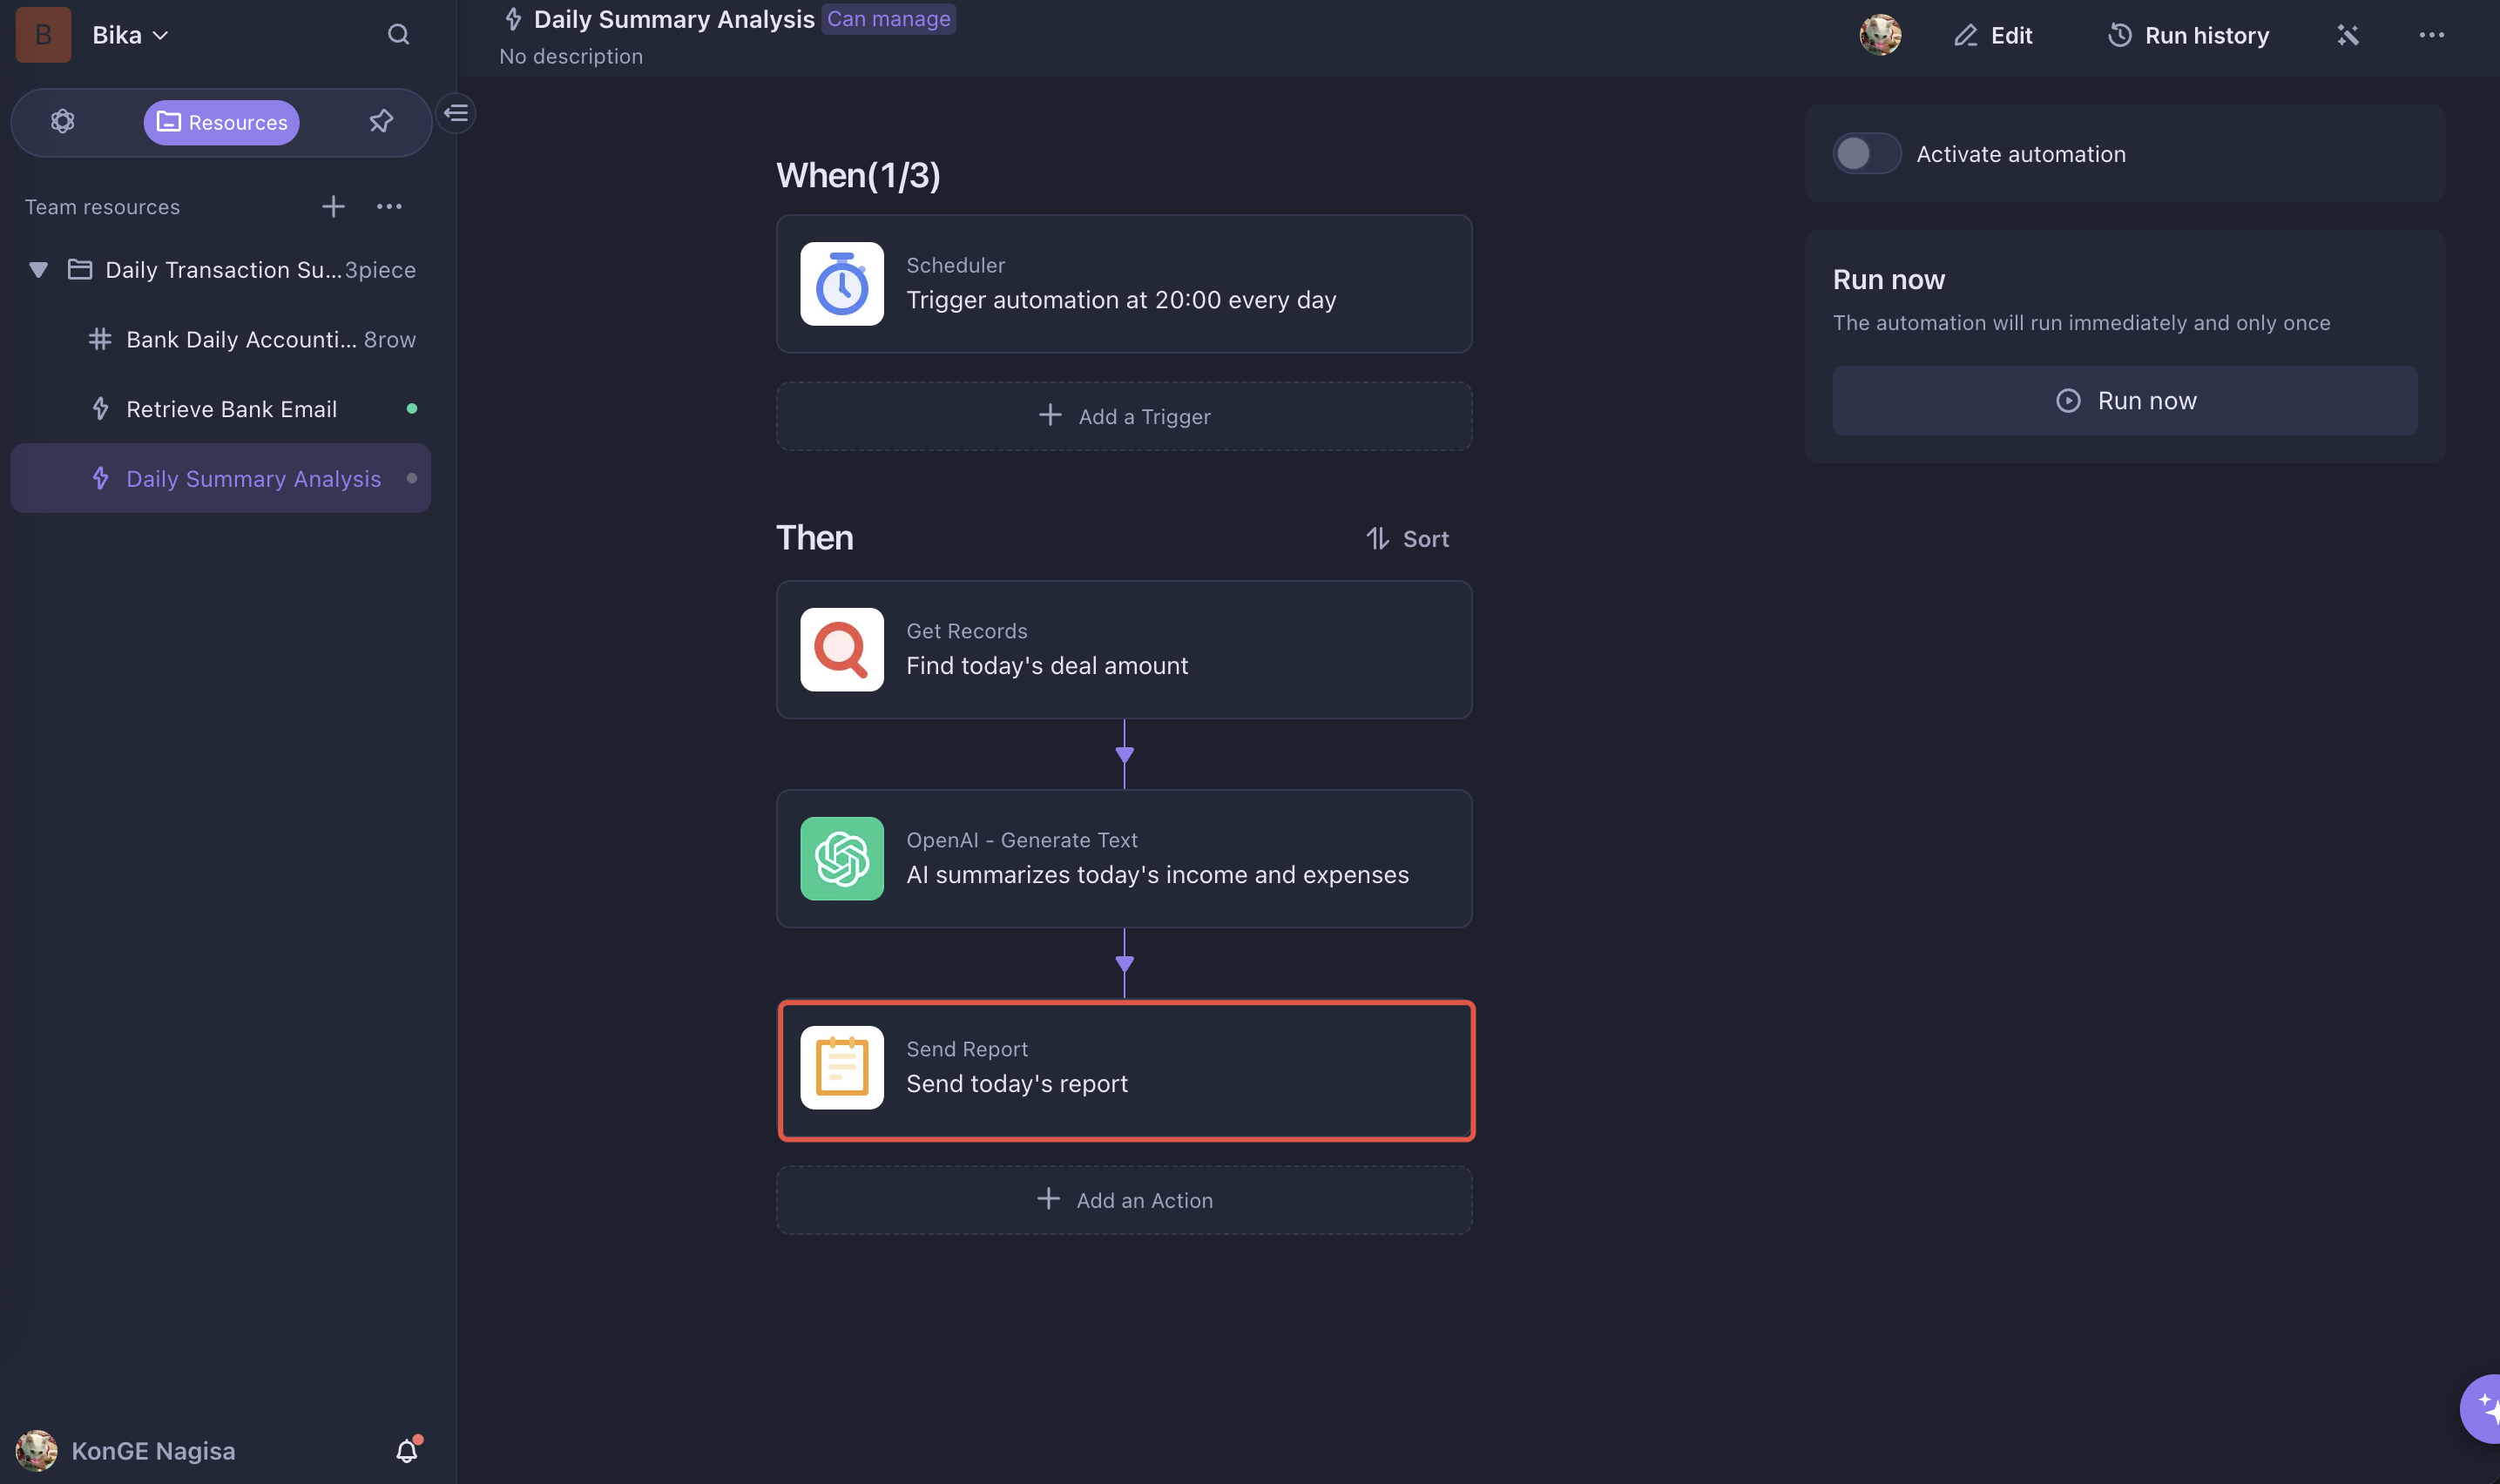
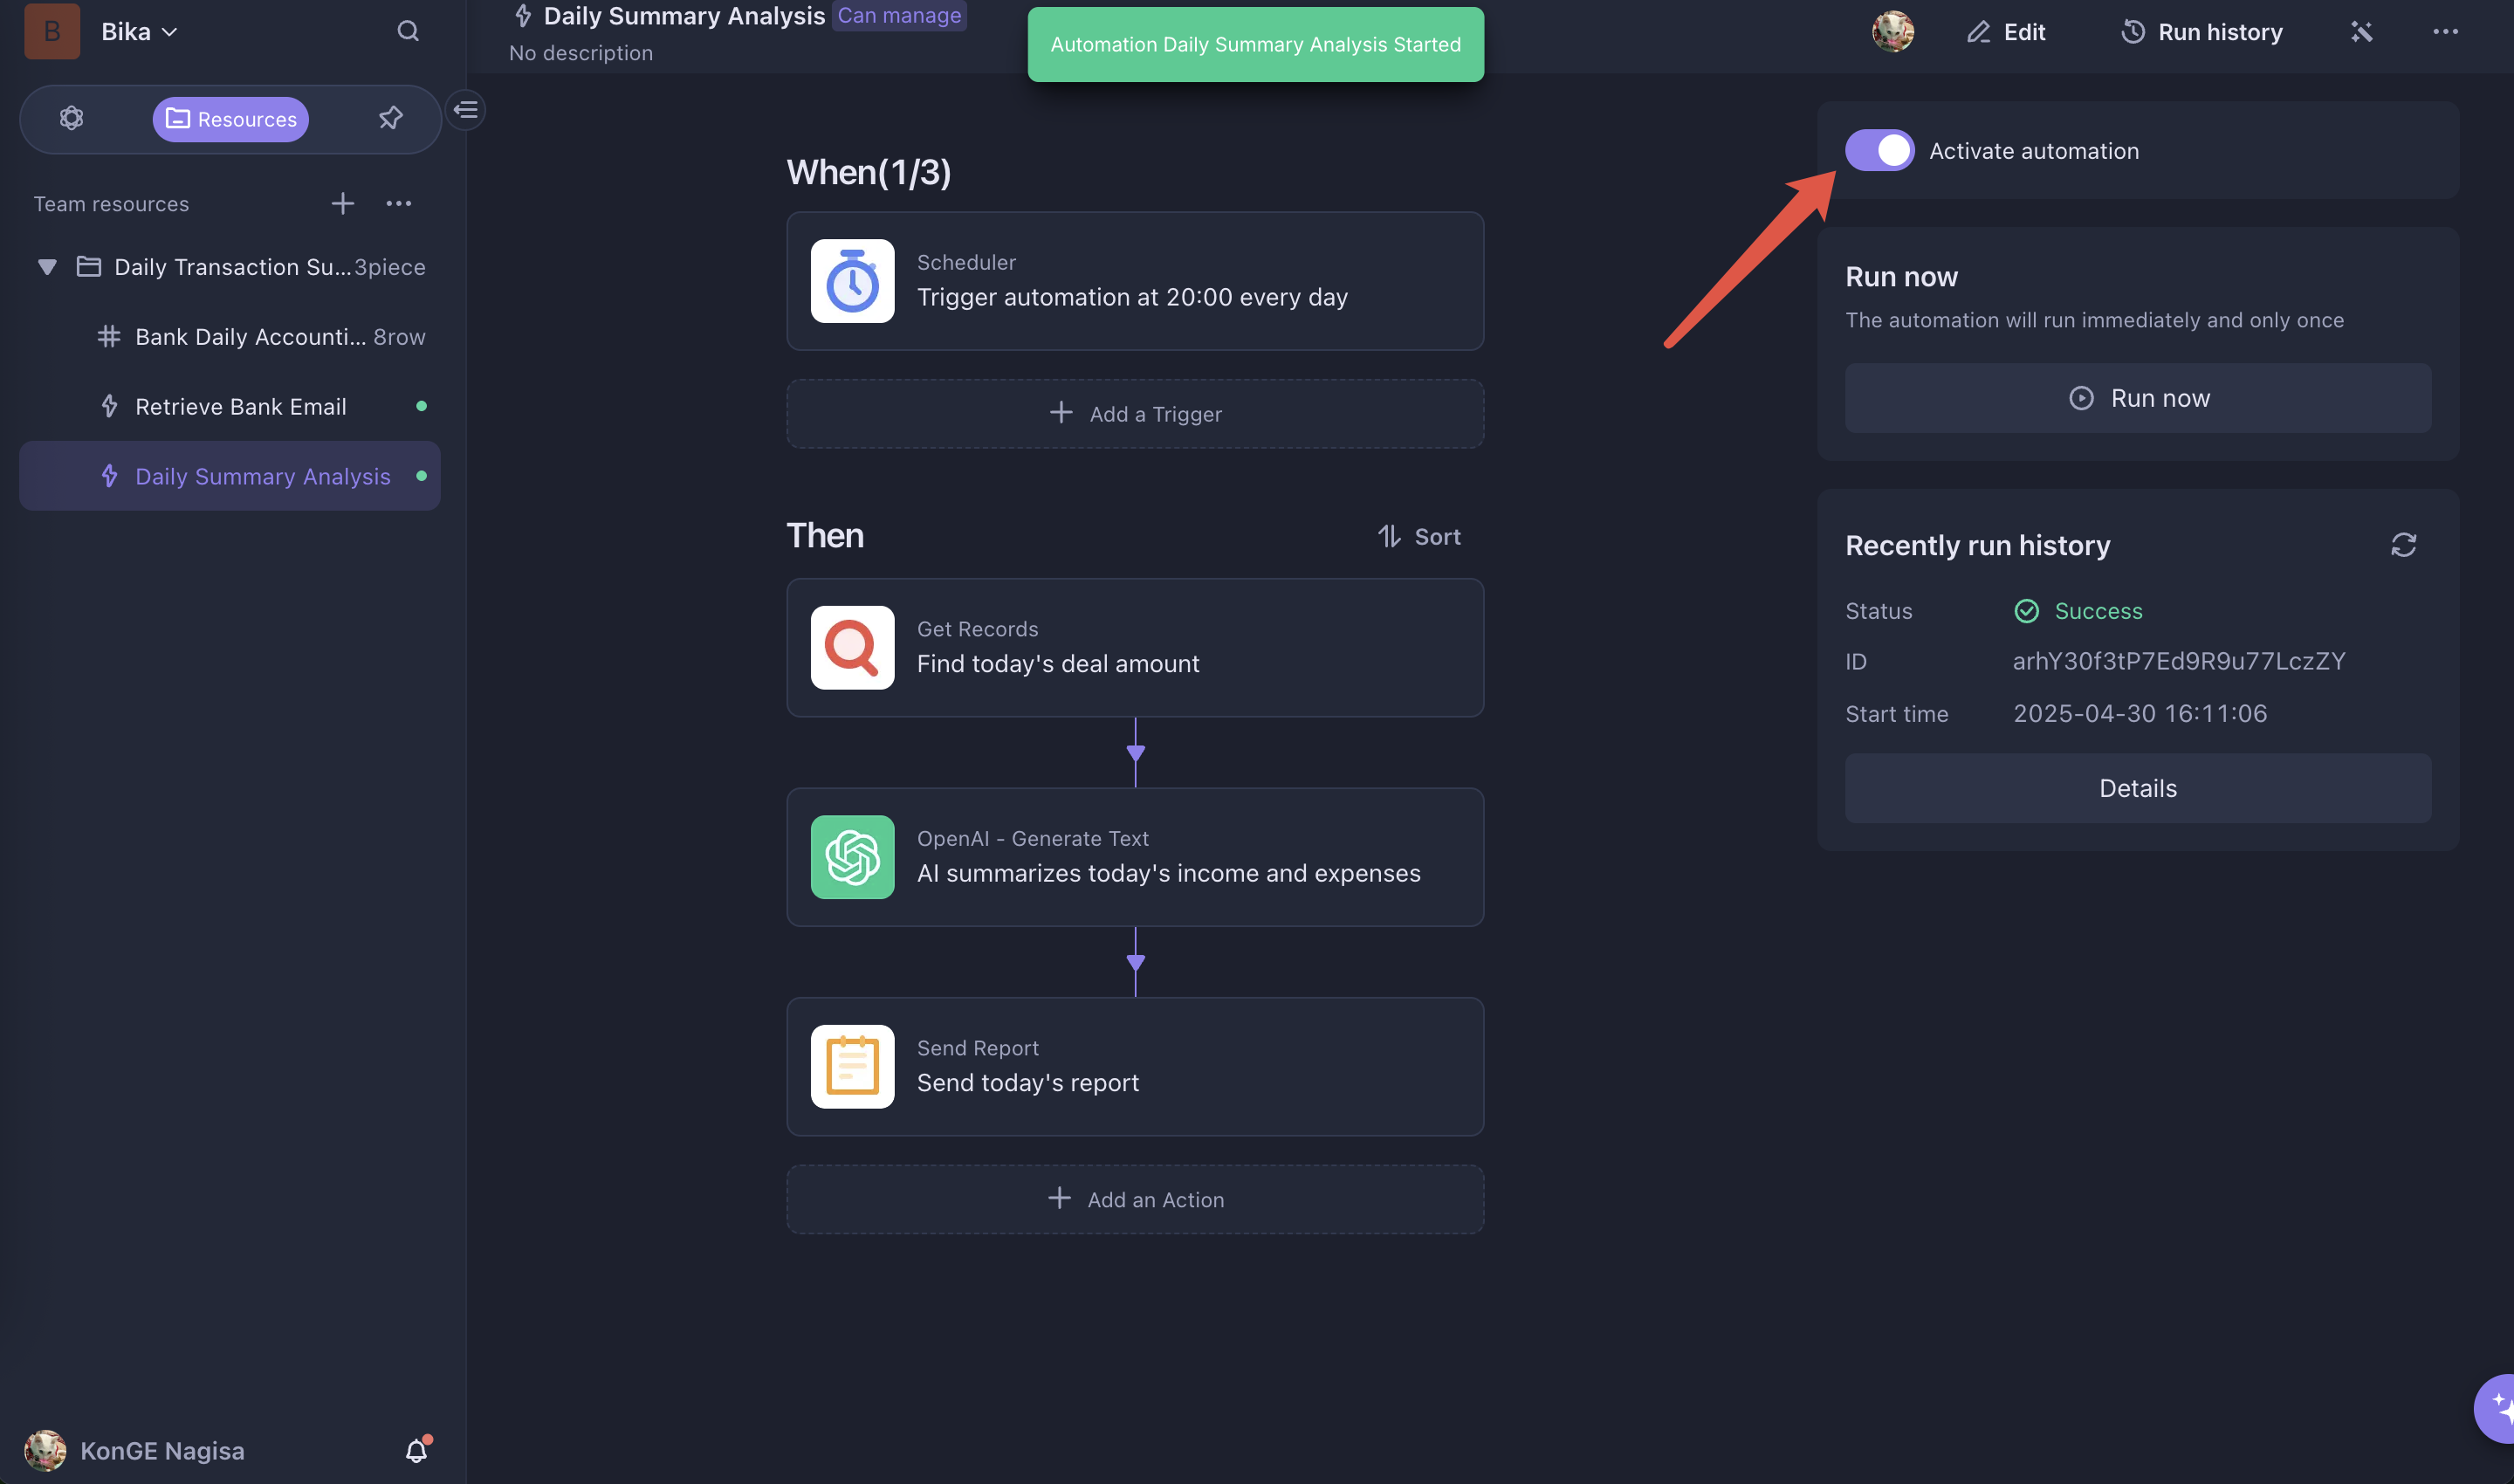
-
Enable Automation
Enable the Daily Summary Analysis automation. Every day at 8 PM, the AI will generate a transaction summary report. You’ll be able to view the day's activity in the smart report.
⭐ Use Cases
- Daily Expense Tracking: Automatically record credit card spending, transfers, and bill payments. Get a daily spending summary to help with budgeting.
- Business Account Monitoring: Track all corporate account transactions (e.g., supplier payments, client remittances) and generate daily cash flow reports for financial visibility.
- Travel Expense Management: Identify foreign currency transactions while abroad and convert them into your local currency for easier settlement.
- Tax Filing Support: Summarize transactions like VAT and payroll deductions to help finance teams prepare tax documents in advance.
👉 Suitable Users
- Personal Finance Managers: Individuals who need to track account activity and manage their personal finances.
- Small Business Owners: Entrepreneurs who need to monitor business account transactions and manage daily finances.
- Financial Analysts: Professionals conducting transaction analysis for financial insights.
🔧 FAQ
Q1: My email provider does not support rule creation or node-imap. How can I filter bank emails?
A1: If your email service doesn't support either filtering method, you can create a Filter in the Retrieve Bank Email automation and set filtering rules based on your needs. When a new email arrives, the automation is triggered, and only emails that match the rules will proceed to the next step. Others will be discarded.
Here’s an example of a filter that catches emails containing the word “bank”:
-
Create a
Filterin the automation page.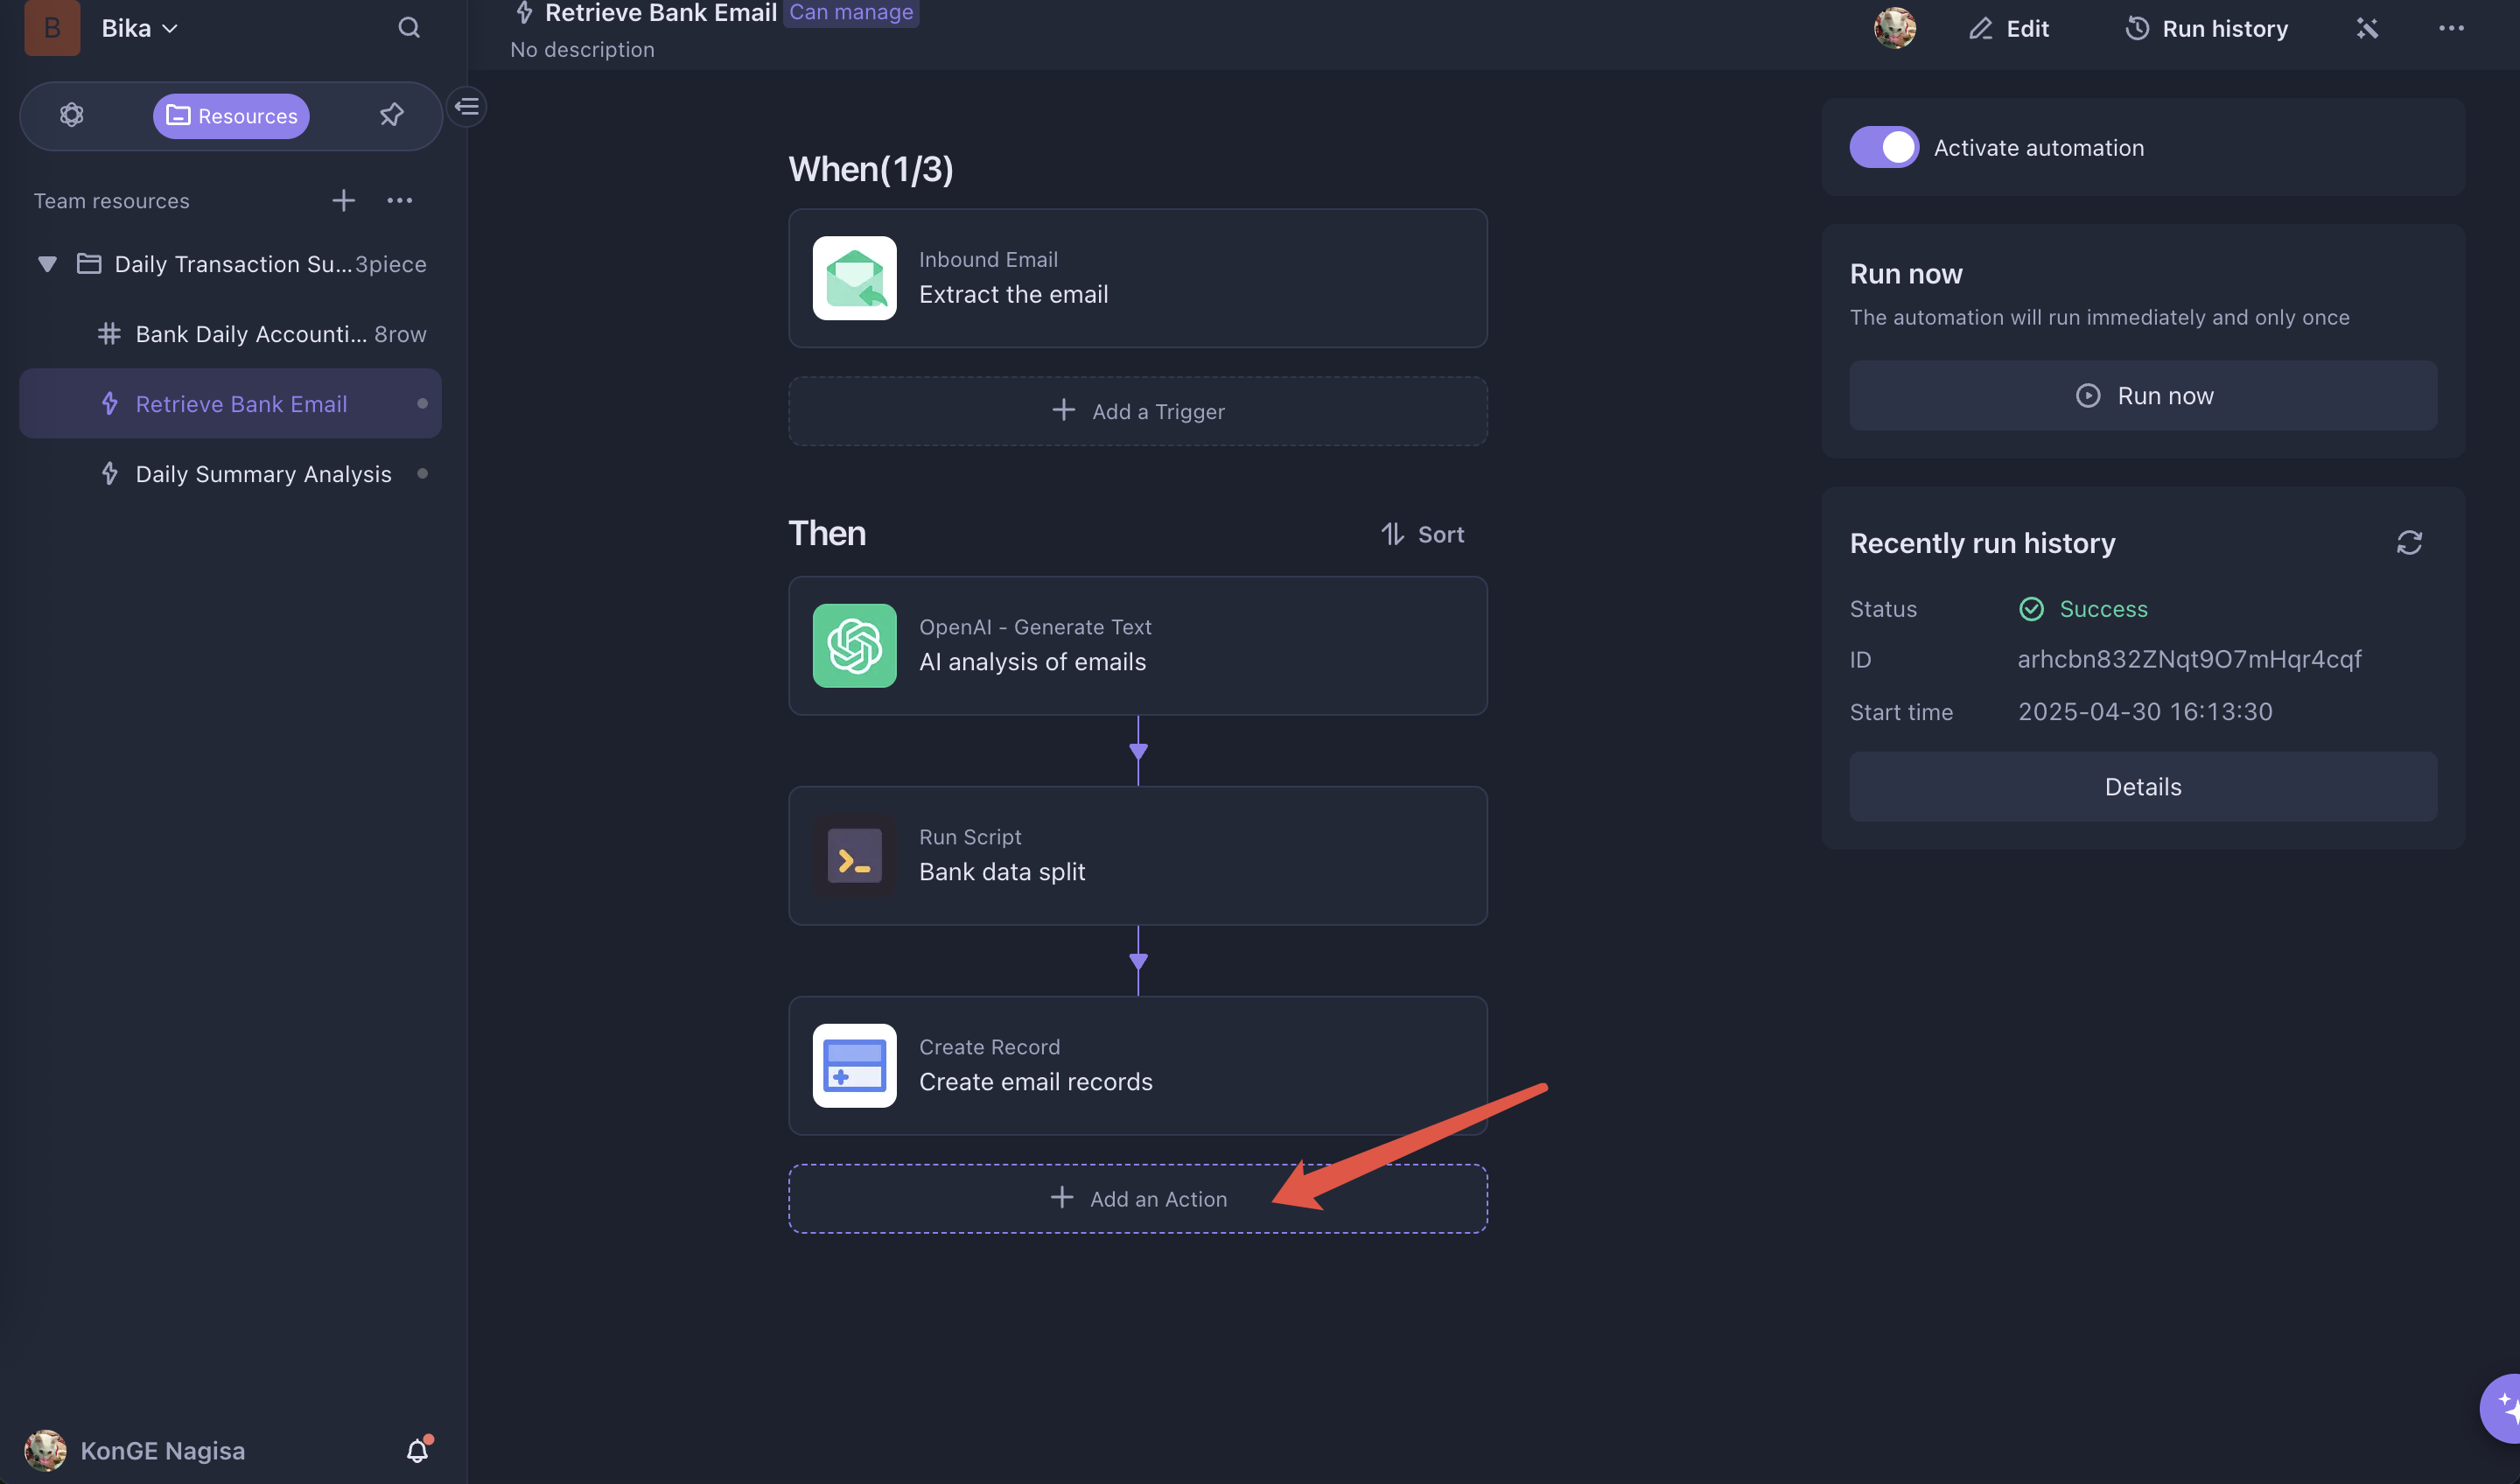
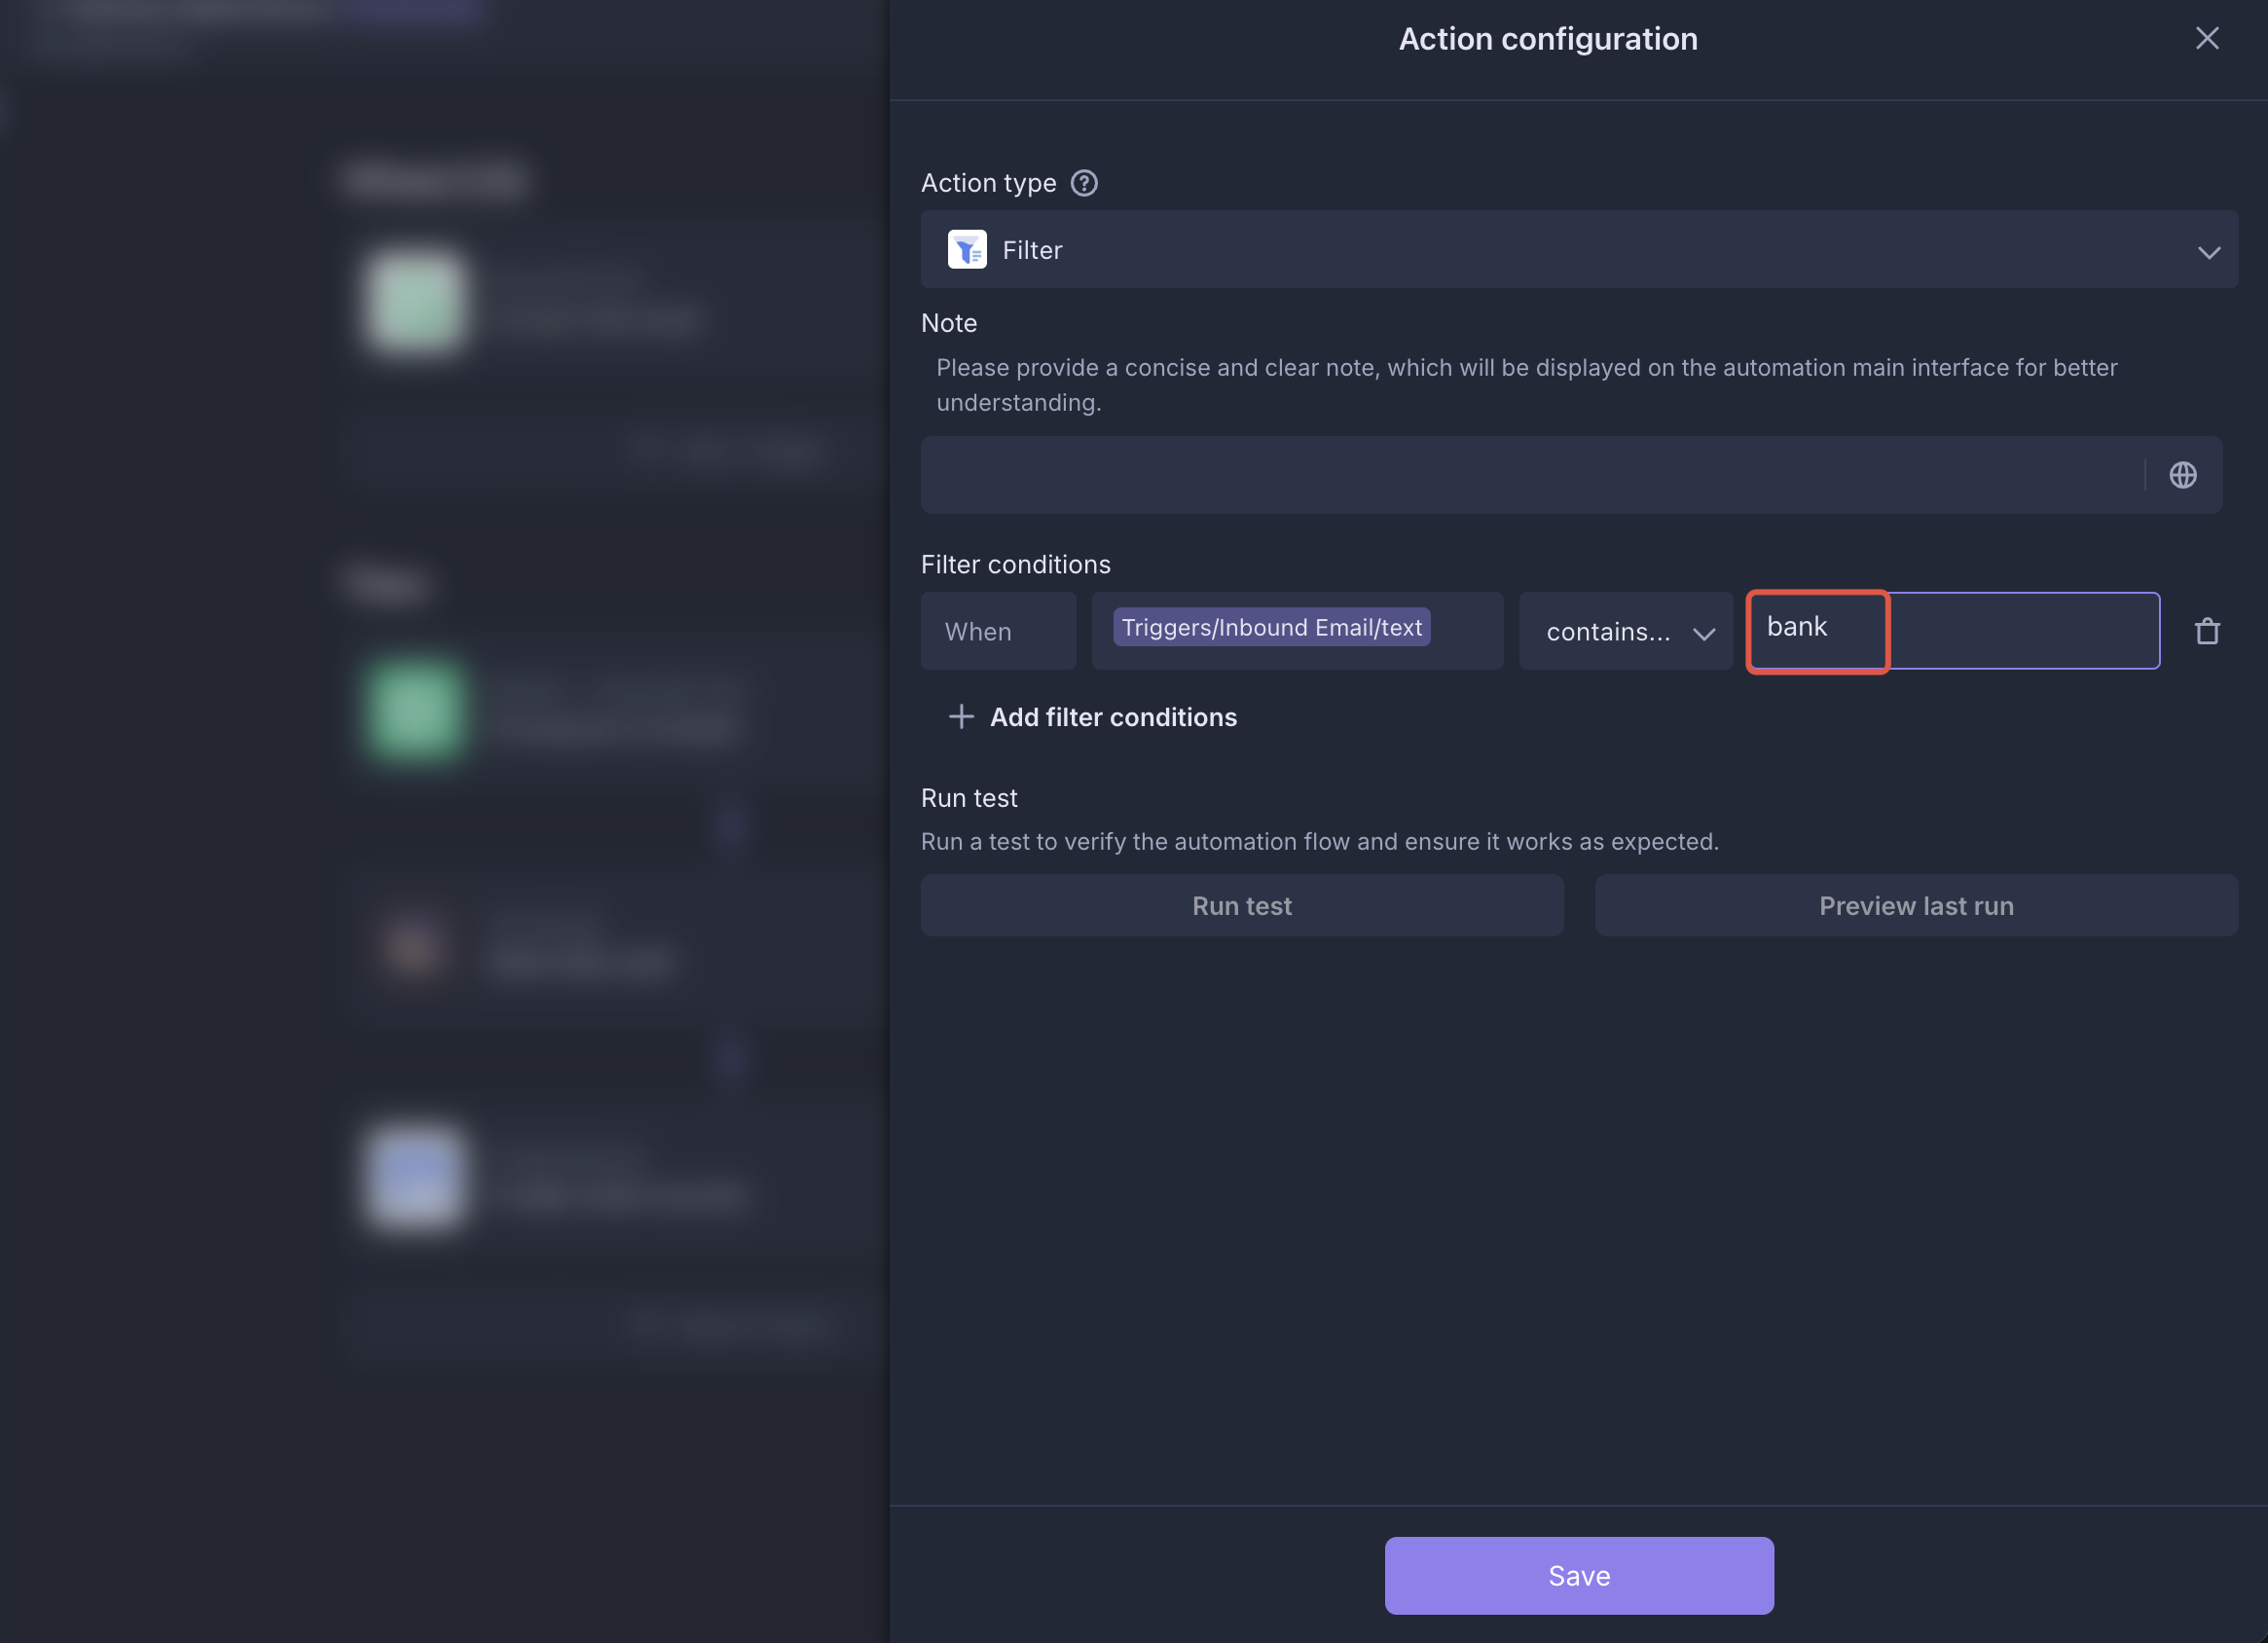
-
Set the filter condition to match content from the
Receive Specific Emailtrigger. Choose the condition “contains” and input “bank.”
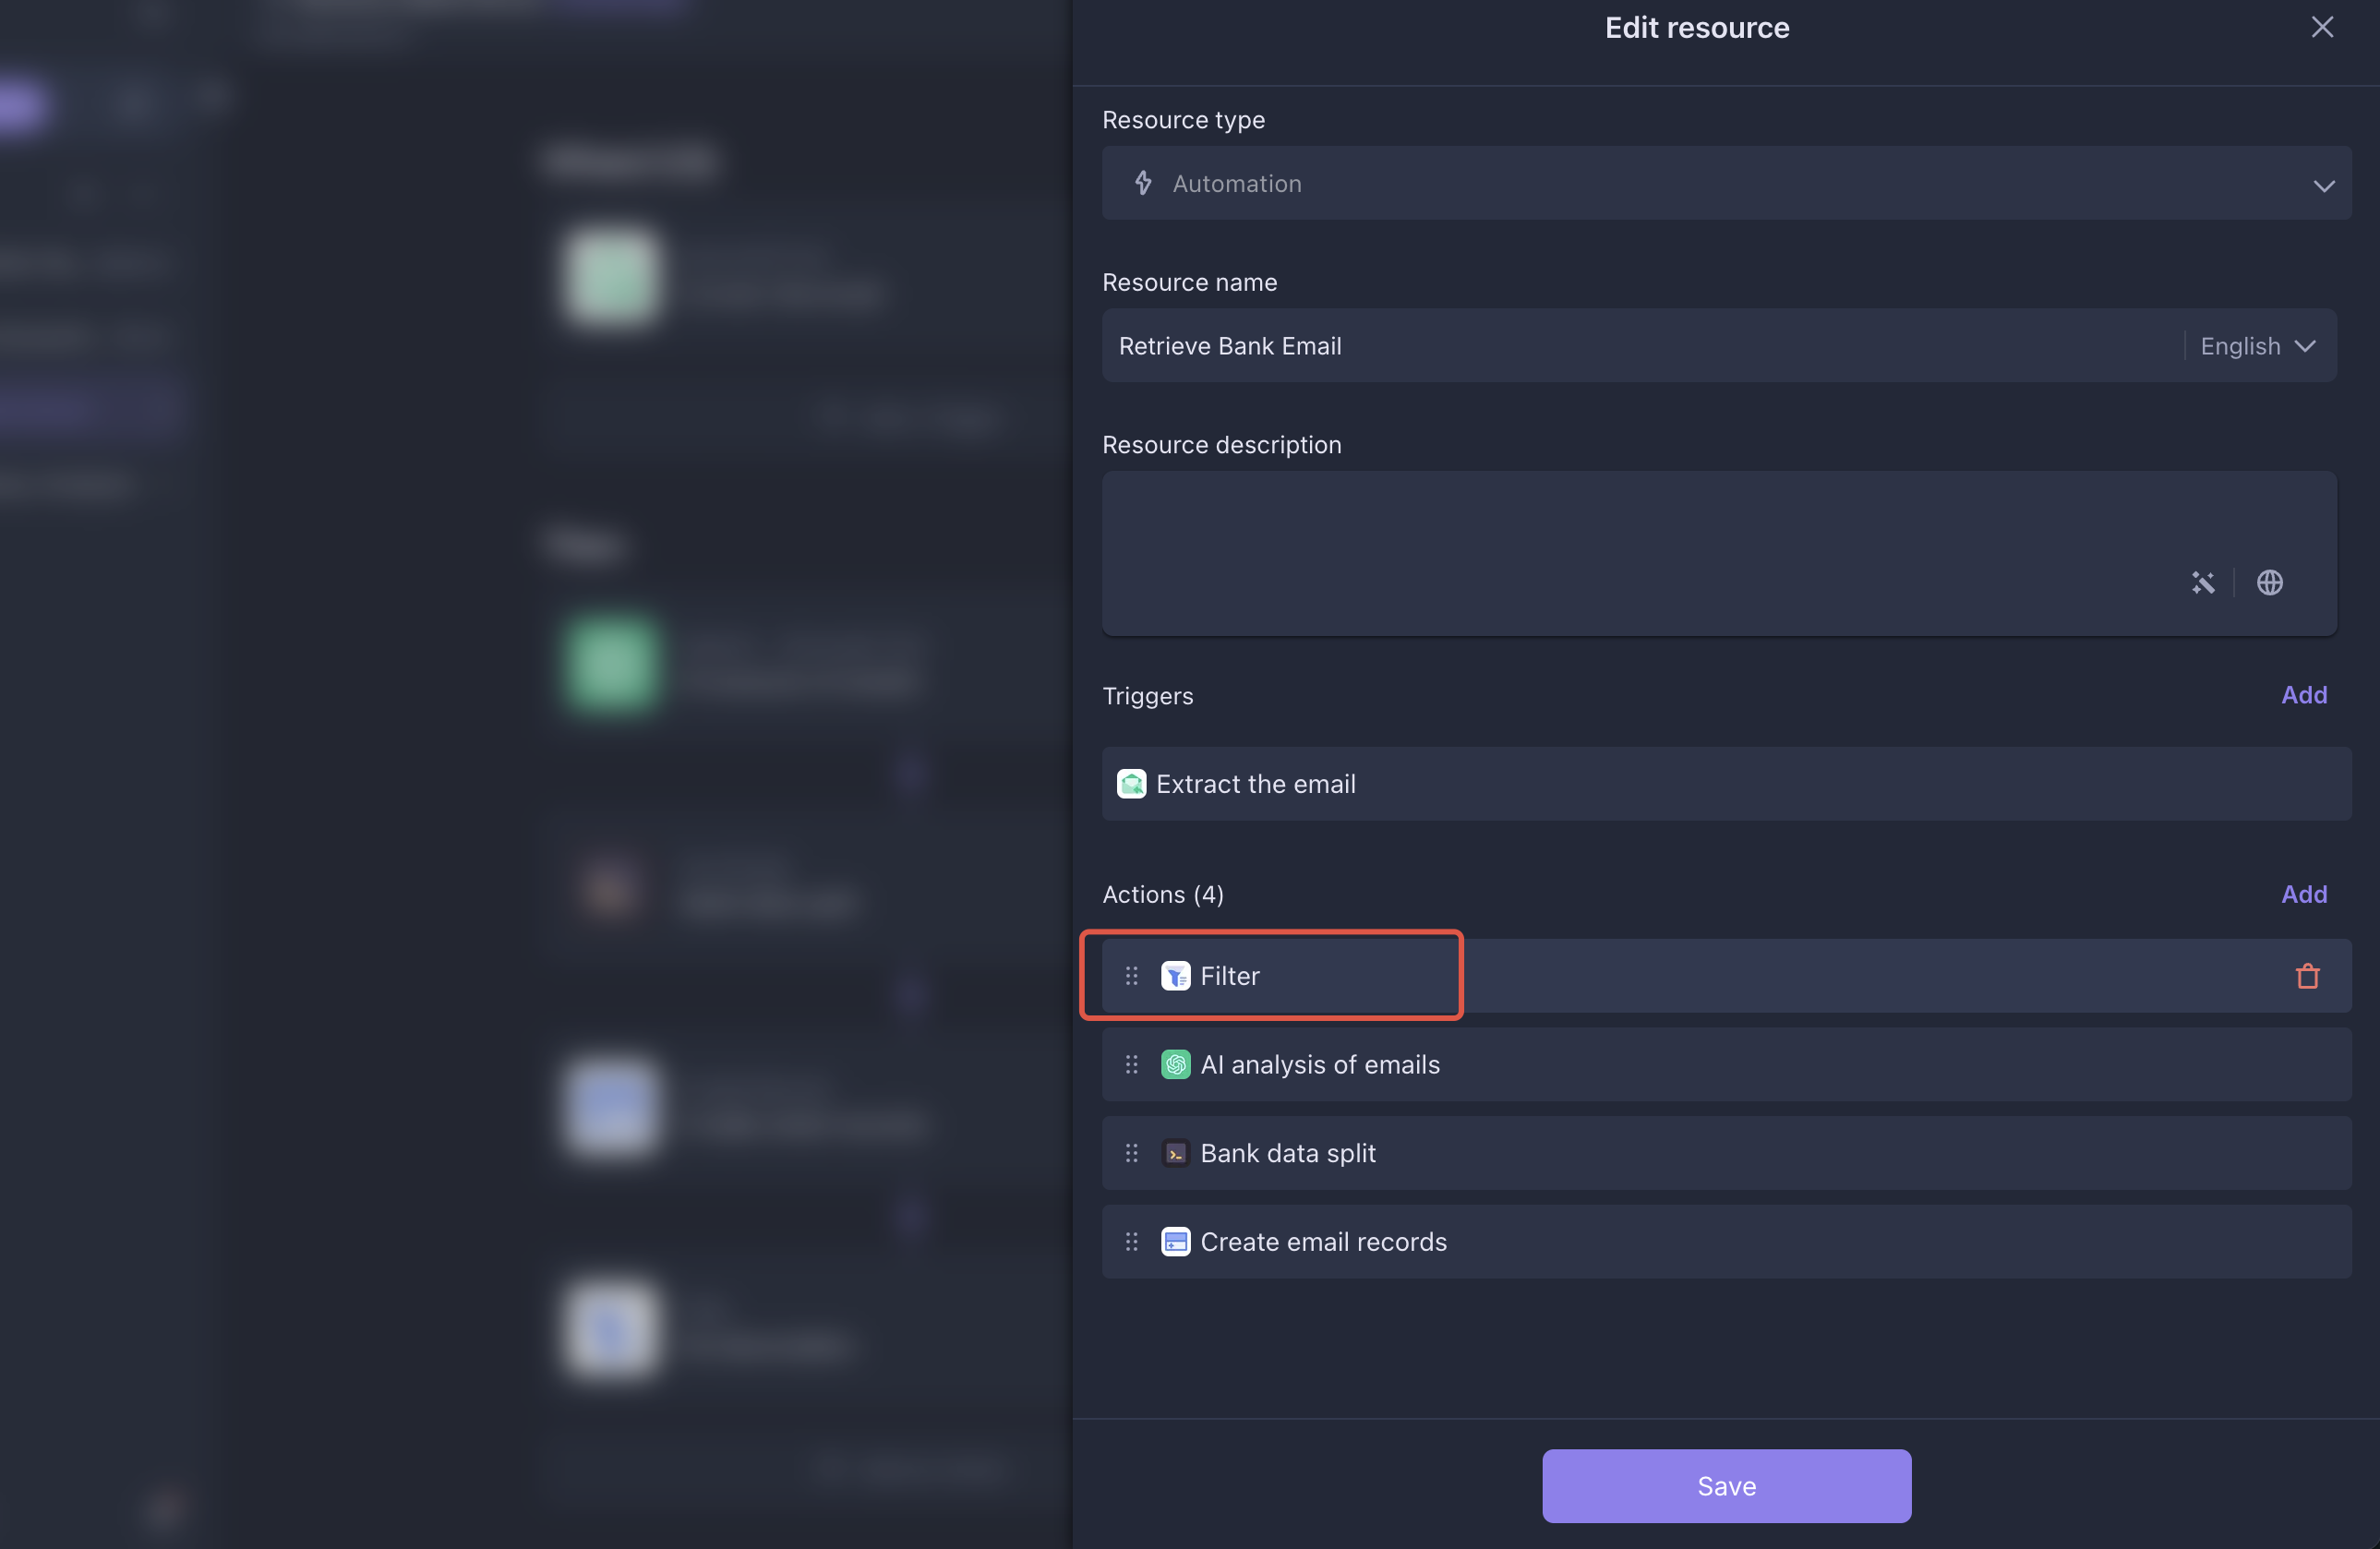
-
Adjust the automation sequence by moving the filter to the top and saving the configuration.
-
Enable automation and verify the filtering result.
Q2: Why do I get an "Invalid search criteria." error after configuring email fetching rules?
A2: The "Invalid search criteria." error may occur if your email service provider does not support node-imap, or if the search rule is incorrectly configured. For specific rule formats, please refer to the node-imap documentation.